
For many of us, WordPress has begun to seem like a recycling bin of the same boring templates meant to appeal to the lowest common denominator. For those trying to create a powerful, long-lasting brand, having the dexterity to create a site that closely matches your vision is essential.
There is an alternative to relying on a cheap and inflexible WordPress template or a pricey designer or developer – usually both. That alternative is Leadpages.
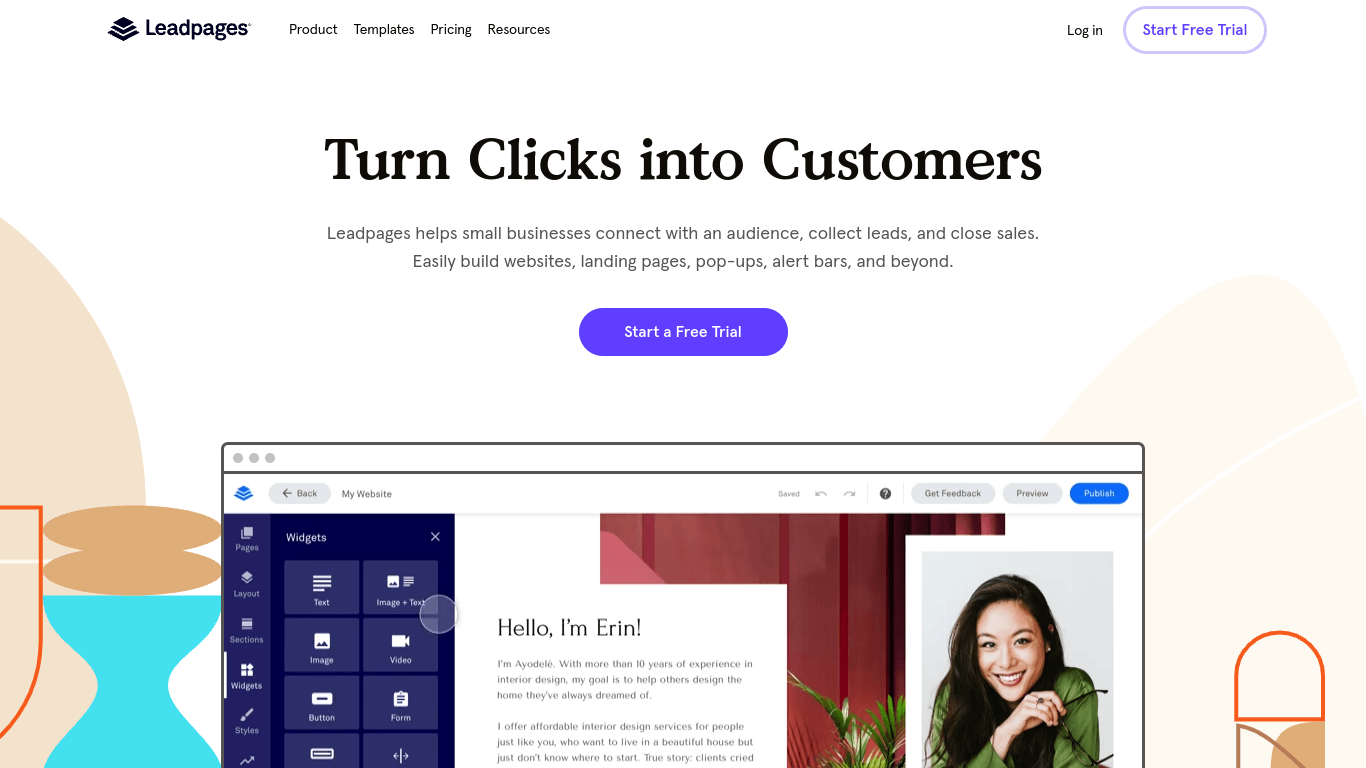
With Leadpages, you have an array of tools geared towards efficient brand building and lead conversion. The most important tools are its nifty site builder and the wide range of drag-and-drop widgets to achieve exactly the look and feel you’re going for.
However, the one downside to Leadpages is the lack of blogging functionality. However, it does allow you to embed your own HTML. This means a tool like DropInBlog is a perfectly viable option.
That said, before you sign up for Leadpages, and before we go into the nitty gritty of adding a blog, there are some useful things we’d like to note.
Table of Contents
Free Trial Extension
Leadpages offers a 14-day free trial period, but there is a little trick that will help you get an additional 14 days.
If you go to Account Settings and then Billing to cancel your account, it'll give you a list of reasons asking why you want to cancel. If you select Cost, Leadpages will offer you an extra 14 days on your trial.
It’s also worth noting that Leadpages requires your credit card details before starting a 14-day trial. Nevertheless, 14 days should be plenty of time to learn the ropes and get your site ready to launch and prime your blog with posts. But remember, you didn't hear this from us. 😉
Setting Up Your Leadpages Site
First things first. Before getting to a blog, you’ll need to set up your Leadpages site, and that starts with choosing a template.
Choose a Template
For this demo, I'll be using the Luxury LA Real Estate template; I personally like the look of it. You can choose whichever template tickles your fancy – integrating DropInBlog will be the same with any of them.

Create a New Blank Page
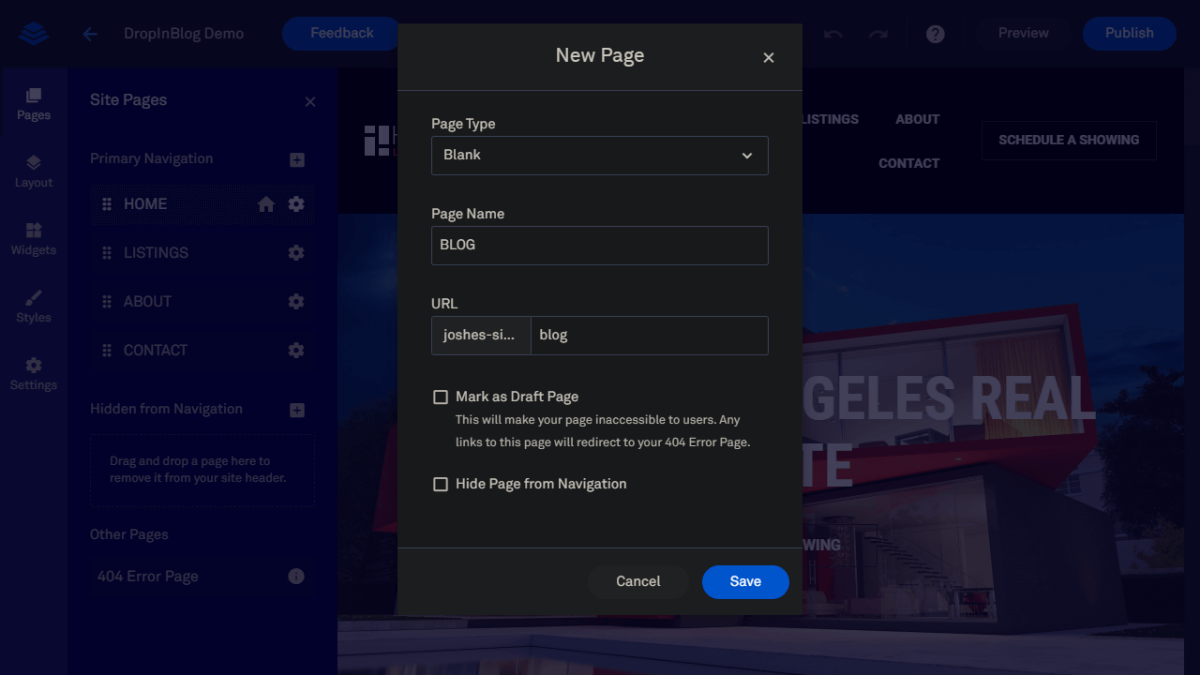
After you complete the template setup process, you'll have access to the builder. On this page, we can control most aspects and settings of the site. What matters to us, though, is the pages tab, where we'll add a new Blog page to the navigation bar.
It’s important to set the Page Type as Blank. This way, we’ll have a clean slate and won’t have to worry about any other default widgets getting in the way.
Add an HTML widget
After you've opened your new blog page, click on Leadpage's Widgets panel. You can select any of these widgets and simply drag and drop them onto the canvas to add functionality and content to your site. The only one we care about right now is the HTML embed component all the way at the bottom.
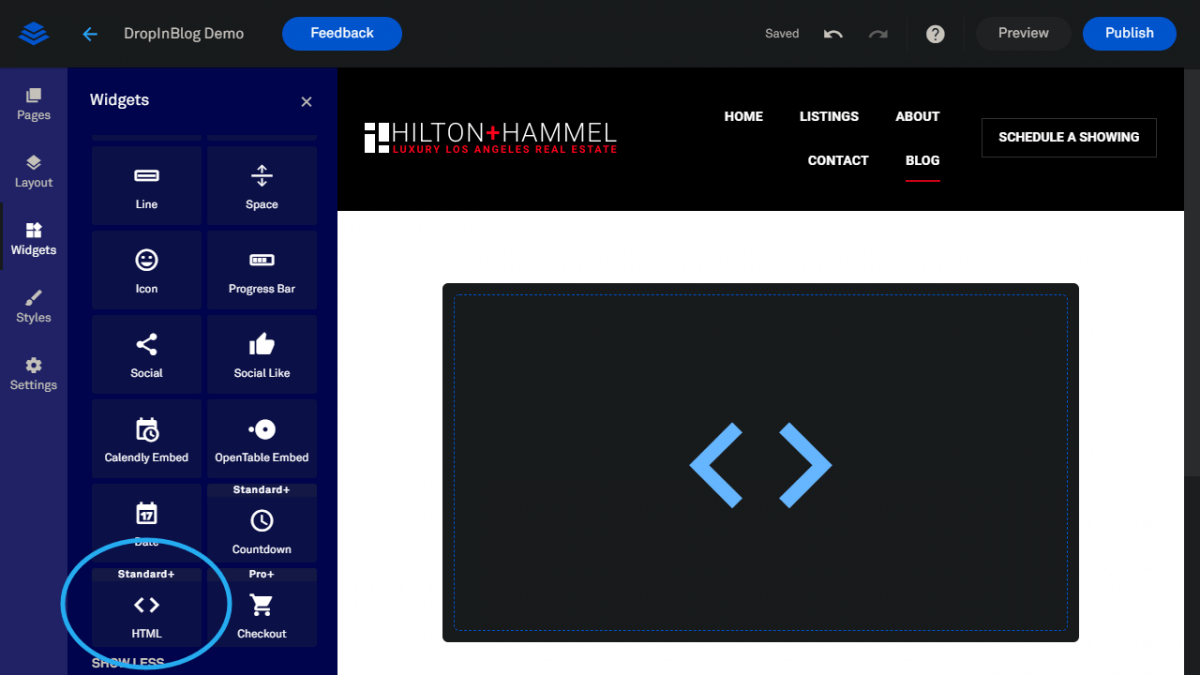
When you drag the HTML widget over to your canvas, you'll get a big black box like you see in the above image. When you click on this black box, you'll see a little blue modal box pop up with HTML at the top. Let's leave it empty for now because we need to grab some things from your DropInBlog account.
Grabbing the DropInBlog Code
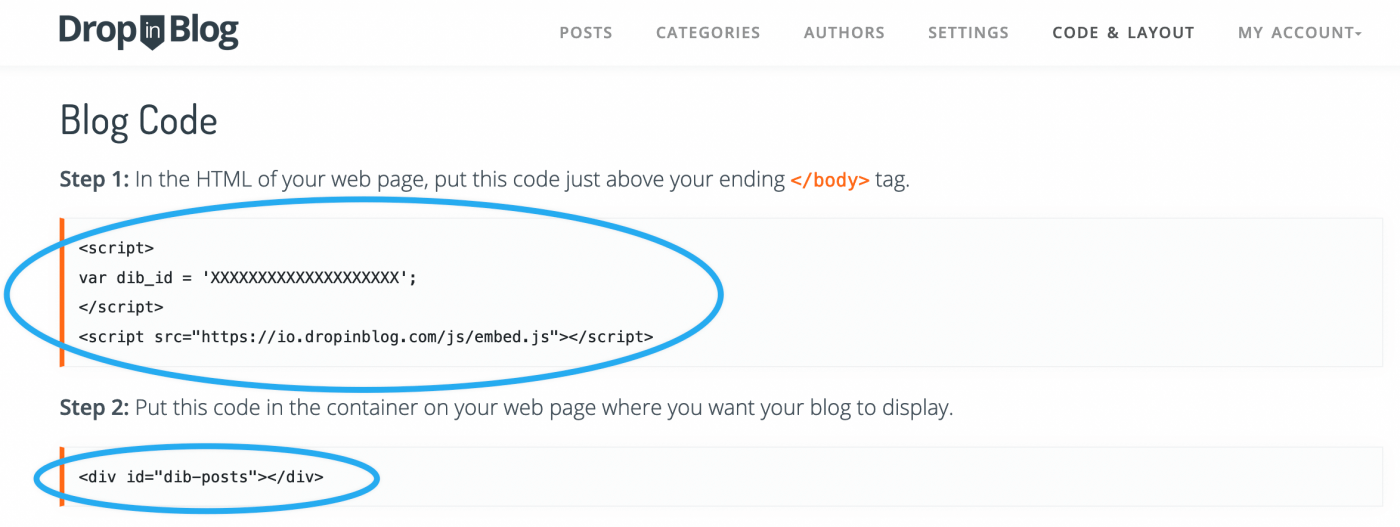
In your DropInBlog account, you'll find the Blog Code section containing two short code snippets on the Code & Layout page. The first code snippet will tell Leadpages to connect to your specific DropInBlog account. The second snippet will tell Leadpages where to place the blogs on your page.
Once you've copied both of these code snippets, you can move back to the Leadpages builder.
Making the Magic Happen
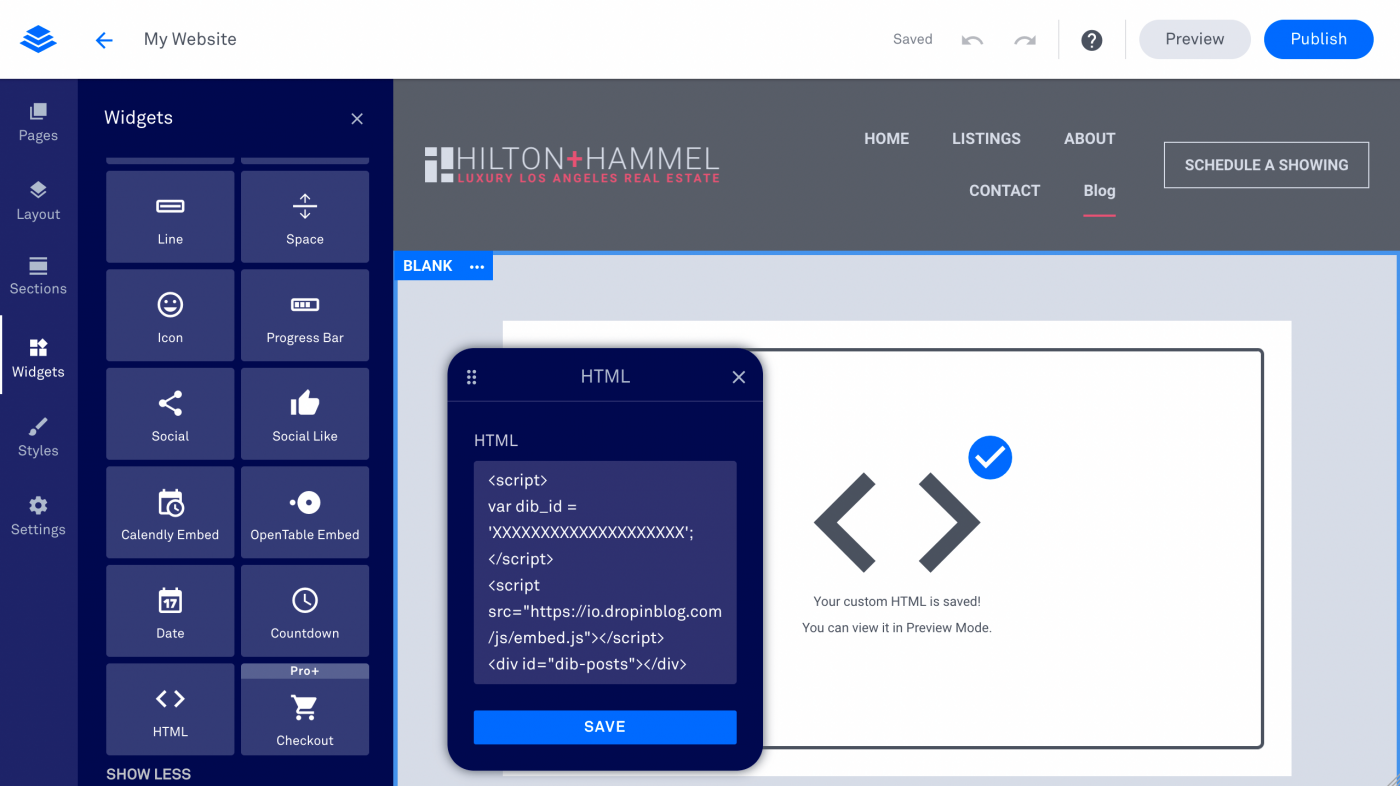
It’s all very simple. Just paste the two code snippets you copied from your DropInBlog account into the Leadpages HTML modal and hit Save.
Once you've connected the page, there will be a small dropdown next to the Publish button with the option to View Site. This will take you to the live version of your new blog, which is now ready to be shared with the world!
You've Successfully Added a Blog to Your Leadpages Site
Providing you followed the steps correctly, you now have a professional and fully responsive blog running on your site.

The best part is that DropInBlog will adopt whatever styling is applied across the rest of your website. I recommend checking out the Leadpages page builder's Styles tab and playing around with the values to see how you can customize your posts.
If you're in the know and feeling a bit adventurous, you may even want to go crazy with a little custom CSS. 🤷
One Last Step
Fixing the Blog Post Links
This is the last and most important step to get DropinBlog fully merged with your Leadpages site – correcting the links.
While your blog posts are successfully connected to your blog landing page, when you click on any of them, they won't load the post detail page. This is because DropInBlog works by using the blog landing page that we created as a template for the post detail pages.
To get your blog posts linking correctly, all you have to do is view your new blog landing page and copy it's full URL. Then, move back over to the Settings page on your DropInBlog account.
Paste the URL under the Blog URL section, as displayed in the following image.
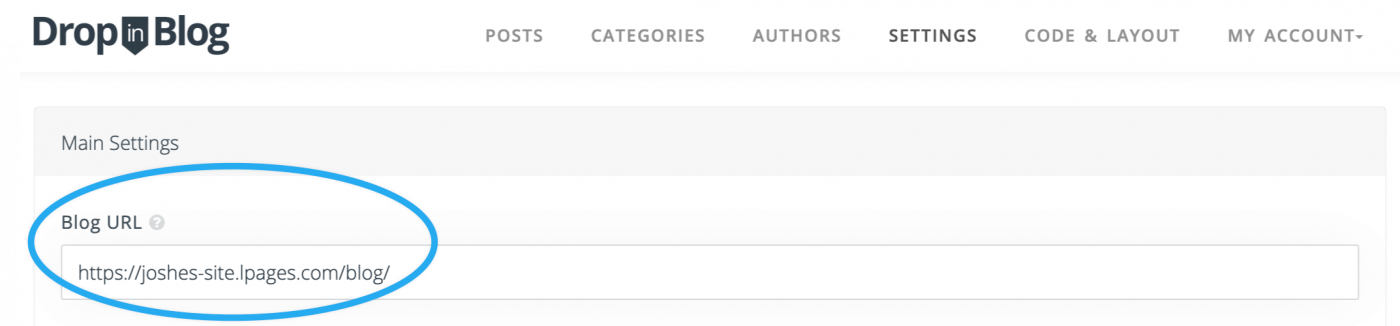
If you check out your live site again, now all of the post detail pages should be working perfectly. 😁
FAQs
How can I start an SEO-friendly blog on Leadpages?
Leadpages doesn’t have a quality native blogging option. There are some ways you can insert a blog page into your Leadpages site, but your best option is DropinBlog. Other alternatives won’t cut it for a professional blog prioritizing search engine optimization.
Adding DropinBlog to your Leadpages site is as simple as embedding HTML. Moreover, DropinBlog is affordable, easy to use, and it includes an SEO Analyzer tool. Your final blog content will be optimized and uploaded to the site smoothly every time.
How much does Leadpages cost per month?
Once you’ve completed the free trial period, you will have to subscribe to a paid plan. Leadpages plans start from $37/month if paid for the whole year in advance ($444 in total). Otherwise, if you pay on a rolling monthly basis, it’ll cost $49/month.
Closing thoughts
Leadpages certainly seems to be one of the easiest site-building platforms to integrate with DropInBlog. Without any previous experience using Leadpages, I was able to create a site, transform it into a fully functional blog, and deploy it live in just a few minutes.
As always, if you have any questions about setting up your blog or using any of our features, feel free to reach out to us.
Happy blogging. ✌️