
Key Takeaways
- The best way to add a blog to your Thinkific site is with DropInBlog!
- The free trial and quick setup lets you to test it in a few minutes.
- DropInBlog has different pricing plans for individuals and teams.
You can easily create a blog on Thinkific, and in this guide, you’ll learn how.
Before we begin:
We've put together this quick video to guide you through the process of creating a blog with the DropInBlog Thinkific App, the only fully integrated blog solution for Thinkific. If you want to follow our written guide or see other blog integration methods for Thinkific sites, read on.
Summary
- Thinkific doesn’t have a native blogging feature, but you still have three options to embed a blog on Thinkific. You can install DropInBlog, link to an external blog from your Thinkific site, or create a blog using the platform’s custom pages.
- DropInBlog is Thinkific’s recommended solution for adding a blog to your online school. It is also the most complete blog integration method.
Table of Contents
- Key Takeaways
- Thinkific Blog Integration Method 1: DropInBlog
- See Your New Blog in Action!
- Next Steps: Create a New Blog Post in DropInBlog
- Display Recent Posts on Your Thinkific Homepage with DropInBlog
- Thinkific Blog Integration Method 2: Link to an External Blog
- Thinkific Blog Integration Method 3: Custom Pages
- DropInBlog vs. Custom Pages vs. External Blog Links
- Thinkific Blog Examples
- FAQs
- The Best Blogging Option for Thinkific: DropInBlog
Thinkific Blog Integration Method 1: DropInBlog
Step 1: Install the DropInBlog App
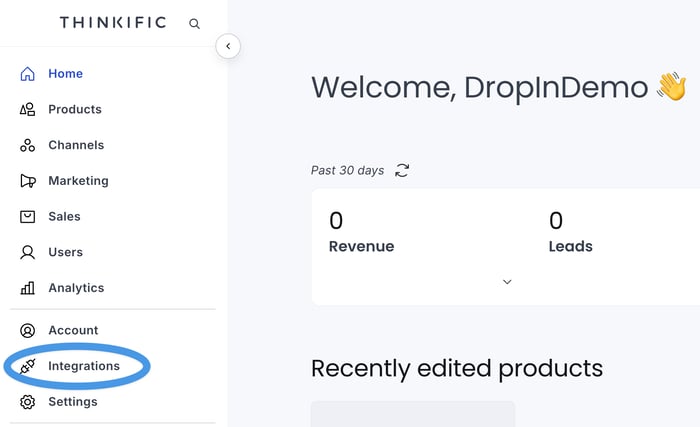
Log in to your Thinkific account and navigate to the Integrations section on the left sidebar.
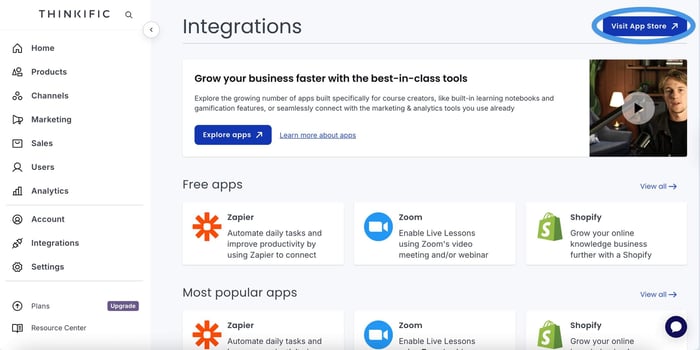
Next, access the Thinkific App Store, and in the app store's search bar, look for DropInBlog.
Once you locate the DropInBlog app, proceed to install it.
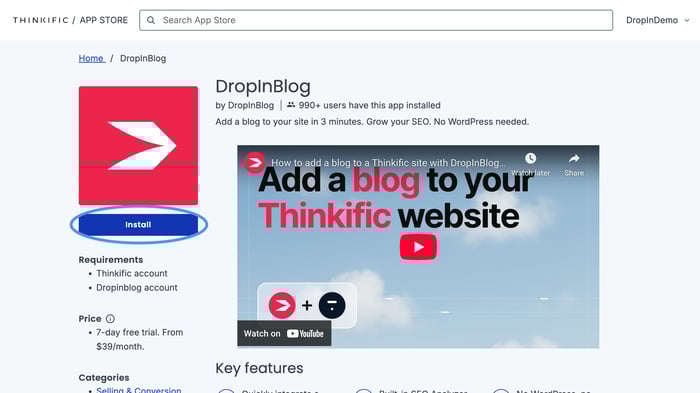
You will be prompted to give permission to DropInBlog to use your Thinkific data to create an account. Select Accept & Install.
During the installation process, a DropInBlog account will automatically be created for you, and you’ll be directed to your DropInBlog user dashboard.
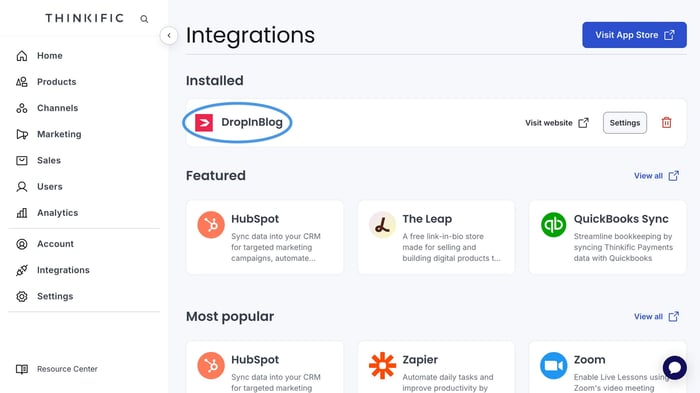
To check that the app was installed successfully, return to the Integrations page on your Thinkific site and refresh the page. The DropInBlog app should appear in the Installed Apps section at the top of the page.
Step 2: Create a Blog Page
Once the DropInBlog app is installed, you need to create a new page on your site where you'd like to show off your new blog. As mentioned before, it's simple – just follow these few steps.
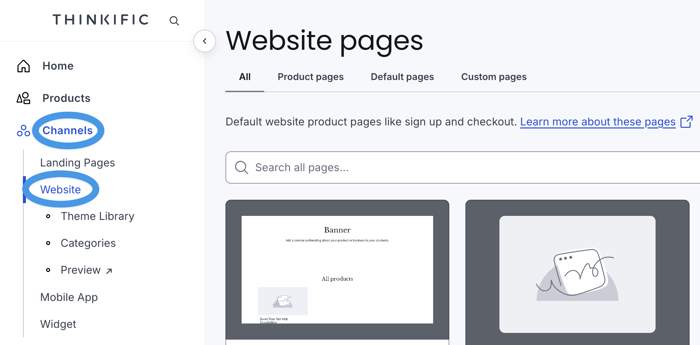
From within your Thinkific account, navigate to Channels on the left sidebar and select Website.
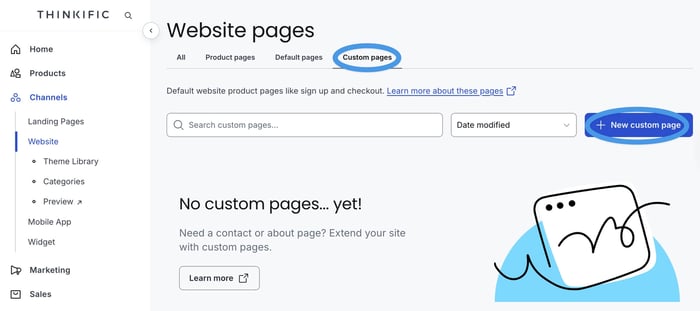
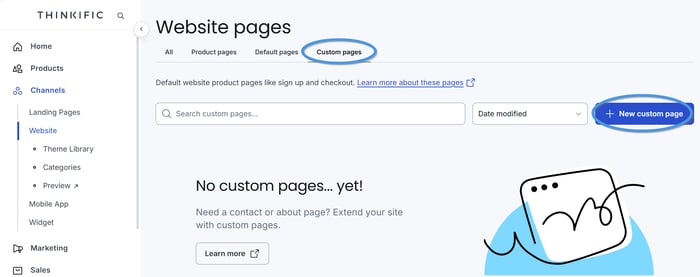
Click the Custom Pages tab at the top of the page, then select the New Custom Page button on the right side of the screen.
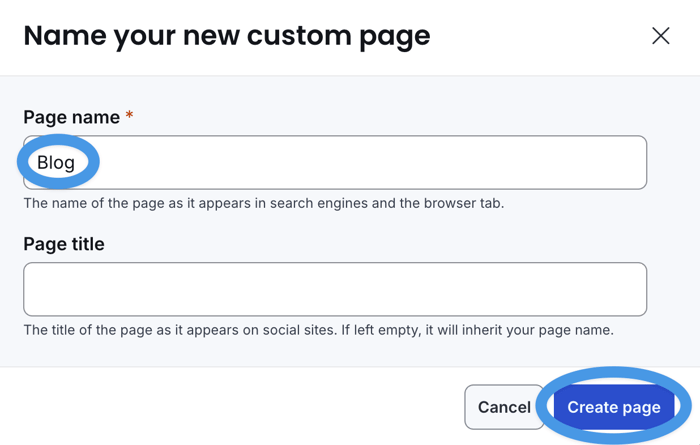
Name your new page Blog, or choose any page title you like, then click on Create Page, and your new page will be created.
Step 3: Add DropInBlog to Your New Thinkific Blog Page
After creating a new custom page for your blog, you’ll be automatically directed to the page editor.
If that doesn’t happen, select Channels from the left-side menu, then Website. Your blog page will appear first as the most recently created one. Click on the kebab button (three vertical dots) in the lower-right part of the blog page icon to go to the site editor.
Once inside the editor, look for the Add Section option on the left sidebar and click on it.
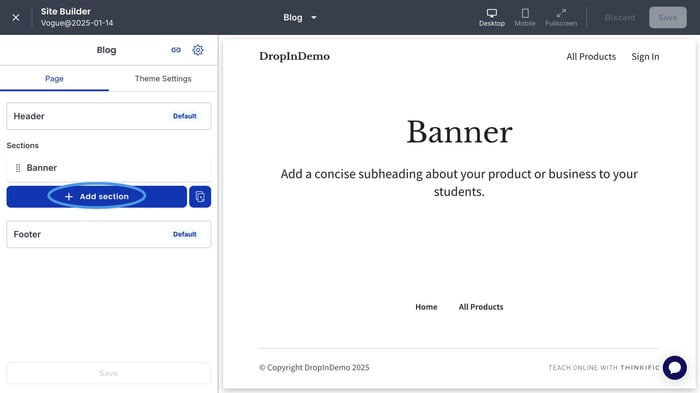
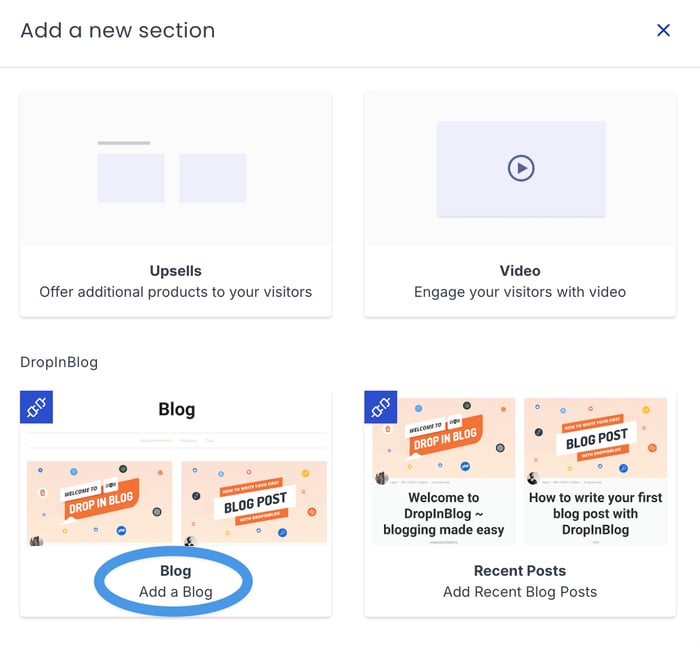
Scroll to the bottom of the pop-up and click on Blog, which is listed under DropInBlog. The posts from your DropInBlog account will automatically be pulled into your new page!
Click Save, and voila, you've just created a blog on your Thinkific website!
Step 4: Add Your New Blog Page to Your Website Menu
Here’s how you can do this:
Open the site editor, and from the left sidebar, click Header and then click the Add Link button.
Select your new link and name it Blog (or whatever you'd like the new menu item to be called).
Next, click the Select a Destination dropdown, and choose Another page…
From the Page dropdown, scroll through the list and select your Blog page (under Custom Pages, at the end).
Click Save and voila... you've just added your blog to your main menu!
See Your New Blog in Action!
The moment you've been waiting for is here – it's time now to check out your new blog in all its glory! Go ahead and open the live version of your site, give the page a refresh, and behold the beauty of your new blog!
DropInBlog is designed to automatically take on the look and feel of your Thinkific theme. It uses your fonts and colors to blend seamlessly into your site. Looks pretty great, right?
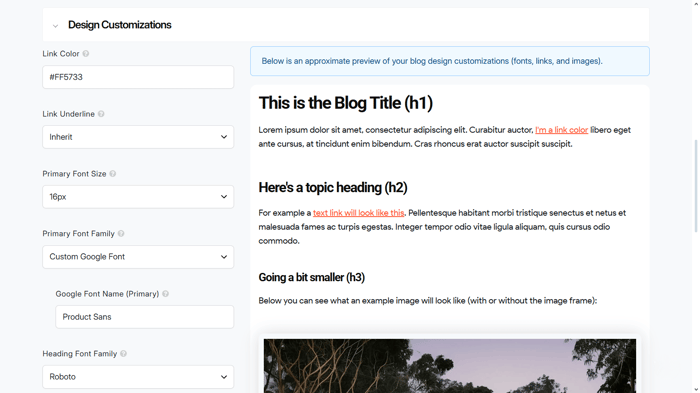
Moreover, if you want to tweak your blog’s design, you can customize it from within the Design Customizations section of your DropInBlog account.
Next Steps: Create a New Blog Post in DropInBlog
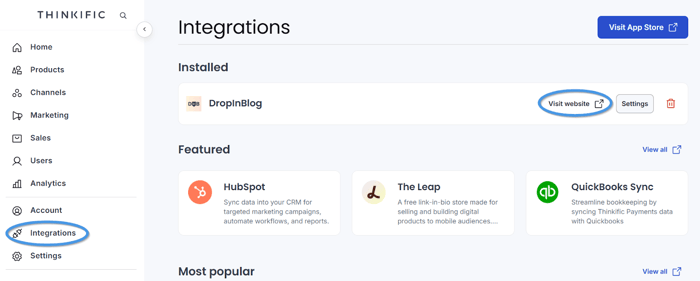
Once you’ve successfully installed the DropInBlog app, you can manage all your content from your DropInBlog account. To open the app from within Thinkific, select the Integrations tab, and on the following screen, click on Visit website next to DropInBlog.
You’ll be taken to the Posts page from where you can create new blog content by clicking on the Add Post button.
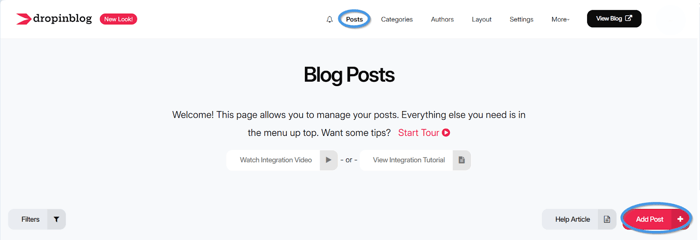
Doing so will open the DropInBlog editor, from where you can stylize and format your content and add images, videos, products, and FAQs.
Apart from the powerful editor, DropInBlog is equipped with SEO features out of the box, including:
Built-in SEO fields
As-you-type SEO suggestions
Rich-snippet support
That means your Thinkific blog won’t just look nice, but it will also load fast and be optimized for search engines.
After you add content to your blog, you can increase its visibility by displaying your recent posts on any page on your Thinkific website. We’ll show you how, of course.
Display Recent Posts on Your Thinkific Homepage with DropInBlog
2. Navigate to your homepage and click the Edit page button.
3. From the Add section pop-up, scroll down and choose Recent Posts under DropInBlog. Your recent posts will automatically be pulled into the new section on your homepage.
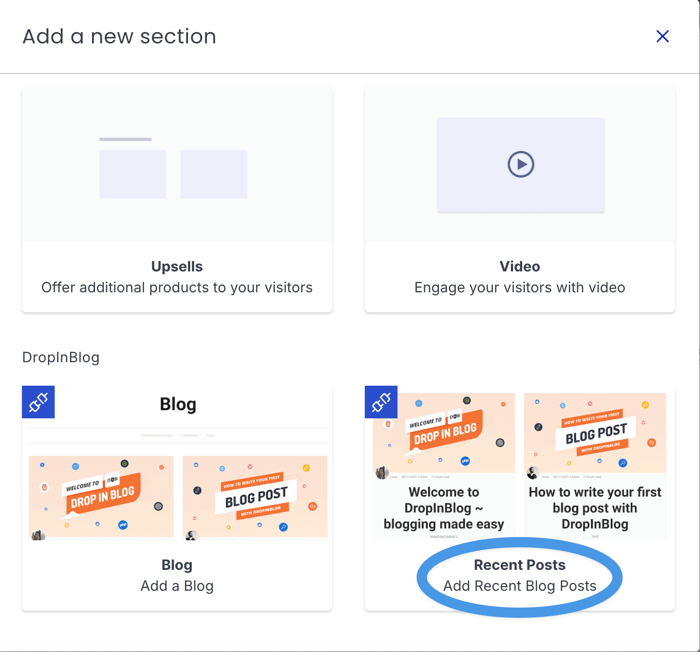
4. Your two most recent posts will be displayed on your homepage. You can adjust the number of posts shown by clicking Recent Posts and changing this number to your liking.
5. Make sure to save your changes and then check them out on your live website!
Now, let’s see the other two methods of embedding a blog on Thinkific.
Thinkific Blog Integration Method 2: Link to an External Blog
This blog integration method might be a suitable solution if you already have a blog and want to display it on your Thinkific website.
Alternatively, you can export your existing blog to DropInBlog and add a blog to your site using blog integration method 1.
Step 1: Copy Your Blog Link
Before you make changes to your Thinkific site navigation, open the platform you used to create a blog, and copy the blog link.
Step 2: Edit Your Site’s Navigation Menu
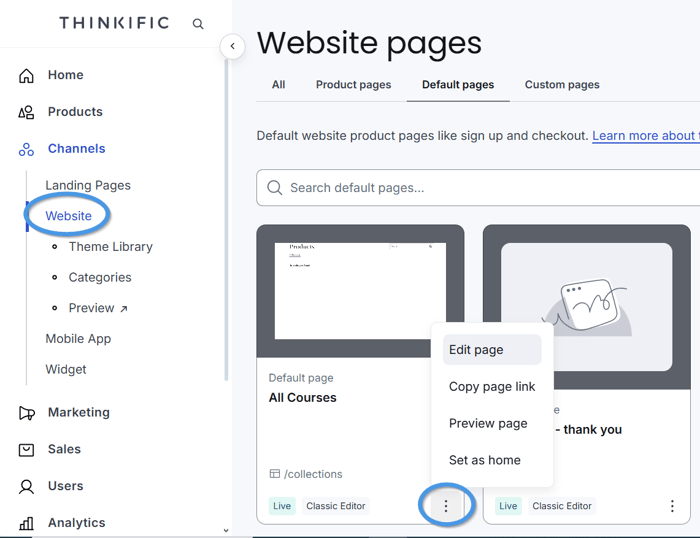
Next, go to your Thinkific dashboard, select Channels → Website, and click on the three dots next to the page you want to edit. Locate the Edit page option, and click on it to open the editor.
Open the Header section on the left by clicking on it, then under Blocks, select Add link to access the block settings.
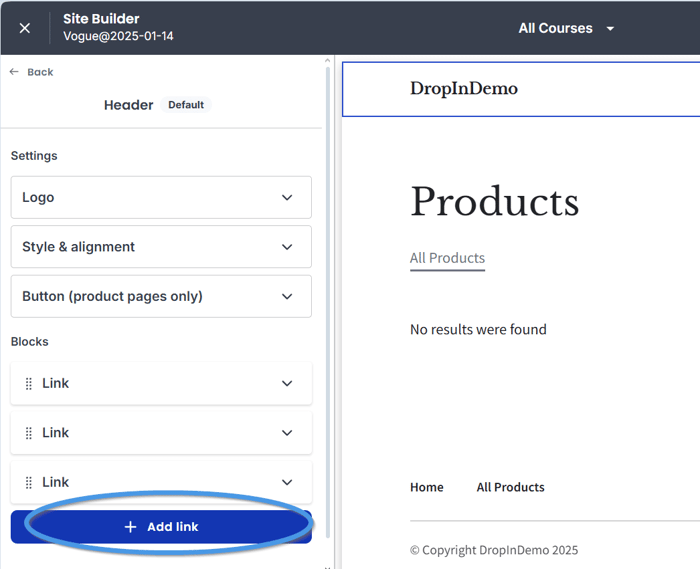
In the block settings, add the name of your blog under the Text field. From the Link dropdown, select A custom URL, and paste your blog link inside the URL field.

When you save your changes, the link to your blog will be visible in your site’s menu.
Using this method to embed a blog on Thinkific is quick and straightforward, but it has its drawbacks:
Your website and blog are on two domains, which means that your blog’s SEO won’t contribute to your site’s SEO.
Your visitors need to navigate two platforms.
You need to adjust the design of your blog to match your site’s design to create a better visual experience for your visitors.
If you don’t want to use this method, custom pages are another workaround for Thinkific’s blog limitation.
Thinkific Blog Integration Method 3: Custom Pages
Using Thinkific’s custom pages, you can create a blog – well, technically. In practice, this would mean creating one page where you’d list the links to all your posts, and adding a new page for each blog post, which, at the very least, is time-consuming.
Here’s how you can do that.
Step 1: Create a New Custom Page
From your Thinkific admin dashboard, navigate to Channels → Website. Select Custom Pages from the top menu, then click on New custom page, and name it whatever you like, e.g., “Blog.”
Step 2: Add Links to Your Blog Posts
After creating your blog homepage, you’ll be taken to Thinkific’s editor, where you should add links to all your blog posts.
To do that, click on Add section on the left, and select Text & Media.
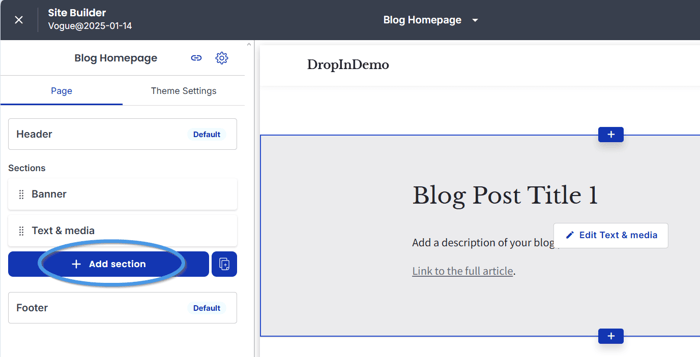
Inside the Text & Media section, add your blog post title, description, and the link to the full article.
Step 3: Add a New Blog Post
Return to your Thinkific dashboard, then go to Channels → Website → Custom Pages, and create a new page.
This will be your blog post page, which you can create with the Text & Media section – the only section that has a text editor and allows you to add other types of content besides text, such as images and videos.

Once you add your post, save it and copy the page link. Then, open your blog homepage, and add the link to your blog post to the corresponding section. Repeat the steps for every new blog post.
This method is the closest thing to the Thinkific blog feature, and it has several downsides, including:
The time you need to create and manage your blog
The lack of some basic blogging features (e.g., categories)
The non-traditional (clunky) blog navigation
Based on the data from HubSpot’s State of Blogging report, 12% of bloggers publish their content bi-weekly and monthly. Even if your content marketing strategy can yield some results with a similar publishing schedule, your blog will have at least 12 new posts each year. Now, imagine your site’s menu and the links to individual blog pages after 2–3 years. This makes this method a non-scalable option.
DropInBlog vs. Custom Pages vs. External Blog Links
If you’re unsure about the best way to add a blog to your Thinkific site, the following use cases might help you decide:
If you want a fully-featured blog with built-in SEO features, use DropInBlog.
If you don’t want to change your blogging platform and are established elsewhere, linking to an external blog should meet your needs.
Thinikific’s custom pages will serve you well if you post only occasionally.
To help you even further, we included a brief comparison of the blog integration methods discussed in this guide below.
| Feature | DropInBlog | Thinkific Custom pages | External blog links |
|---|---|---|---|
| Easy to set up | ✓ | ✓ | ✓ |
| Customizable design | ✓ | ✗ | ✓ |
| Centralized content management | ✓ | ✓ | ✗ |
| Optimized for search engines | ✓ | ✓ | ✗ |
| Seamless user experience | ✓ | ✗ | ✗ |
| Scalable | ✓ | ✗ | ✓ |
| Low maintenance | ✓ | ✗ | ✗ |
| Branding consistency | ✓ | ✓ | ✗ |
DropInBlog ticks all the boxes and makes running a blog a breeze. Take a look at some Thinkific blogs below and discover the capabilities of DropInBlog for yourself.
Thinkific Blog Examples
Take a look at some Thinkific blogs below and discover the capabilities of DropInBlog for yourself.


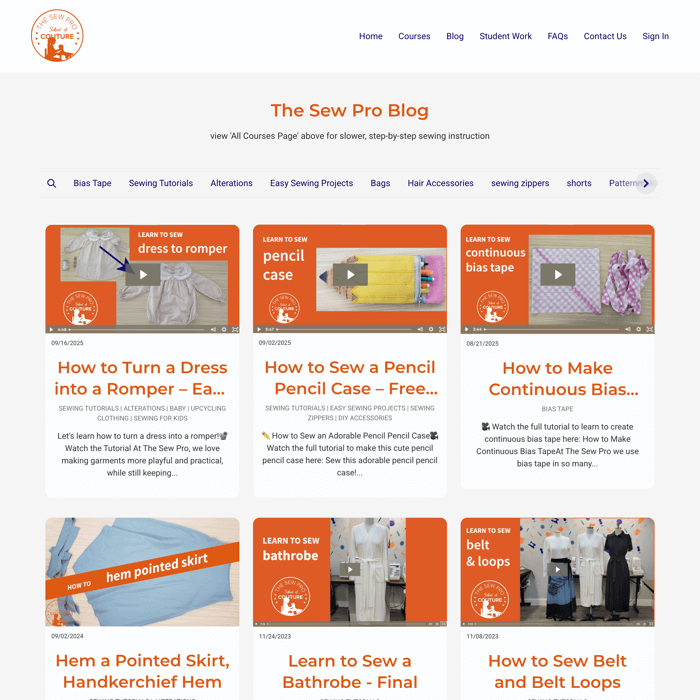
For more Thinkific blog examples, visit our Thinkific examples page.
And if you want to enhance your SEO results, this detailed guide on optimizing your Thinkific site and courses for better Google rankings will help you with that.
FAQs
Is it possible to create a blog directly within Thinkific?
Unfortunately, Thinkific itself does not offer a built-in blogging feature, so creators on Thinkific aren't able to compose blog posts directly on the platform. If you want to create a blog on Thinkific, the solution is to integrate a third-party blogging tool (like DropInBlog).
Is integrating DropInBlog with Thinkific free?
When you integrate DropInBlog with Thinkific, you can take advantage of a free trial. This trial period allows you to explore the features and benefits of DropInBlog on your Thinkific site without any initial cost, giving you the opportunity to see how it enhances your online course platform. See DropInBlog plans and pricing here.
Can I import my blog to DropInBlog?
Yes, you can import your content created on another platform to DropInBlog. For that, you can use the Import/Export feature and upload your content as a CSV file. Then, if you want to add that blog to Thinkific, simply install the DropInBlog app.
The Best Blogging Option for Thinkific: DropInBlog
If you’re looking for a fully integrated blogging solution for your Thinkific site, DropInBlog is the only method that allows you to do that.
The professional blogging app is easy to install, fits your Thinkific site design perfectly, and has all the features you need to run a successful blog.
Here’s a 30-second video of the DropInBlog blog installation showing just how quick and easy it is to add a blog to Thinkific with DropInBlog:
And, remember, DropInBlog is always here to assist you in every step. So, if you have any questions, let us know.
Happy blogging!