Key Takeaways
- The best way to add a blog to your Sellfy site is with DropInBlog!
- The free trial and quick setup let you test it in a few minutes.
- DropInBlog has different pricing plans for individuals and teams.
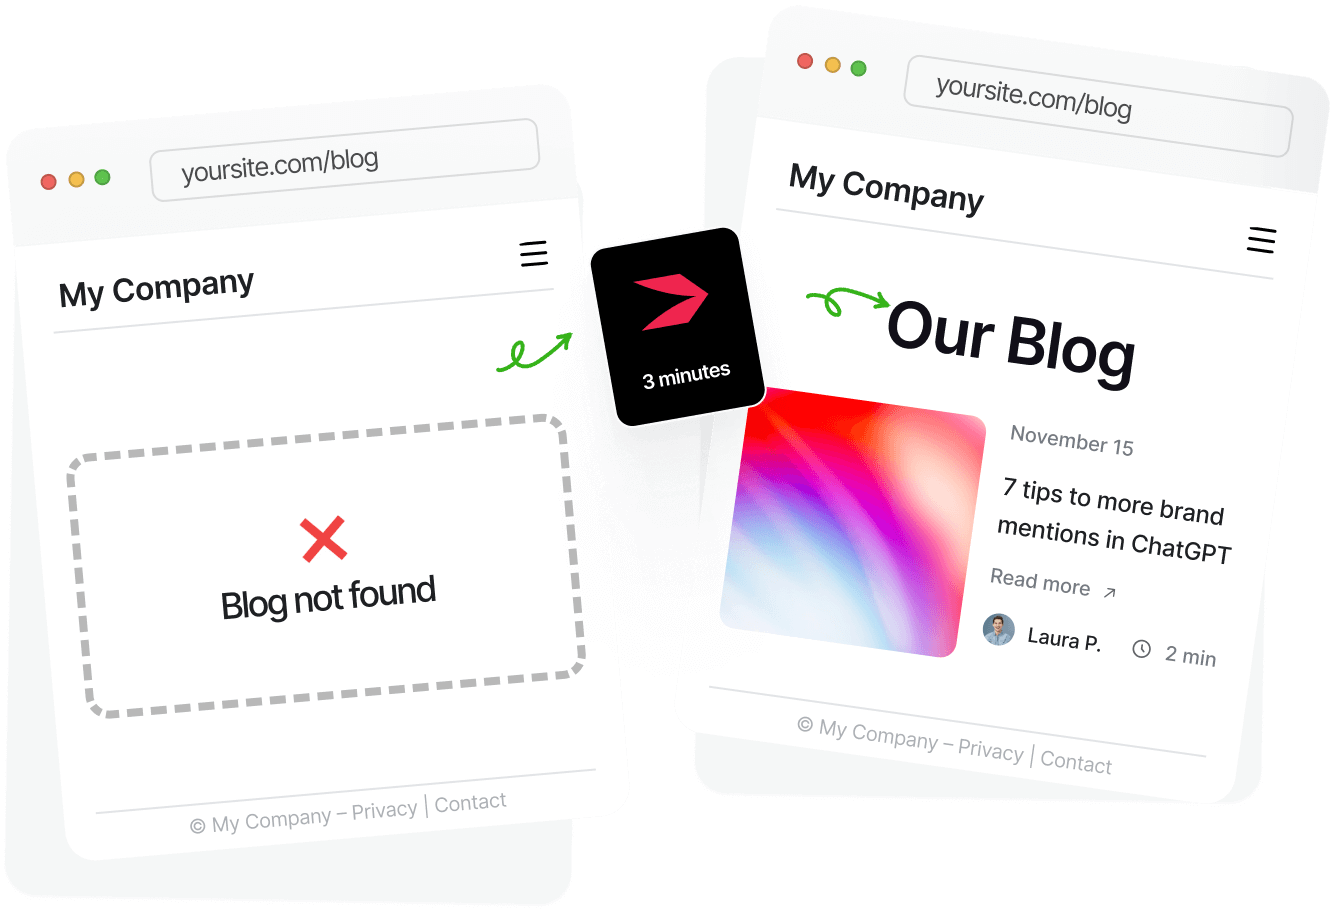
If you’re looking for a simple way to add a blog to your Sellfy store, look no further. We’ve created an easy-to-follow tutorial on how you can do that using DropInBlog.
Just follow the steps outlined in this guide, and you’ll have your blog set up and running in no time!
Table of Contents
What Is Sellfy?

Sellfy is an e-commerce platform designed for creators selling digital and physical products. Since its launch in 2011, Sellfy has become the go-to platform for over 60,000 musicians, writers, filmmakers, and other creators.
The platform presents itself as a more affordable Shopify alternative that offers all the tools you need to run an online store – from a built-in email marketing tool to a generous digital product file size to an affiliate program.
If you’ve already set up your store with Sellfy, you know that, unfortunately, it doesn’t allow you to create a blog. This is where DropInBlog comes into play.
Now, let me show you how easy it is to add a blog to a Sellfy store.
Prerequisites for Sellfy blog integration
Before you can start the integration process, make sure:
You’re subscribed to Sellfy’s Starter plan or higher, which enables you to add custom code.
You’ve signed up for DropInBlog’s free trial for testing the integration.
Once you check these requirements off your list, you can start the integration process.
Step-by-step: How to add a blog to Sellfy
Step 1: Create a new page in Sellfy
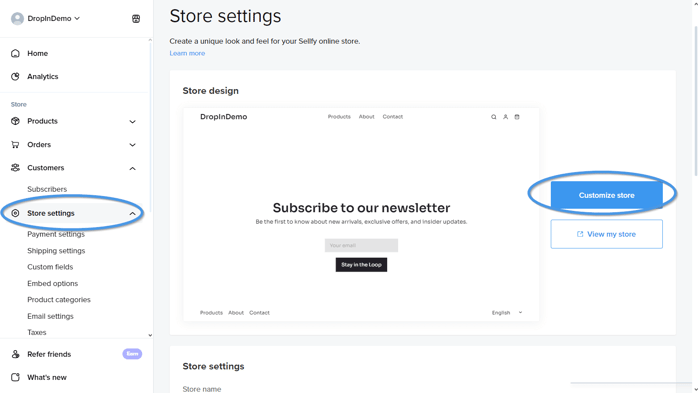
To start, log in to your Sellfy dashboard and head to Store Settings. From there, click on Customize Store to launch the page editor.
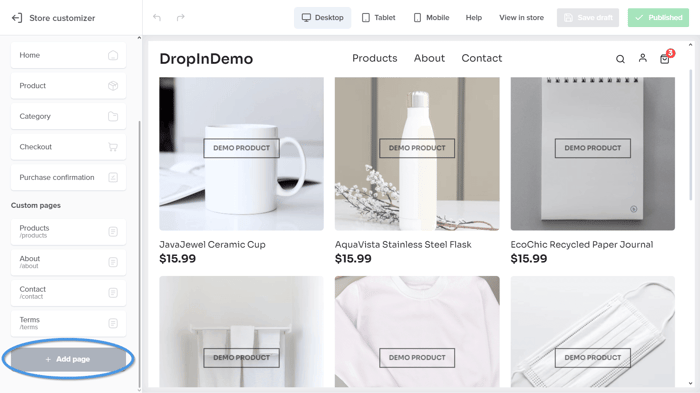
In the editor's left-hand menu, scroll all the way down and select Add Page. This will create a new page that you'll use as the blog.
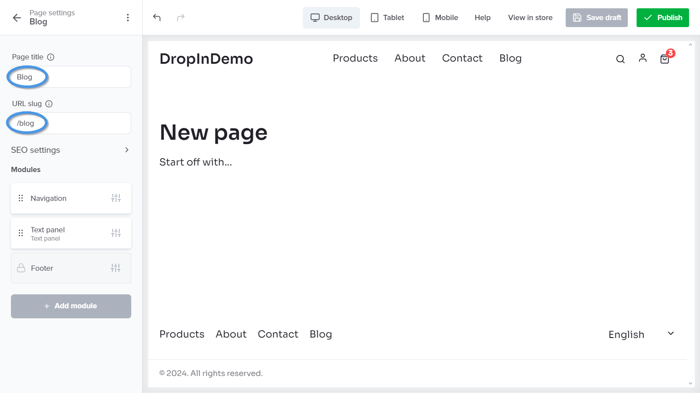
Once the new page is added, rename the page title to “Blog” and change the URL slug to “/blog.” This helps visitors and search engines identify the page easily.
Next, remove all default content blocks on the page. Just hover over each element and click on the trash can icon to delete it. You want the blog page to start with a clean layout.
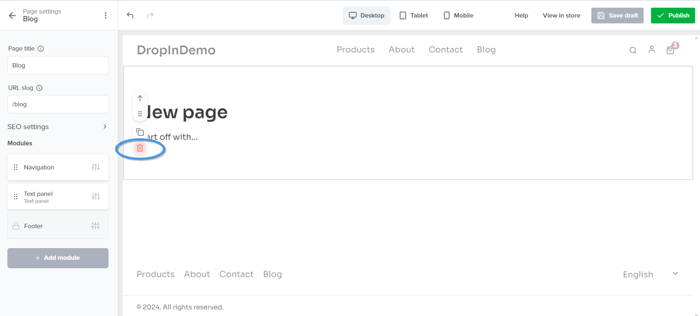
Step 2: Add the DropInBlog embed code
Now that your blank blog page is ready, it’s time to bring in DropInBlog. Click on the Add module button and choose the Embed code module from the list.
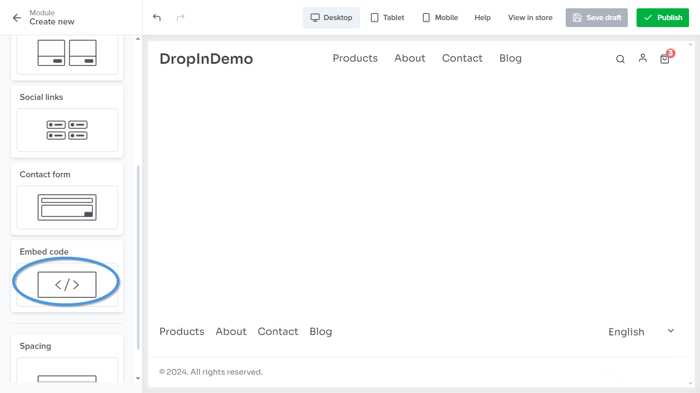
After clicking the Embed code module, a new page will open. Click on the Edit code button to access the module settings.
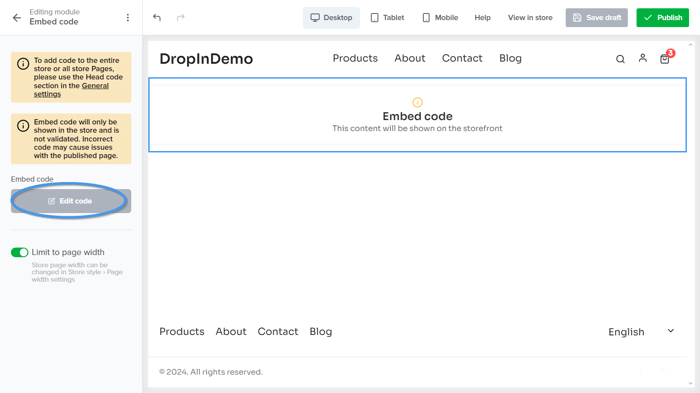
A pop-up window will appear where you can paste your DropInBlog code.
To do that, go to your DropInBlog admin dashboard, then select the Code & Layout tab. Here, you’ll find the two lines of code you should copy and then paste into the Embed Code module on your Sellfy blog page.
Click Copy code under Step 1, then paste this code into the pop-up window in Sellfy.
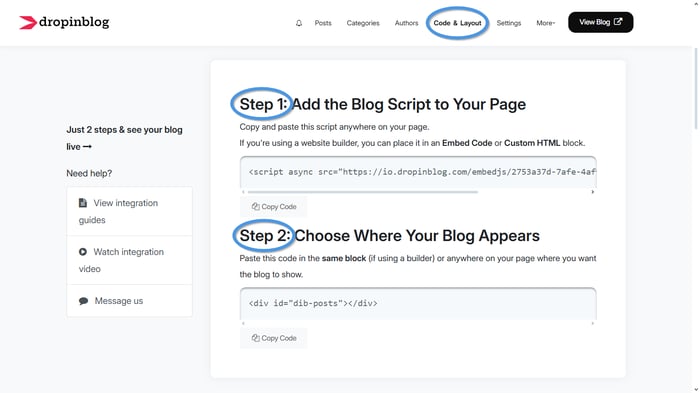
Return to your DropInBlog Code & Layout tab, repeat the step for the second line of code under Step 2, and paste it into the same pop-up window on Sellfy.
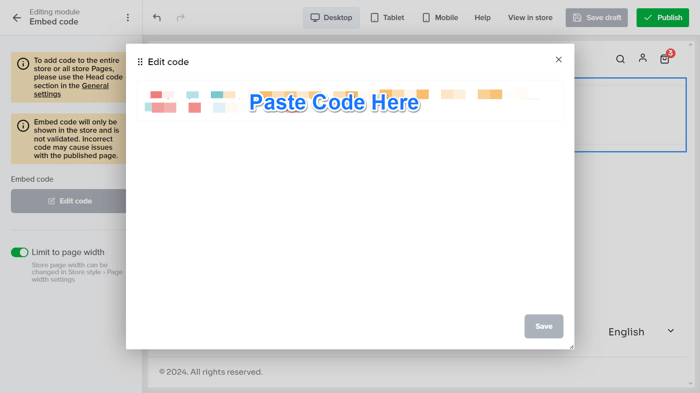
Once both snippets are in place, click on Save to apply the changes.
Note: You won’t see the blog content appear immediately inside the editor. You’ll need to publish the page to preview your blog.
Step 3: Publish and preview your blog
After saving the embed code, click on the green Publish button in the upper-right corner of the Sellfy editor.
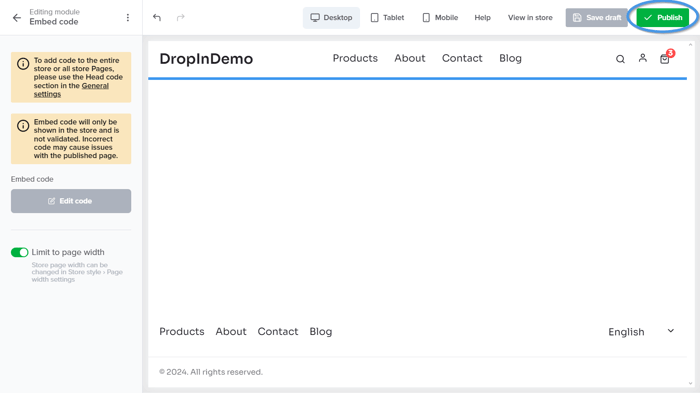
Once the page is published, select View in Store from the same area. This opens your live site so you can confirm that the DropInBlog integration is working as expected.
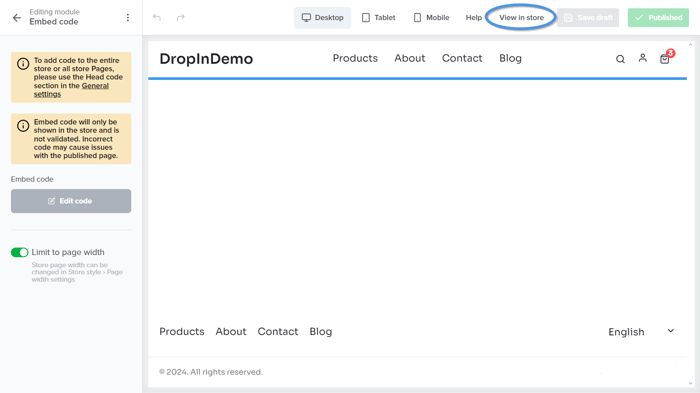
And just like that – you have successfully added a blog to your Sellfy store.
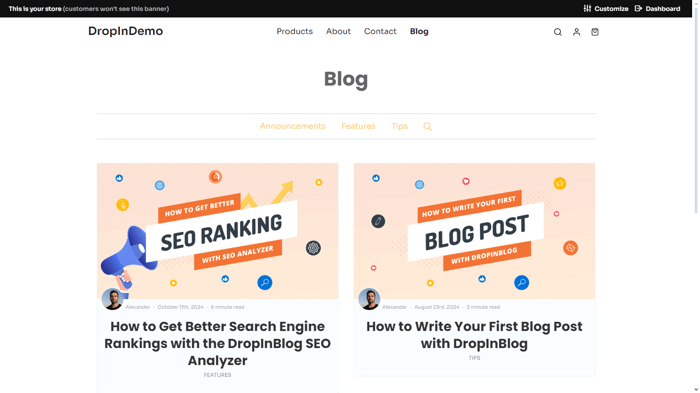
Now that your blog is all set up, we recommend going through our blog setup checklist to get some tips on fine-tuning and growing your blog.
Sellfy Blogging Options: Why Use DropInBlog?
With DropInBlog, you can turn your Sellfy store into a full-featured content hub that helps drive traffic and improve SEO. Here’s what makes it the best blogging solution for Sellfy:
SEO-optimized blog posts: Every blog post you publish through DropInBlog includes built-in SEO fields like meta titles and descriptions, helping your content rank better on search engines and attract organic traffic.
Intuitive, easy-to-use editor: The blogging interface is as simple as writing an email. Whether you're a seasoned content creator or just getting started, you can easily format text, add images, and structure your posts.
No coding required: The integration process involves just two lines of copy-and-paste code. After that, everything can be managed through the DropInBlog dashboard – no HTML, CSS, or web development needed.
Matches your Sellfy store’s design: DropInBlog is designed to blend naturally with your Sellfy storefront, so your blog looks like a native part of your website, not an awkward third-party add-on.
Advanced blogging features built-in: Unlike basic embed tools, DropInBlog gives you the ability to organize posts into categories, assign authors, schedule articles, and customize URLs. It’s a true blogging engine.
Mobile responsive out of the box: Your blog will look great on all devices, whether customers are browsing on desktop, tablet, or mobile – no extra setup required.
Integrated content marketing workflow: Because DropInBlog lives inside your Sellfy store, it makes content marketing frictionless. You can drive traffic directly to product pages, educate your audience, and boost conversions.
Whether you're publishing product updates, tutorials, case studies, or thought leadership content, DropInBlog makes it possible to build a professional blog directly inside Sellfy.
FAQs
Can I add a blog to my Sellfy store?
Yes, Sellfy lets you embed third-party solutions like DropInBlog into your online store. This is possible with Sellfy’s custom code module, but you can also use Zapier to integrate your store with other tools you already use.
Can I use Sellfy for free?
Yes, you can use Sellfy for free, but only for the duration of their free trial. After that, you’ll have to subscribe to one of the platform’s paid plans.
Is Sellfy better than Shopify?
If you’re just starting and want to sell digital products, Sellfy may be a better fit for you. Meanwhile, if you’re a growing business looking for an e-commerce platform with advanced features and a dedicated app store, Shopify might serve your needs better.
Is DropInBlog compatible with all Sellfy plans?
DropInBlog integration works with Sellfy’s Starter plan or above – these allow the addition of custom code modules.
Add a Blog to Sellfy with DropInBlog
Adding a blog to your Sellfy store can significantly boost your SEO, engage your audience, and build trust. DropInBlog makes this process seamless with just a few steps.
If you encounter any problems while adding a blog to your Sellfy store, feel free to reach out to us.
We’re also always happy to hear from you – you don’t need to have a technical issue to get in touch with us. So, drop us a line at any time, and happy blogging!


