

Key Takeaways
- The best way to add a blog to your TeleportHQ site is with DropInBlog!
- The free trial and quick setup lets you to test it in a few minutes.
- DropInBlog has different pricing plans for individuals and teams.
This guide will discuss TeleportHQ blogging options, including the platform’s built-in features, CMS integrations, and a specialized blogging app. By the end of it, you’ll know how to add a blog to your TeleportHQ website – the easy way.
But first, let’s run through TeleportHQ’s core capabilities.
Table of Contents
Overview of TeleportHQ
TeleportHQ is a low-code website builder that uses ChatGPT to write code for you. It supports different (easy) ways to create and design a website, including:
Using pre-built templates.
Importing frames from your Figma project and converting them to HTML/CSS code.
Typing in a prompt describing the site you want to create.
In all these scenarios, you just pick a starting point and let AI do the rest. And by the rest, we mean everything. Using the platform’s AI capabilities, you can create site pages and sections, content, and images. Then, you can download your website’s code in several JavaScript frameworks.
The company’s even been working on their conversational AI engine and released a demo of Voice to Website, which uses your voice to generate code. 🤯 This just goes to show how advanced AI builders have become. However, the primary focus of these site builders is on creating websites, and blogging features may or may not be included. That brings us to TeleportHQ’s blogging options.
Can I Create a Blog Using TeleportHQ?
Yes, TeleportHQ supports sections called Blog post headers, which can be used to create blog posts and category pages. However, if you’re looking for a standard blogging interface with a rich text editor, you won’t find it inside TeleportHQ. The platform’s Blog Post Header sections serve as shortcuts for starting a blog post, but if you want to add blog post elements, you’ll have to drag and drop them to your post page one by one.
The downside of using Blog Post Header sections is that you don’t have a clear overview of your content, and creating post templates can be time-consuming. The team at TeleportHQ has thought about that and made it possible to connect your TeleportHQ website with your content management system (CMS). It lets you import your blog content from WordPress, Contently, and a few others.
This leaves us with the question: what can you do if you’re looking for an alternative to WordPress or don’t use any of the supported CMS options?
The answer: DropInBlog.
The cloud-based platform designed for professional blogging integrates seamlessly with TeleportHQ, offering you an easy way to create and manage your blog content. Apart from its powerful yet intuitive editor, DropInBlog comes with a built-in SEO analyzer, made for boosting your blog’s visibility in search engines. Transforming your written content into audio, adding your store products, and creating EEAT-optimized author profiles is all possible with the DropInBlog blogging app.
So, if you’re looking for an easy way to add a blog to your TeleportHQ site, we’ll show you how to do that using DropInBlog.
Integrate TeleportHQ with DropInBlog: Prerequisites
Before you start the integration process, check these items off your to-do list:
Create a TeleportHQ account and start a new project.
Sign up for DropInBlog’s free trial to test the integration.
Step 1: Adding a New Page to Your TeleportHQ Website
From within the TeleportHQ site editor, select the Files & Layers tab from the left-hand sidebar, then click on the plus sign icon next to Pages, and select New Page from the dropdown.
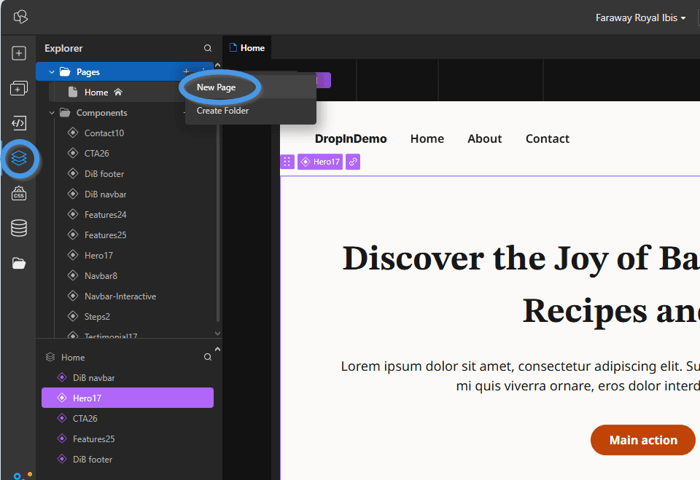
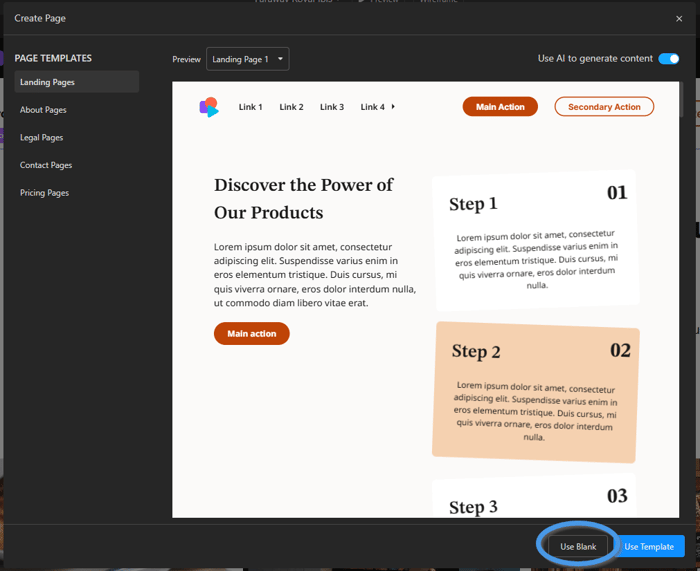
A pop-up window will appear where you can select a page template or a blank page. We’ll use a blank page.
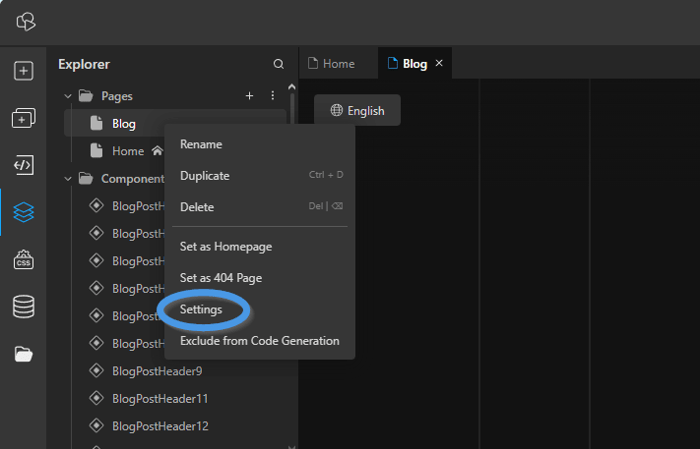
Change the default “Page” name to “Blog,” then right-click on your new blog page and choose Settings from the dropdown menu.
This will open the page settings where you should set the SEO title, description, and URL slug for your blog page.
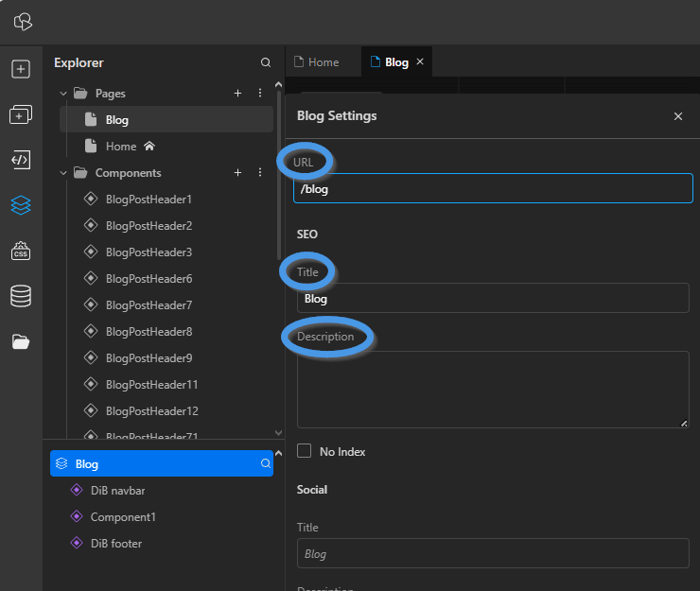
Enter “/blog” under URL and remember it because you’ll need to append this part to your published site’s URL.
Step 2: Adding Components to Your New Blog Page
Since we created a blank page, we need to add navigational elements to our page so that our blog isn’t the only element on the page.
If your new page already has a navigation menu and a footer, you can skip this part.
Using TeleportHQ’s Components, we created reusable sections for the navigation menu and the footer.
If you want to use these sections on your site too, simply add a container (row, column, or grid) from the Elements tab and drag and drop the elements of your choice inside the container.
Next, customize the elements’ layout and style. Then select them all, right click on them, and choose Make Component from the dropdown.
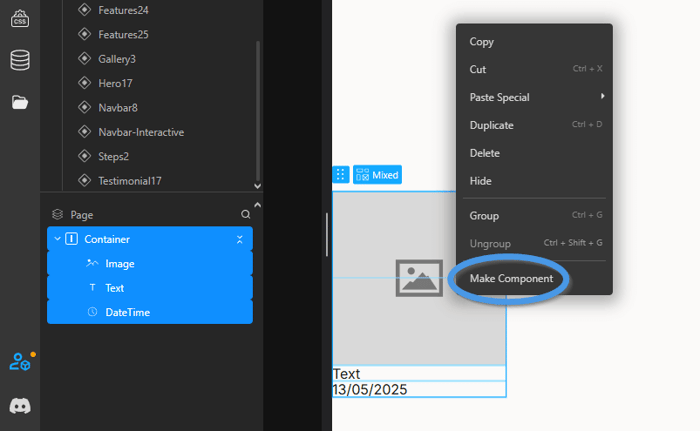
Now, when you update the content in your component, it will update across all instances on your site, which is similar to how DropInBlog’s Smart Snippets™ work.
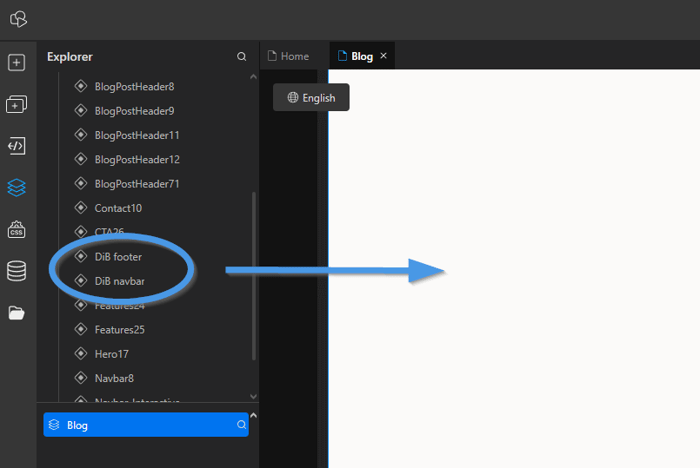
To add the components to your page, drag them onto the page and drop them in the preferred order.
All that’s left to do is to add the Code Embed element.
To do that, click on the Elements tab in the left-hand sidebar, and under the Media section, you’ll see the Code Embed element.
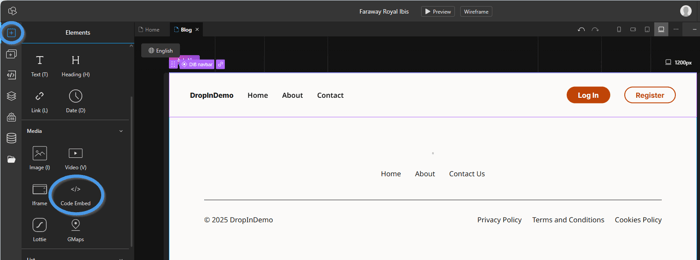
Drag the element to your blog page and drop it between the navigation menu and the footer.
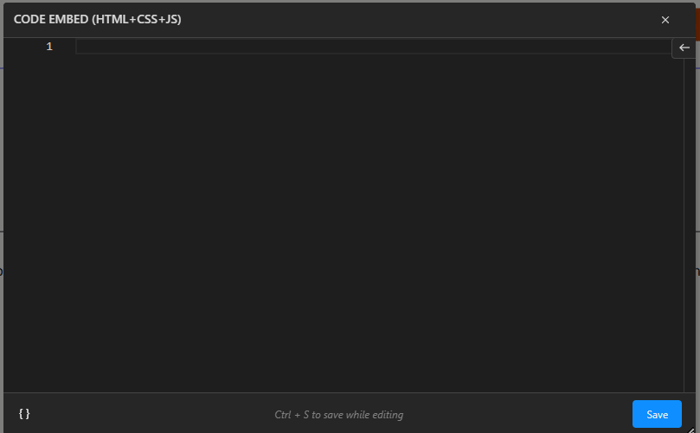
Next, you’ll see a code editor where you should add two lines of code from your DropInBlog account.
Step 3: Adding Your DropInBlog Code to Your TeleportHQ Page
Head over to your DropInBlog account and select Code & Layout from the top navigation menu.
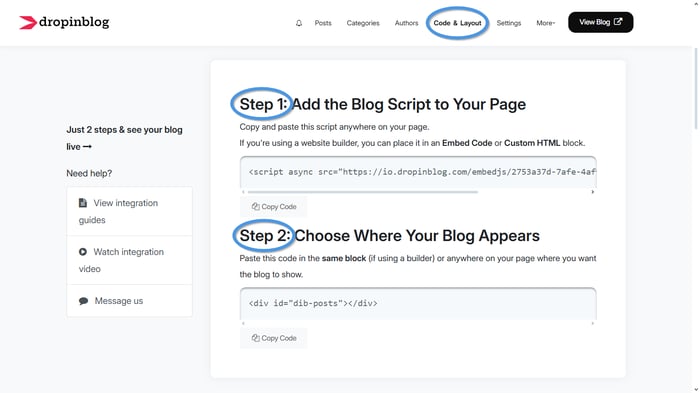
You’ll find your unique blog code under Blog Code, which looks something like this:
Step 1:
<script src="https://io.dropinblog.com/embedjs/XXXXXXXXXXXXXXXXX.js"></script>
Step 2:
<div id="dib-posts"></div>
Copy the code under Step 1, then return to the TeleportHQ editor and paste the code inside the code editor.
Go back to your DropInBlog’s Code & Layout page, copy the code under Step 2, and paste it into the TeleportHQ’s code editor.
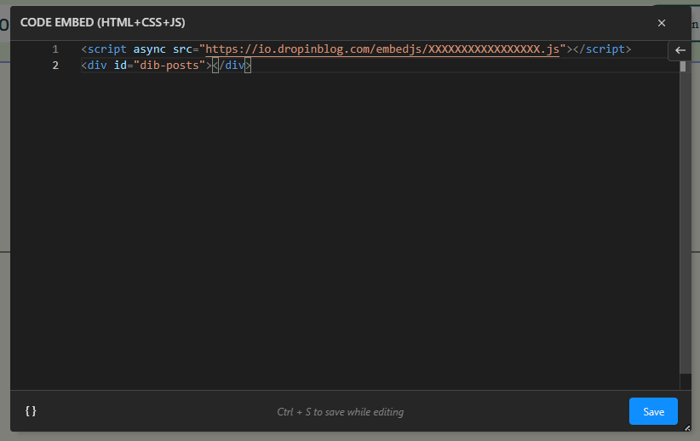
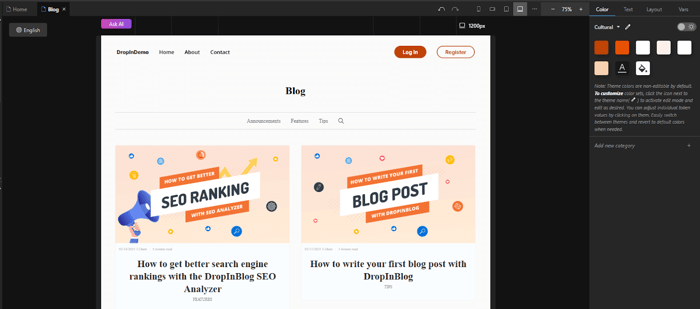
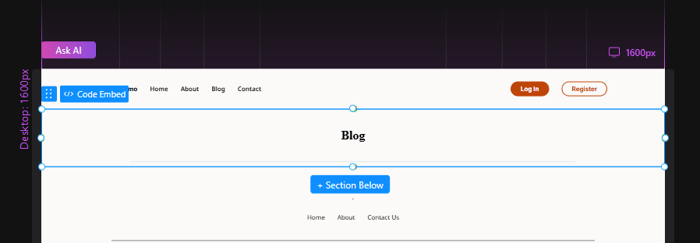
To complete this step, click on the Save button in the lower-right, and you’ll be presented with a preview of your blog.
Step 4: Making the Custom Embed Element Responsive
Next, you want to make the blog element responsive to avoid visibility issues and ensure your TeleportHQ blog displays correctly on different screen sizes. To do that, you need to resize your blog page.
Start by locating TeleportHQ’s breakpoints, which are located in the top-right. To edit or add more breakpoints, click on the three-dot menu next to the default ones.
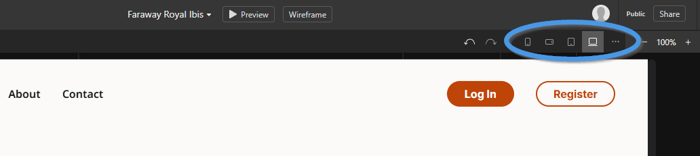
Select a breakpoint, and you’ll see if your blog fits the canvas. If not, click on the resizable handles surrounding the blog element.
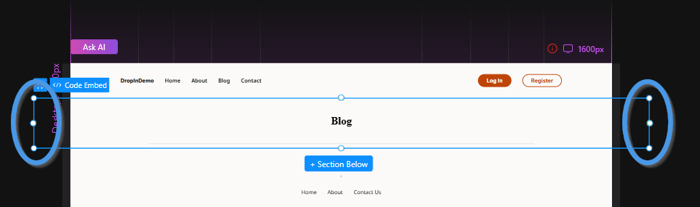
Move the handles until the blog element fits the canvas dimensions.
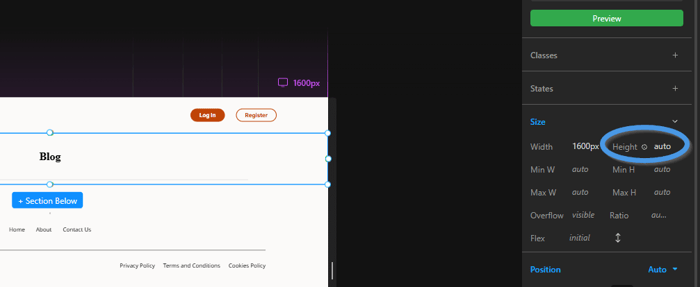
Once you set the desired width of the Code Embed element, from the menu on the right, set the height to Auto so that your blog displays correctly.
Repeat the steps for the remaining breakpoints, and move on to Step 5.
Step 5: Publish Your TeleportHQ Blog
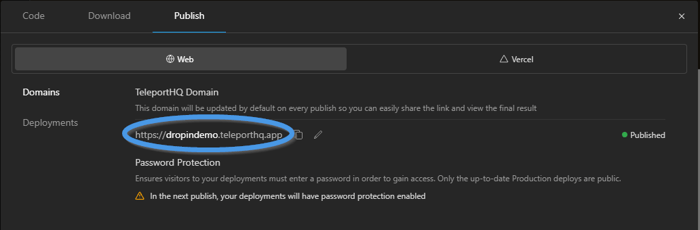
You’re now ready to publish your blog. To do that, click on the Publish button in the top-right, and in the pop-up window, select the Publish option again.
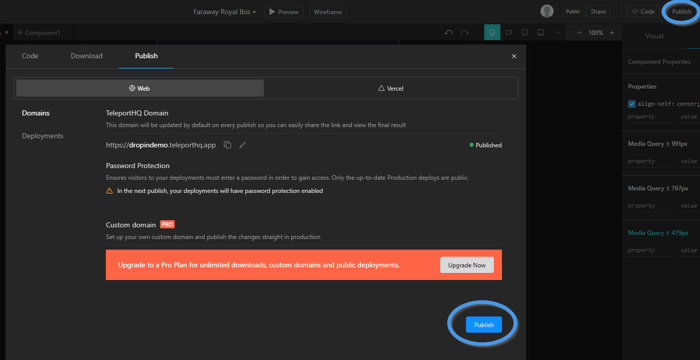
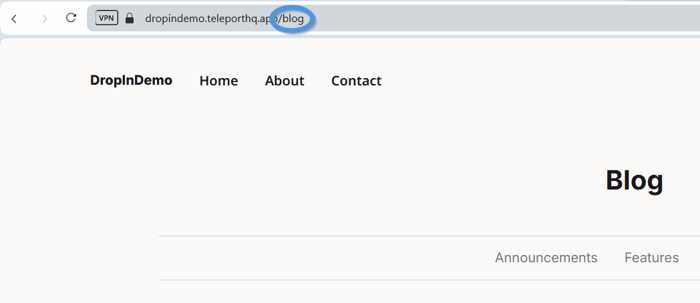
Click on the site URL to view your site.
On the following page, add your blog’s URL slug that you created at Step 2 to access your new blog page.
Copy the page URL, and head over to your DropInBlog account.
Step 6: Connect DropInBlog with TeleportHQ
To ensure all posts are synced between your TeleportHQ site and your DropInBlog account, open the Settings page from your DropInBlog admin panel.
Then paste the URL you previously copied to the text field under Blog URL, and click on the Save All Changes to complete the integration.

That’s it! You’ve successfully added a blog to your TeleportHQ site. 🥳
Add Your Blog Link to Your TeleportHQ Site Navigation
After you publish your blog page on your TeleportHQ site, your visitors won’t be able to access it without a direct link. To change that, you’ll need to add a link to your blog to your site’s main menu, which is a simple task with TeleportHQ’s components.
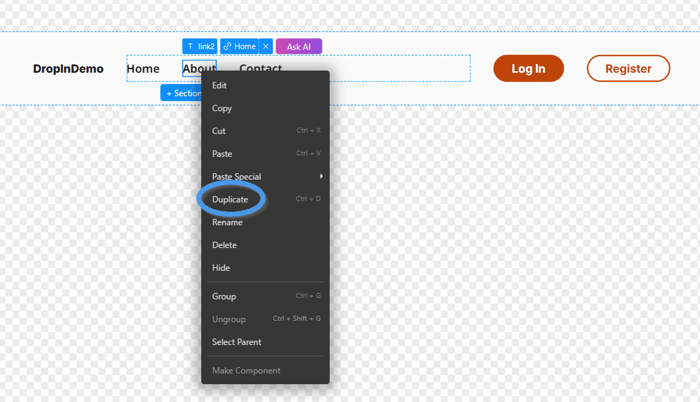
From within the TeleportHQ editor, double-click the menu to which you want to add your blog link to make it editable. Next, right-click the menu item after which you want your new link item to appear and select Duplicate from the dropdown.
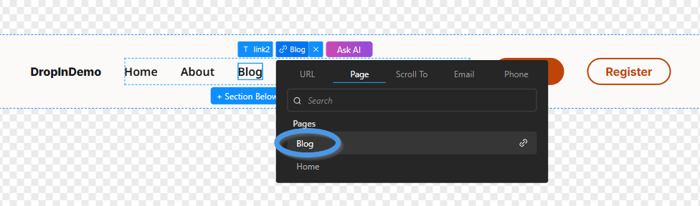
Double-click the new item, and change the title to “blog,” then click on the middle option in the menu above it.
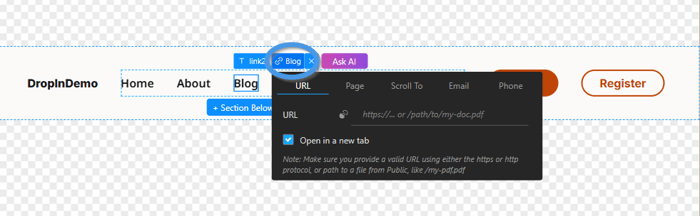
In the popup, select the Page tab, find the blog page you previously created, and click on it to set it as the link destination.
Lastly, publish your website to save all changes.
Now, when you open your website, the link to your blog should be visible in your site’s menu.
Creating SEO-Friendly Content with DropInBlog
After you’ve added a blog to your TeleportHQ website, you can start creating content – which you’ll do from the Posts tab in your DropInBlog account.
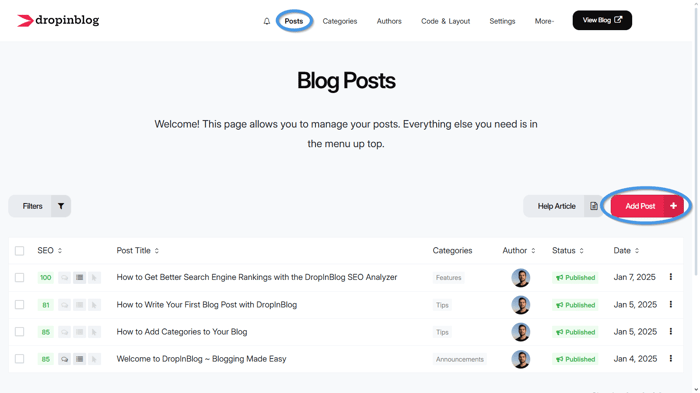
Starting a new blog post is as easy as clicking a button. All you have to do is click on the Add Post button to open DropInBlog’s editor, and from there, you can create engaging, visually appealing posts. The editor lets you add videos, images, product embeds, tables, and much more.
And if you’re doing your own SEO, DropInBlog’s SEO Analyzer will help you with on-page SEO. The tool analyzes your content and checks your keyword usage, SEO title and meta description, links, and image alt text. Using the SEO Analyzer’s suggestions, your content’s chances of appearing in search engines will significantly improve.
That’s just the tip of the iceberg, though, as DropInBlog offers many other blogging features to help you easily create and manage your content.
Add a Blog to Your TeleportHQ Site with DropInBlog Today
That’s it for this TeleportHQ blog integration tutorial. As you’ve seen, adding a blog is a simple task with DropInBlog’s SEO-friendly blogging platform.
If you have any questions about the integration process, feel free to reach out. We can’t wait to see your new TeleportHQ blog.
Happy blogging!


