
If you’re using Shopify’s blog to drive traffic but struggling to convert readers into buyers, embedding products directly into blog posts can help bridge that gap.
Adding a well-placed CTA can increase conversion rates by up to 80% in some cases. Essentially, by including a CTA link in your blog, you can turn a lead into a customer more easily.
In this post, we’ll show you how to add products to your Shopify blog posts.
Table of Contents
How to Add Products to Blog Posts Using the Shopify Blog
If you’ve decided to use the built-in Shopify blog, there are three ways to add products directly into your blog posts. The first is a feature button that you can add from your dashboard, the second is to code it yourself, and the third is to use a plugin.
The “Buy Button”
Shopify developers have created a feature you can add to your page called a “Buy Button.” However, there have been problems with it, and even Shopify doesn’t recommend its use.
The “Buy Button” is designed to make it easier to purchase the product by keeping users on the same page, but unfortunately, it causes problems at the checkout. If your visitors add products from two blog posts, this Buy Button leads to two checkouts rather than adding to the same cart.
If you want to give this option a try, here’s how you can create your buy button and add products to your Shopify blog posts.
Create the Buy Button for Your Shopify Store
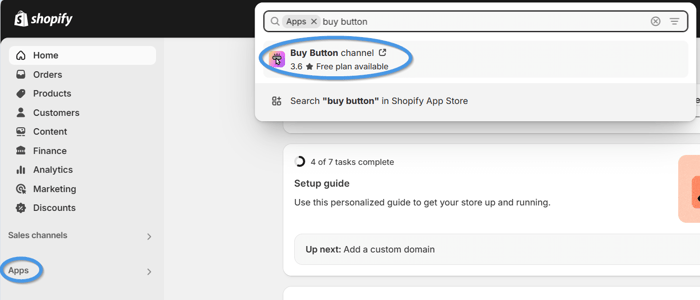
To add the “Buy Button” to your Shopify store, select Apps from the left sidebar of your Shopify dashboard. Then, type in “buy button” in the search bar at the top, and click on the Buy Button Channel in the dropdown.
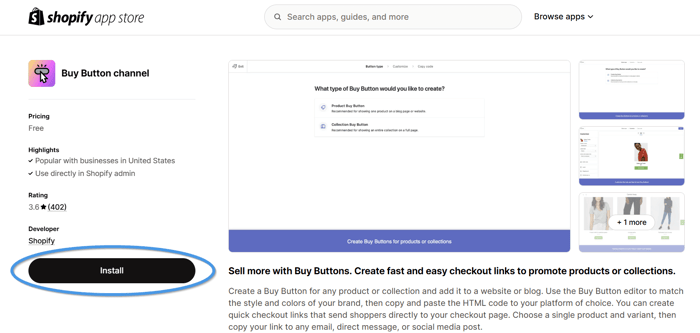
The app will open in a new tab. Click on the Install button on the left to add it to your Shopify store.
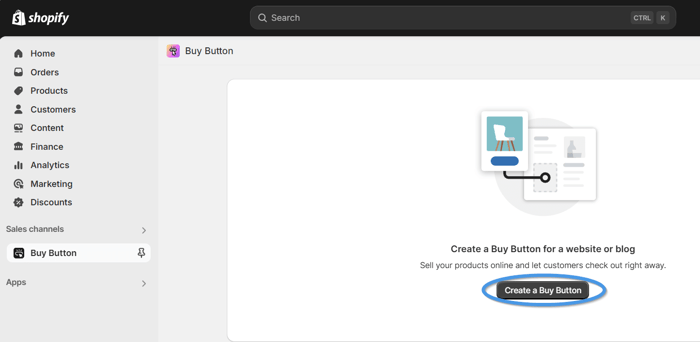
Installing the app will add Buy Button under your Sales channels. Selecting this tab will take you to the button creation screen.
Click on Create a Buy Button to get started.
The first step is to select the type of button you want to create. Select the Product Buy Button to add a single product to your blog page.

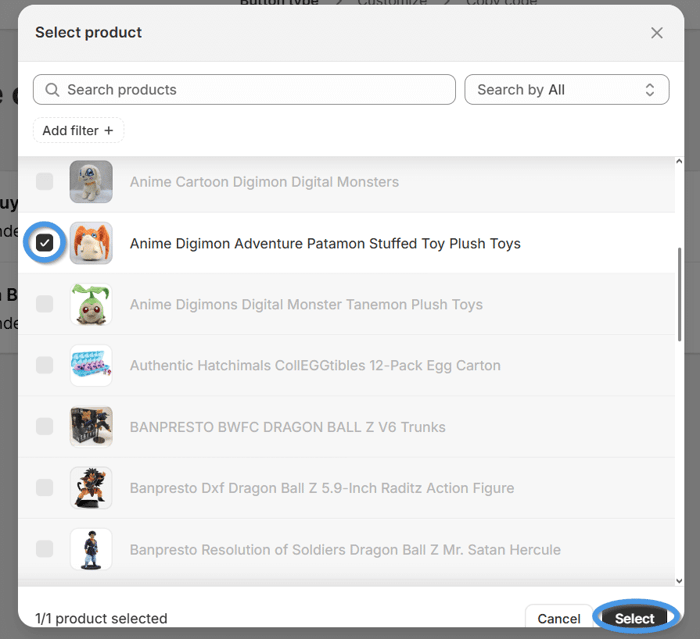
Next, you’ll see a pop-up with your store’s products. Select one of the products by checking the box next to it, then click on the Select button in the bottom right to confirm your choice.
On the following screen, you can customize the look of your buy button, change the cart default text and colors, and adjust the product’s appearance.
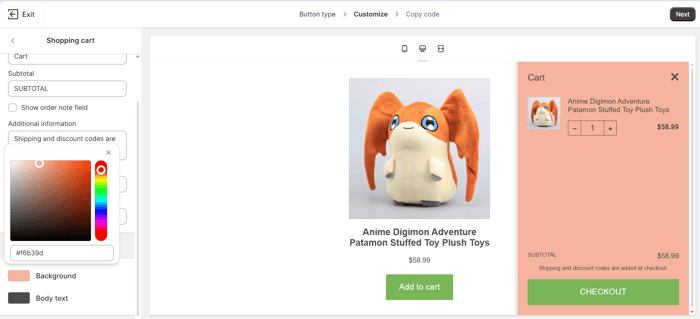
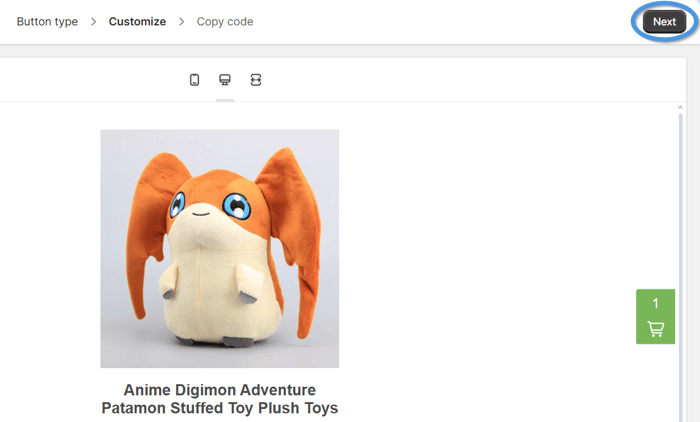
Once you’re happy with how everything looks, click on the Next button in the top right.
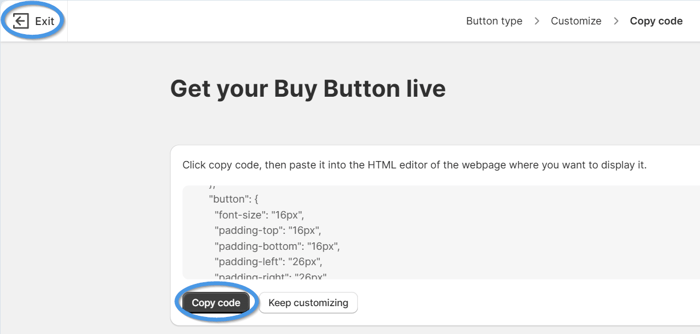
After that, you’ll be taken to a new page where you’ll find the code for your Buy button. Click on Copy Code, then hit the Exit button to return to your Shopify dashboard.
Add the Buy Button to Your Shopify Blog Post
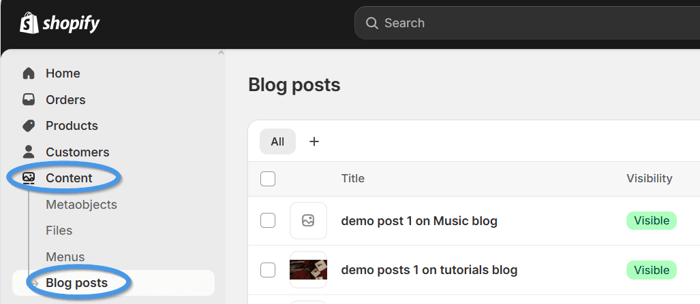
After you’ve created your buy button, click on the Content tab from the left sidebar of your Shopify admin dashboard. Then, select Blog Posts to access the post to which you want to add the button. Alternatively, you can click on Add blog post in the top right to start a new blog post.
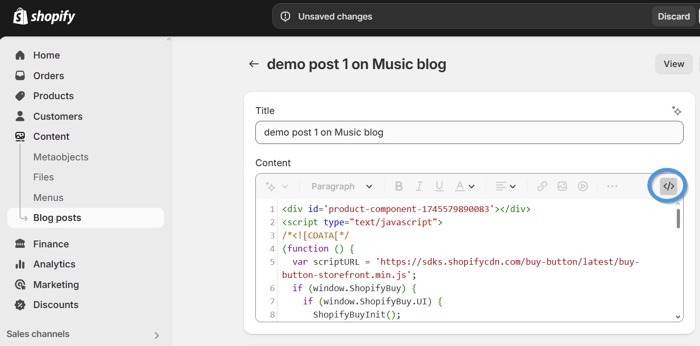
Once in the post editor, click on Show HTML and paste the button code where you want the product to appear.
While the Buy Button isn’t difficult to set up, it breaks a seamless checkout experience by adding products to different carts. Also, if you don’t save your buy button codes somewhere, you’ll have to open the Buy Button tab every time you want to copy the code for a specific product. And if you switch the post editor from the HTML view to the Editor view before saving the buy button code, it won’t work.
If you don’t want to use the Buy Button for adding products to your Shopify posts, move on to the second option – cart permalinks.
Code the Products Button Yourself
Shopify recommends coding a cart permalink into the page as an alternative to using the Buy Button. This sends the customer to the checkout with the product already preloaded into their shopping cart. However, this requires knowledge of HTML, CSS, JavaScript, and Liquid.
There are many code templates available online to help with this, but the best is using either Liquid or JavaScript in the HTML editor.
If you’re like me and you worry about tinkering with the code in case you break your entire Shopify store, fear no more. Simply using a plugin is much easier.
Use a Plugin
A plugin that will give you the ability to create shoppable blogs or inject products directly into your blog posts is a great alternative. Magefan, Bloggle, and Pro Blogger are just a few that give you this function. However, most of these solutions are built on top of Shopify’s blog structure, which means they might have the same shortcomings as the native Shopify blog.
The obvious solution is DropInBlog, which makes it super simple to create SEO-friendly blog posts and add products to your posts easily.
Using DropInBlog to Embed Products into Shopify Blog Posts
DropInBlog is a professional blogging platform that “drops” neatly into your existing Shopify store. It allows you to bypass the shortcomings of the native Shopify blog and avoid the problem of the faulty Buy Button.
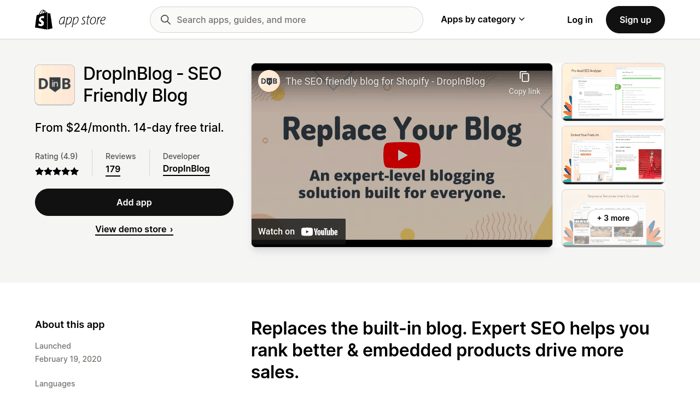
You can find the DropInBlog plugin in the Shopify App Store. From there, you can try the platform for free and see for yourself how easy it is to add products to your store.
You’ll find the WordPress style editor easy to use, and the built-in SEO Analyzer will elevate your content above the competition.
How to Add Products to Posts with DropInBlog
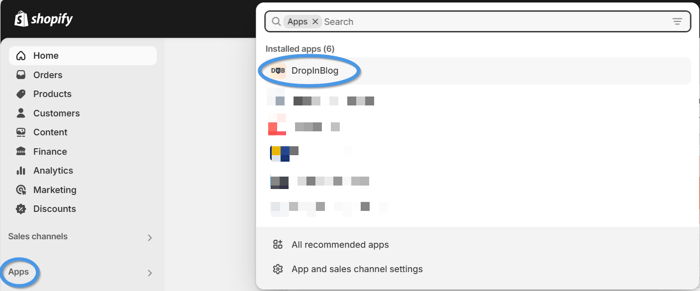
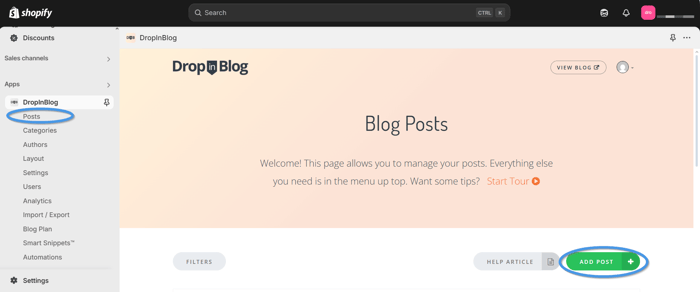
The first step is to sign up for a free trial and create your DropInBlog account. To access the DropInBlog app from your Shopify dashboard, click on the Apps tab, and select DropInBlog from the dropdown at the top of the page.
Your next step is to start adding content to your blog, which you can do by selecting the Posts tab from the left sidebar and clicking on the Add Post button.
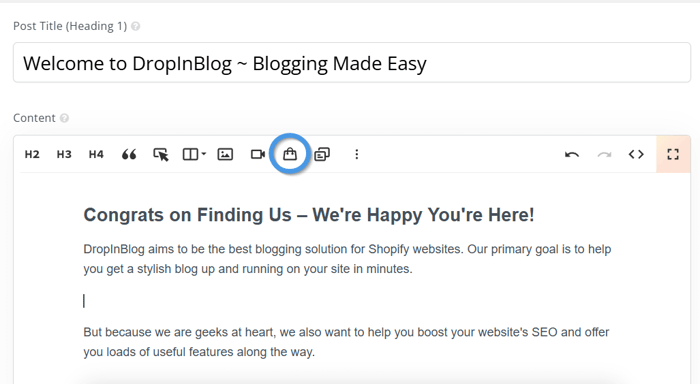
Clicking the Add Post button will open the content editor, from which you can add products to your Shopify blog post. Simply place your cursor where you want the product to appear and click on the shopping bag icon at the top of the post editor.
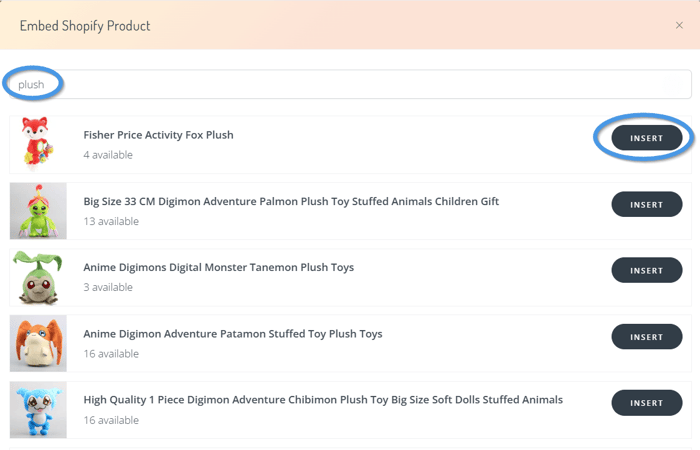
This will open a pop-up with the search bar. To find the product you wish to add to your post, start typing the name of your product, then click on Insert on the right to add it to the post.
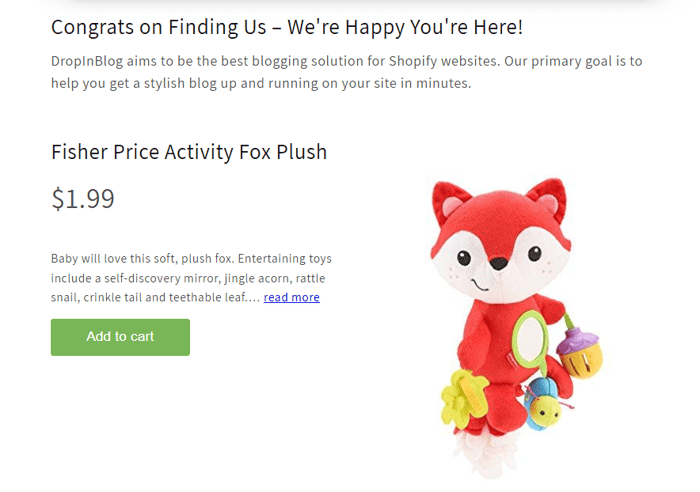
When you add a product to your post, it will look like this:
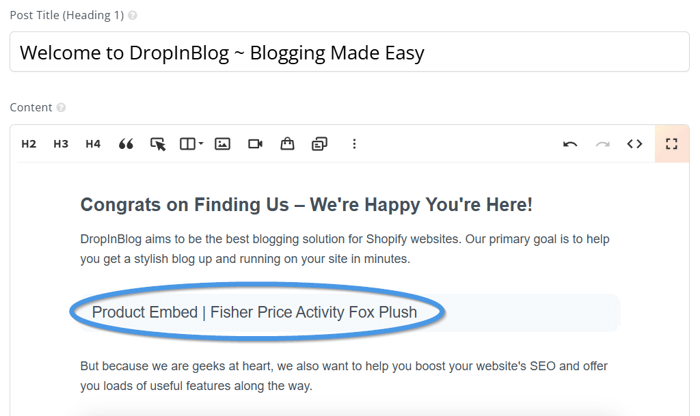
However, when you click on the View Post on the right side of the DropInBlog editor, you’ll see how your product will look once you publish or update your post.
Customize Embedded Products with DropInBlog
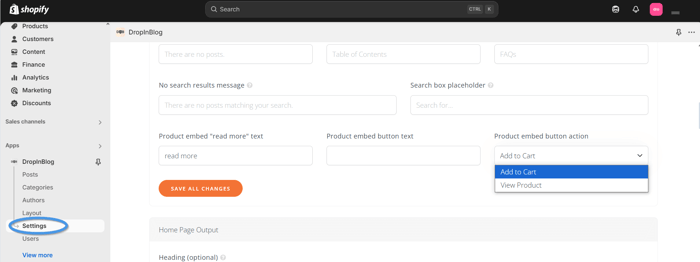
In the DropInBlog Settings tab, you’ll find the Main Settings section where you can adjust the text of your product’s CTA button and select what happens when your blog visitor clicks on the button.
That’s not all! From the same page, you can turn DropInBlog features on and off, including Blog Voice AI™, comments, and social media sharing buttons. You also have the option to optimize your blog for search engines and access a host of other features that make blogging a breeze.
The bottom line is that with DropInBlog, you can easily create shoppable posts that send the customer directly to make a purchase – it’s that easy.
FAQs
Is there an automated process to add products to blog posts in Shopify?
There is no automated process to add products to Shopify blog posts. The simplest option is to use the “Buy Button,” but this is problematic at best. A better solution would be to use DropInBlog to create your blog content and directly inject shoppable products into your posts.
How do I make product carousels inside Shopify blog posts?
The only option to make and place a product carousel into a Shopify blog post is to code it yourself. There are templates you can use, but unfortunately, Shopify doesn’t make it super easy for you.
What are the benefits of adding products to blog posts in Shopify?
The benefit of adding shoppable products directly into blog posts is higher conversions. That’s not all, though – by adding products to your posts, you also help search engines to crawl and index your site. So, overall, it boosts your SEO and can lead to an increase in sales.
Final Thoughts
Still unsure which method to go with? Here's a quick comparison to help you decide based on ease of use, SEO, user experience, and support:
Feature / Method | Buy Button | Custom Coding | DropInBlog |
Ease of Use | ★★☆☆☆ Simple setup, but clunky to manage | ★☆☆☆☆ Requires Liquid and JavaScript skills | ★★★★★ Drag-and-drop style editor, no coding |
User Experience | ★★☆☆☆ Can cause multiple carts at checkout | ★★★☆☆ Cleaner checkout, but manual effort needed | ★★★★★ Unified cart, smooth product display |
SEO Benefits | ★★☆☆☆ Limited content flexibility | ★★★☆☆ Can be optimized manually with effort | ★★★★★ Built-in SEO Analyzer for optimization |
Customization | ★★☆☆☆ Basic customization only | ★★★★★ Fully flexible, if you're technical | ★★★★★ Settings panel with styling & CTA controls |
Support | ★☆☆☆☆ Limited Shopify support for bugs | ★☆☆☆☆ You're mostly on your own | ★★★★★ Active support from the DropInBlog team |
Although Shopify is an e-commerce platform built entirely around online shopping, they haven’t made it easy to add products to blog posts. Likewise, you’re limited in the extent of changes you can make to your blog layout. If you lack the necessary coding skills, you will find adding products to your posts and customizing them incredibly difficult.
There are a couple of solutions, but the easiest is to use a plugin like DropInBlog. That way, you’ll get neat, professional-looking blog posts that you can easily add products to. If you want to know more, feel free to reach out to the DropInBlog team.


