
v0 is a prompt-to-code platform that lets you create apps and websites without writing code. The same applies to blogs. You can use the ChatGPT-like interface to describe how you want your blog to look and work, or you can use one of v0’s pre-built templates for blogging. If you have some coding knowledge, you can also create a blog on v0 from scratch.
Still, most of these blog setup methods aren’t meant for large, complex blogs, and others require lengthy setup and ongoing maintenance. However, you have another option: DropInBlog, which lets you easily create a blog of any size and run it without developer support. In this guide, we’ll examine the pros and cons of different blog integration methods for v0 apps and websites, and show you how to create a v0 blog with DropInBlog.
Table of Contents
TL;DR
If you need a quick demo blog for your v0 project, use the prompt-based setup.
If you want to design a custom blog layout and can work with code, use blog templates from v0’s community template library.
If you want full control over your blog and you can work with code, use v0’s code editor to create one from scratch.
If you need a full-featured blog that doesn’t require coding or too much maintenance, use DropInBlog.
Can I Create a Blog on v0?
Yes, you can absolutely create a blog on v0 using any of the following approaches:
You can ask v0 to create a blog for your site or app using the prompt box.
You can start with one of the pre-built blog templates available in v0’s community template library.
You can use v0’s code editor to build a blog from scratch.
Despite the variety of blogging approaches it supports, v0 is built with developers in mind. Or at least users who have some coding knowledge. So, without some technical background, scaling your blogging projects can become increasingly difficult.
The technical setup behind a scalable blog includes managing post templates, routes, author pages, SEO fields, images, and other moving parts. v0 generates code for all these aspects, but you’re the one who needs to manage it. So, even if you have some technical knowledge, a code-based blog requires a lot of effort. And as your project grows, pricing can increase quickly.
Below, you’ll find a comparison of the common v0 blog setup methods.
| AI blog creation (prompt-based) | v0 blog templates | Manual build (via code editor) | DropInBlog | |
|---|---|---|---|---|
| Easy setup | Yes | Yes | No | Yes |
| Content editing | Prompt-based | Prompt or code-based | Code-based | Built-in content editor |
| Scalability | Low | Low/medium | Hgih | High |
| Maintenance | Medium | Medium | High | High |
| Predictable pricing | No | No | No | Yes |
The first three methods either rely heavily on manual coding or are difficult to scale. DropInBlog, on the other hand, offers a simpler way to add a blog to v0. We’ll show you how.
How to Create a Blog on v0 with DropInBlog
Creating a blog on v0 with DropInBlog is quick and requires only a few steps. In just a few minutes, you’ll have a fully featured blog on your site.
Step 1: Start Your Free Trial on DropInBlog
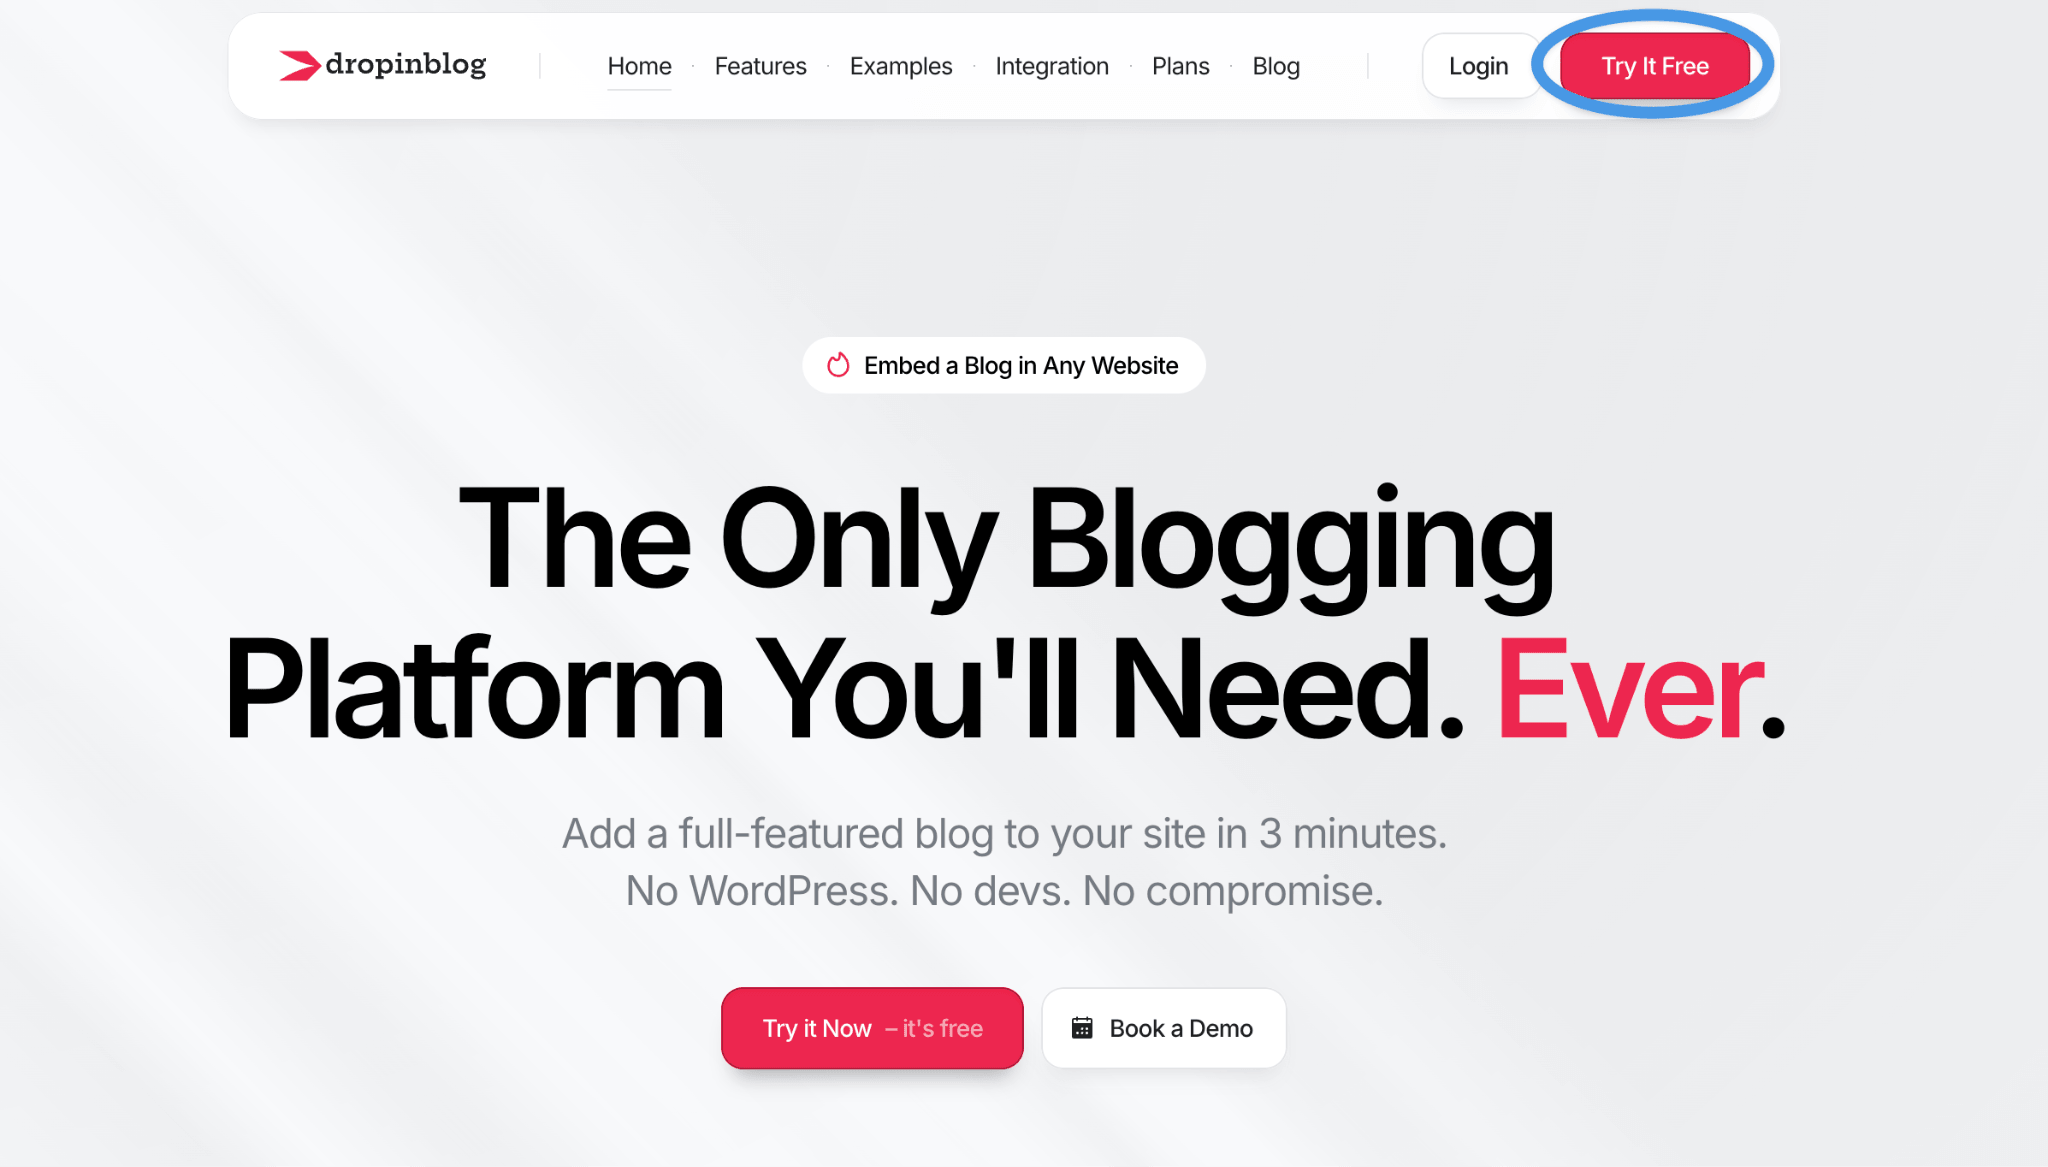
To start the blog integration process, sign up for a free trial at DropInBlog first and create an account.
You also need an active v0 account where you’ll add your blog and a Vercel account to publish your project.
Once you set up all these accounts, you can start the integration process.
Step 2: Copy the Blog Prompt from DropInBlog
Upon creating an account on DropInBlog, you’ll be taken to the Code & Layout page. Here, you’ll find the blog prompt.
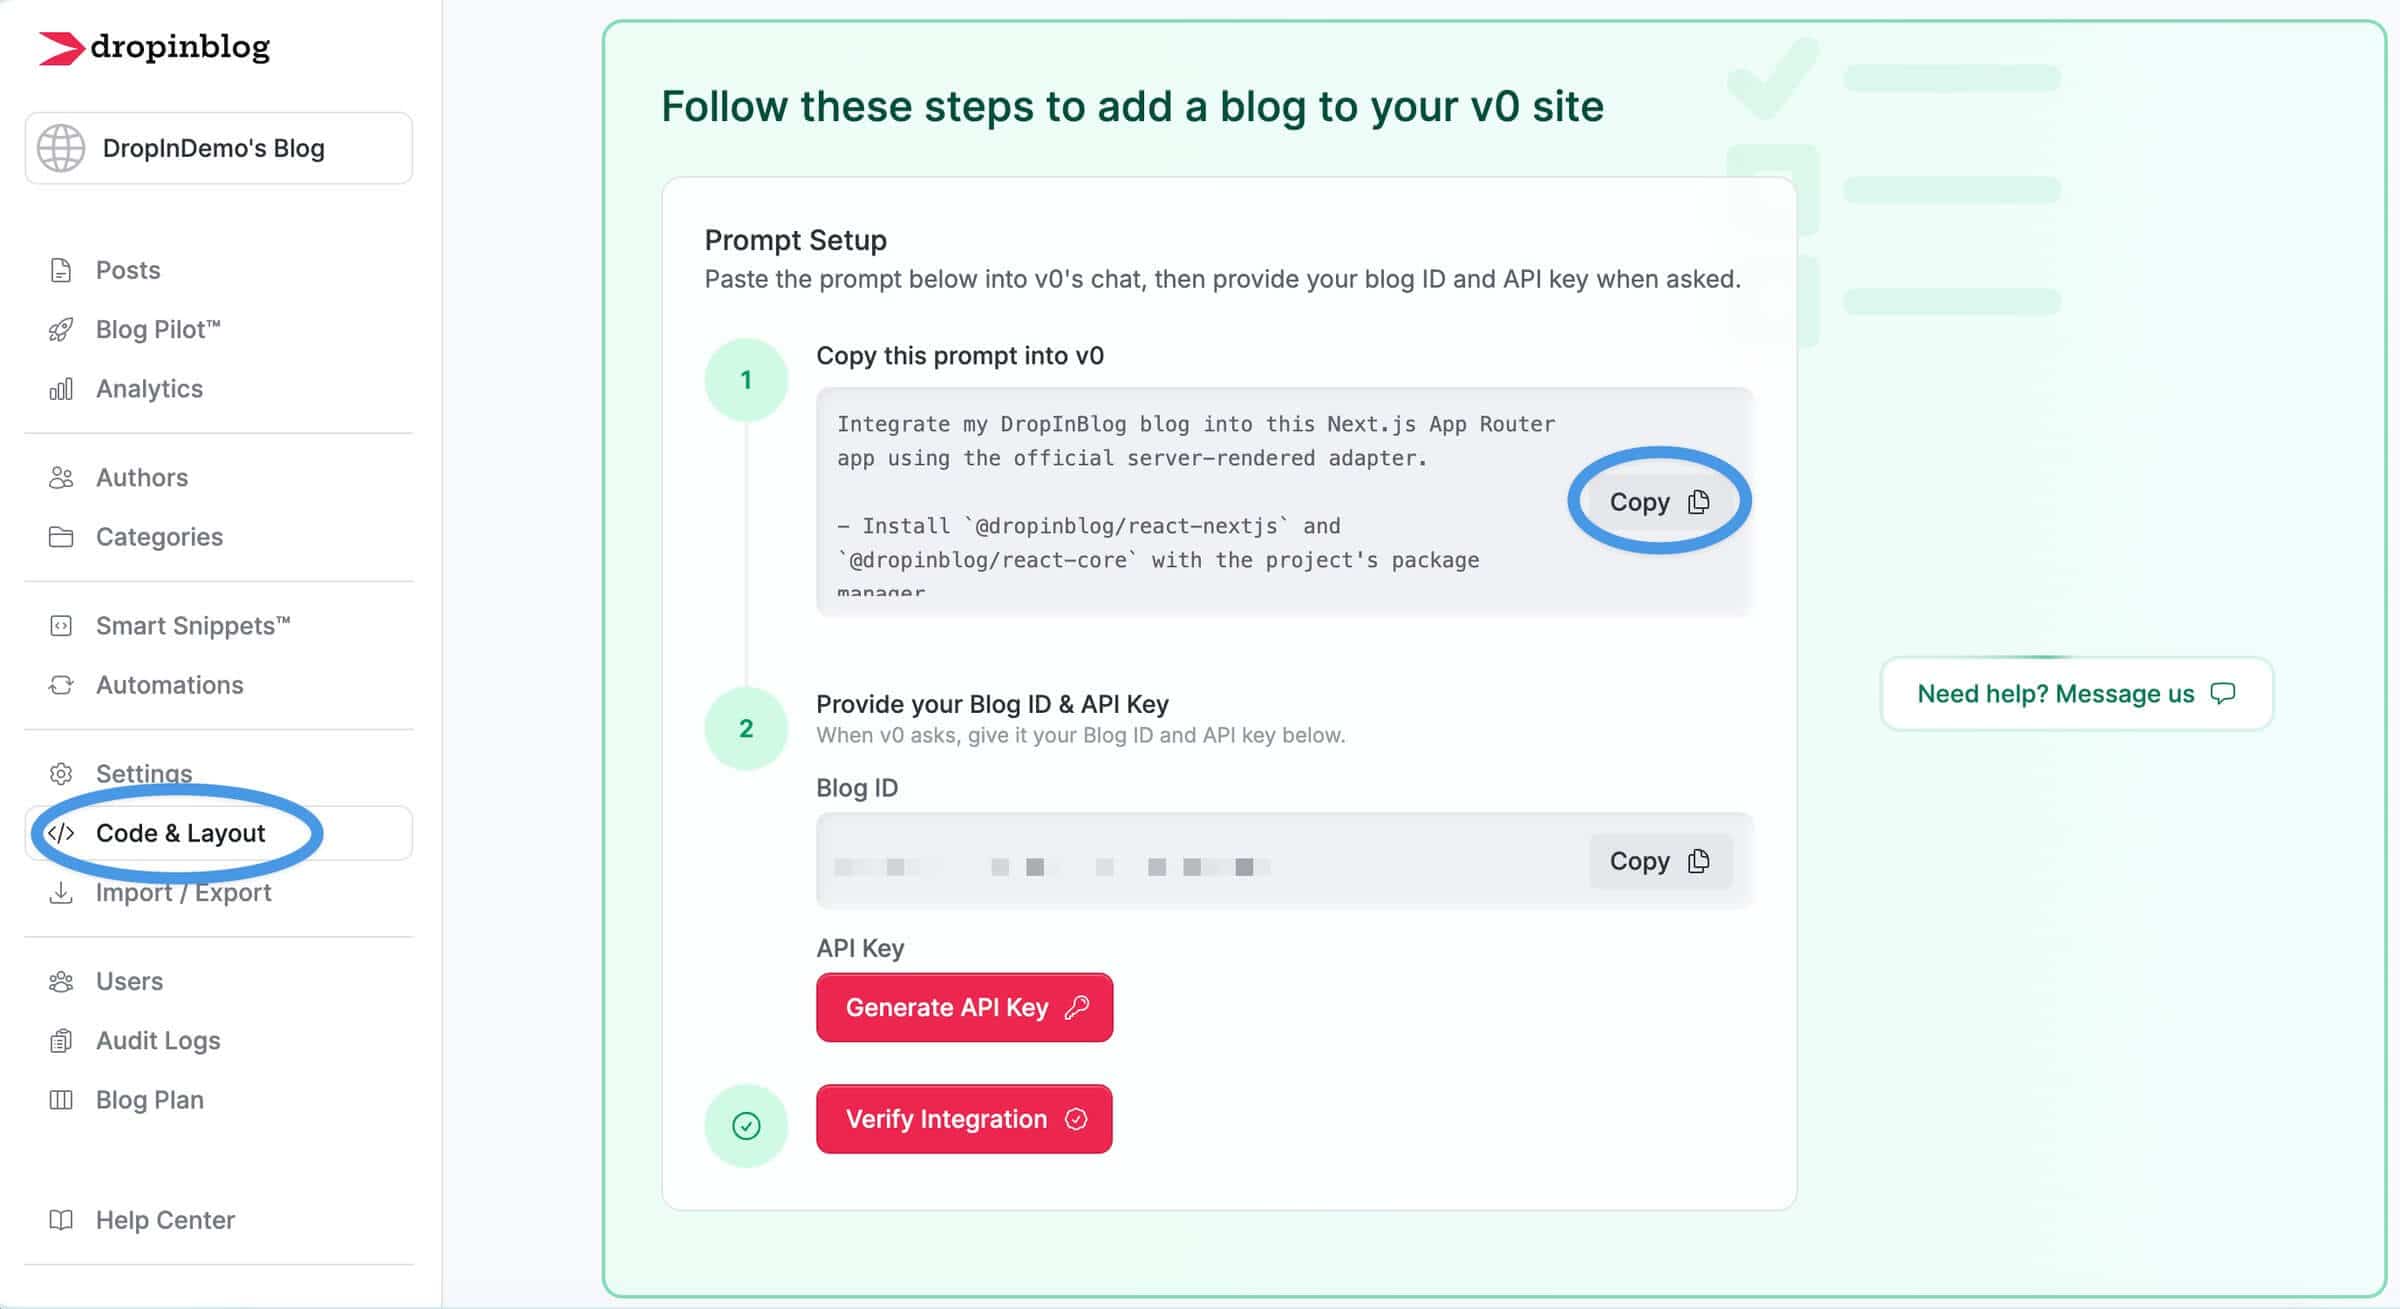
Copy the blog prompt, paste it into the prompt box of your v0 project, and wait for v0 to process your request.
Step 3: Add Your Blog ID and API Key
During setup, v0 needs permission to communicate with your DropInBlog account. You’ll provide your Blog ID and API Key so it can fetch and display your blog content.
You’ll find these on the Code & Layout page of your DropInBlog account.
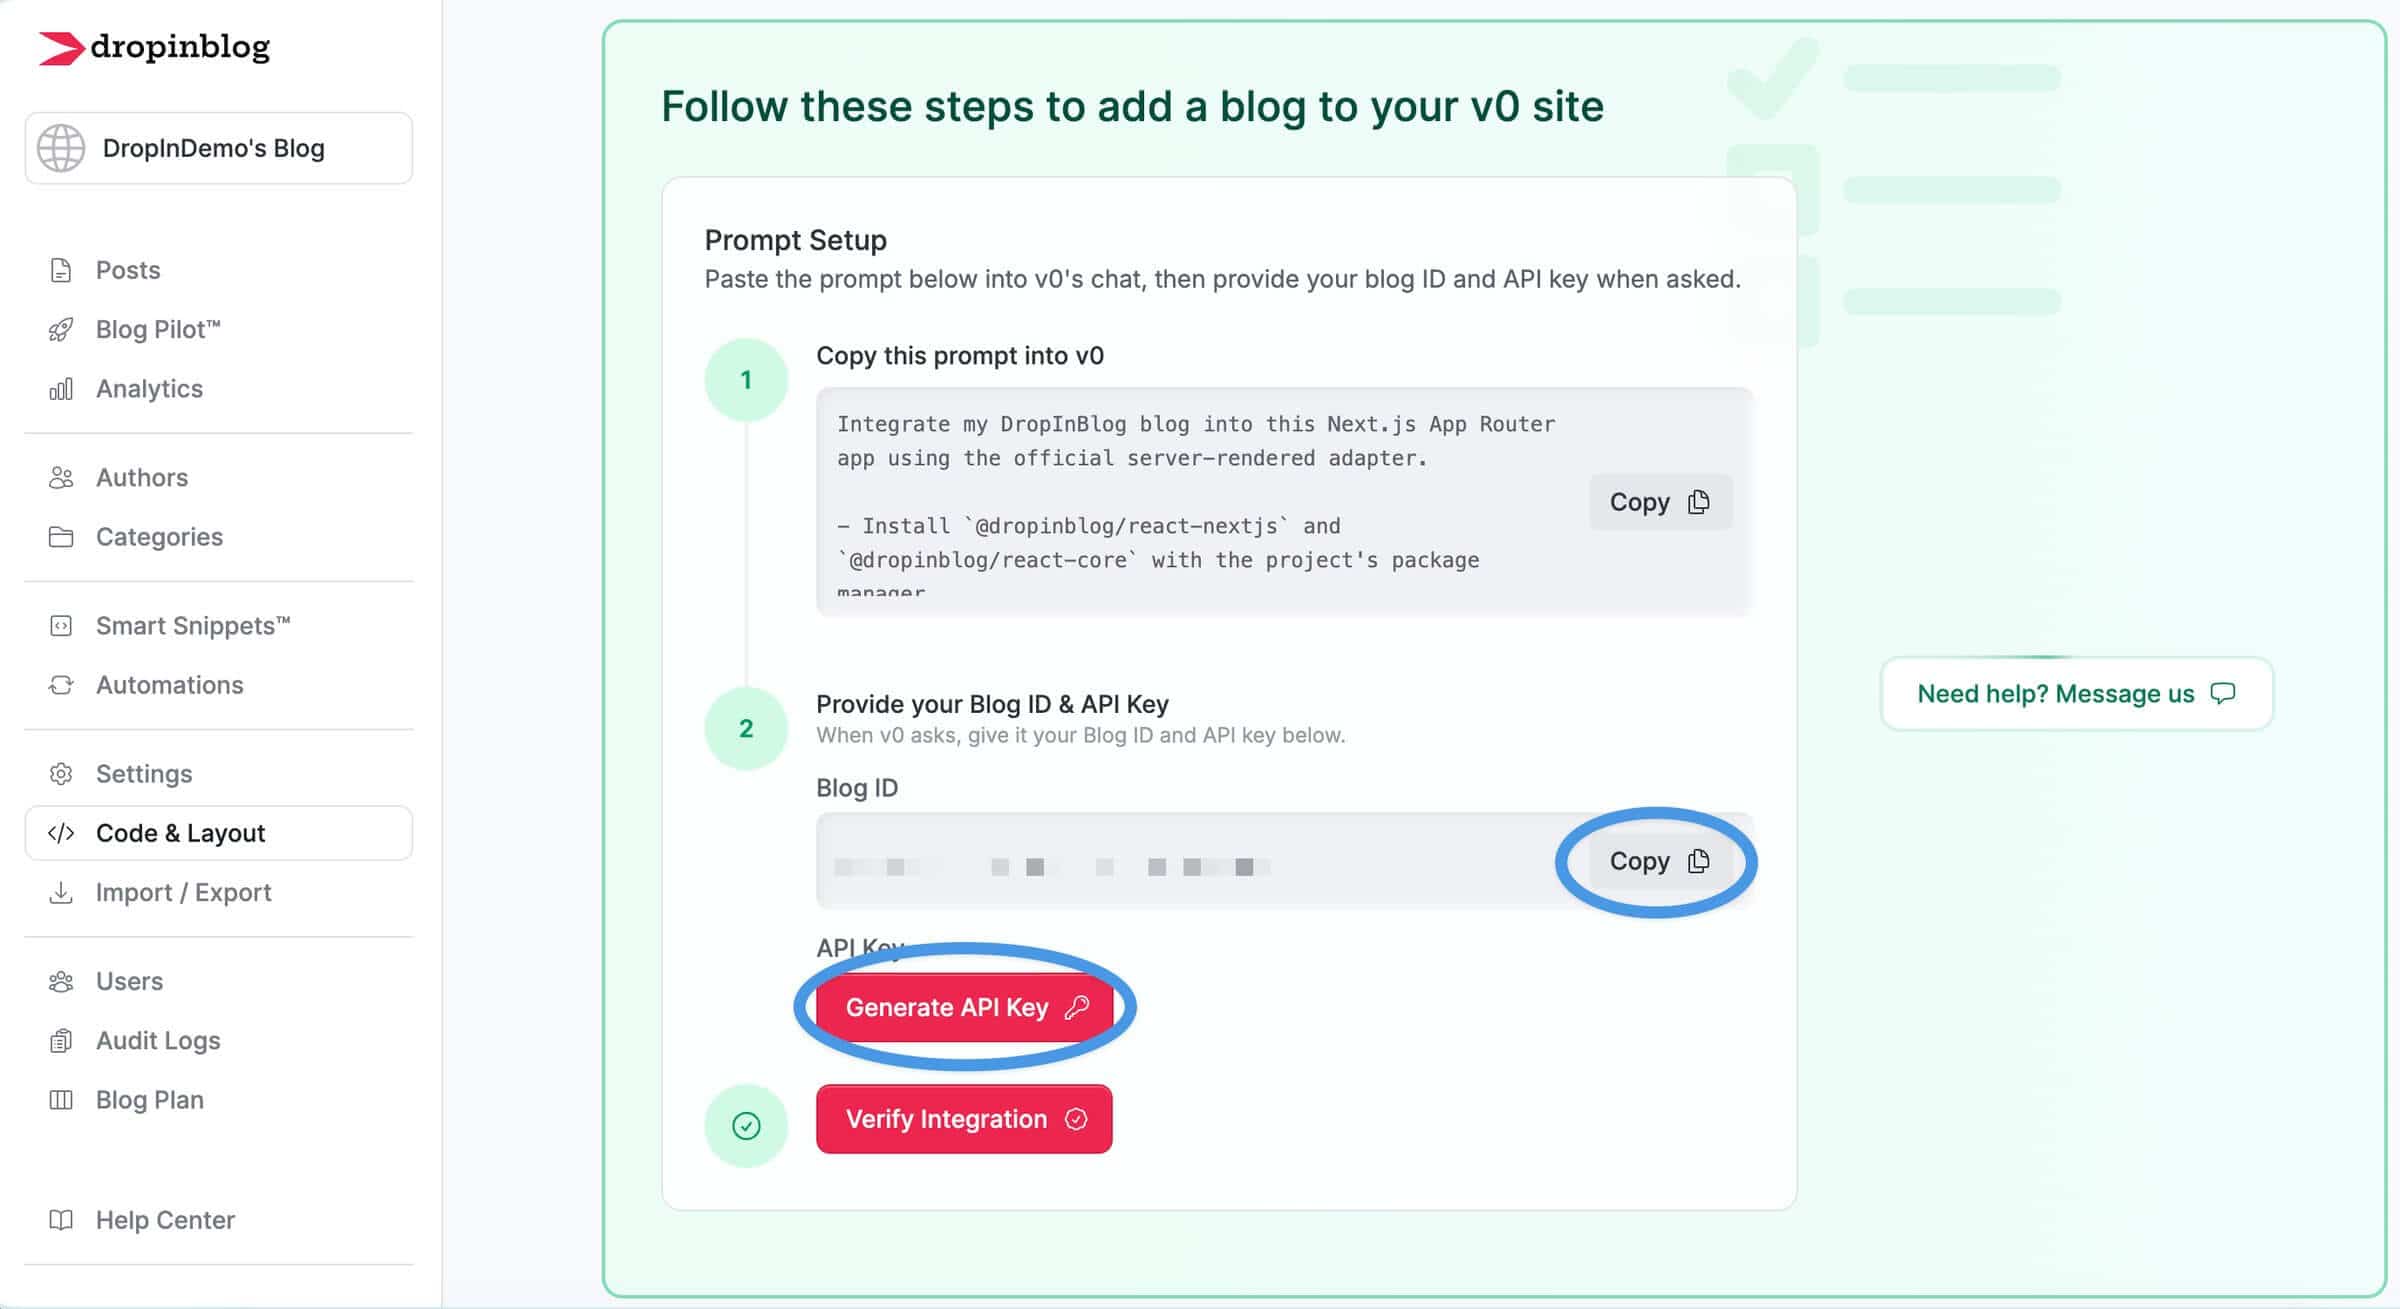
First, copy your blog ID and paste it into the corresponding field in v0. Then, click on Generate API Key, copy the API key, and paste it under DROPINBLOG_API_KEY in v0. When you click on the Submit button, v0 will use your credentials to finish the blog setup.
Step 4: Publish and View Your Blog
To save your changes, you need to publish your v0 project. You’ll do that by clicking the Publish button in the top-right corner of the v0 editor. Once your site is live, click on the blog link in your site’s navigation to view your blog.
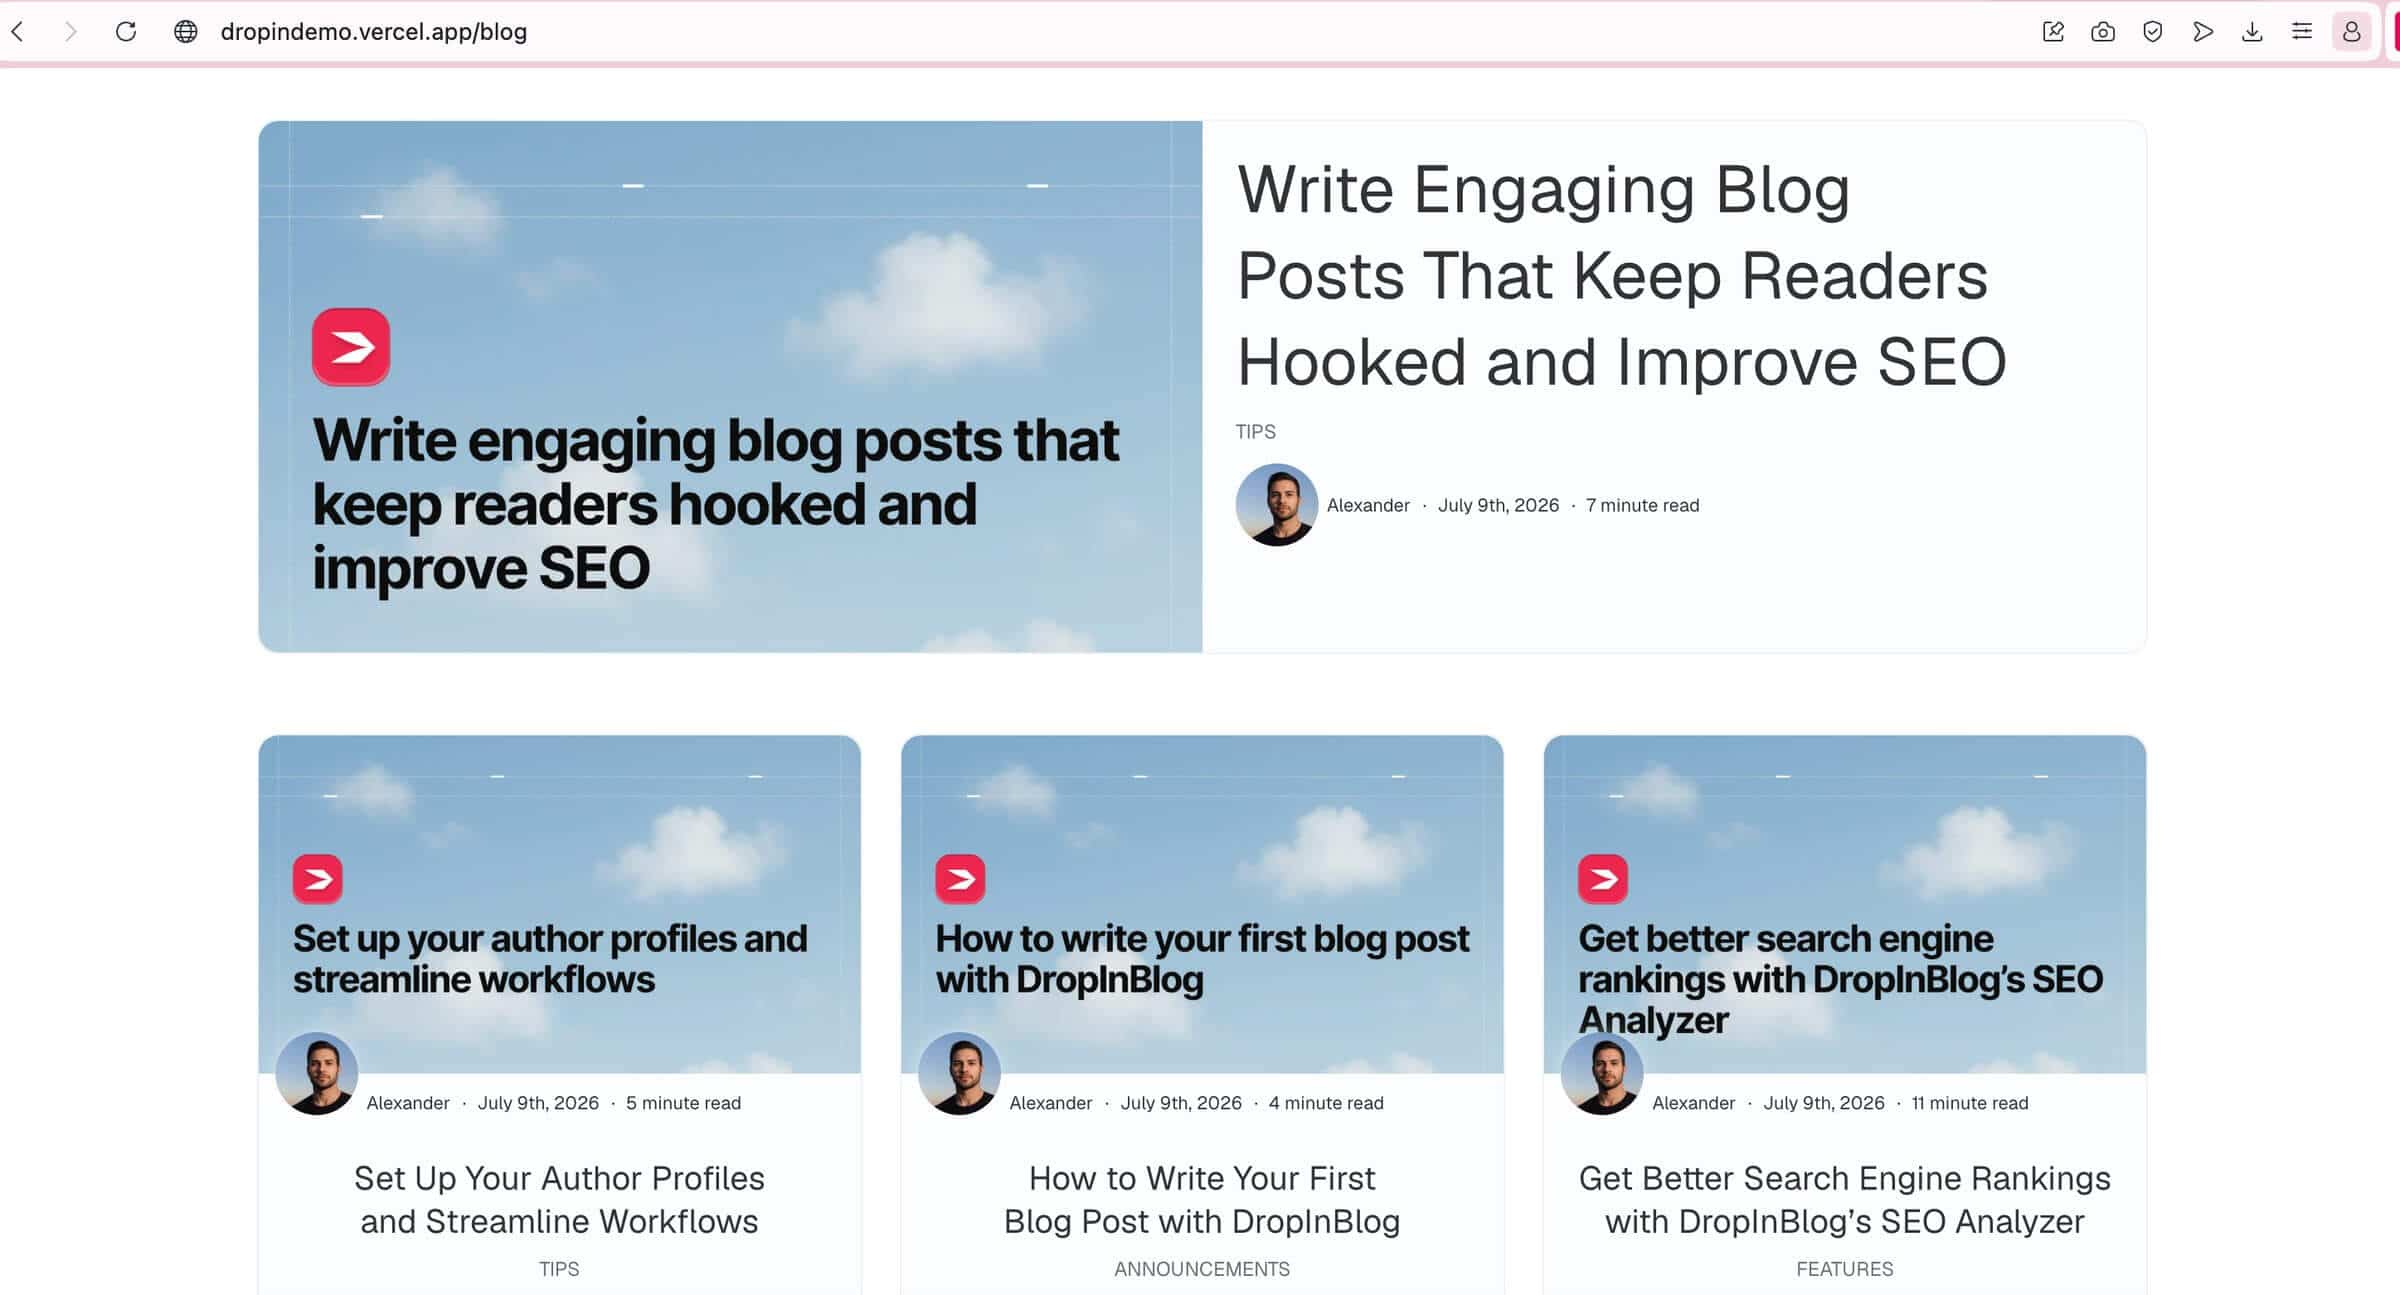
Here’s an example of a blog created with DropInBlog on v0.
Step 5: Verify Integration
The final step is to check whether you’ve successfully added a DropInBlog blog to your v0 website or app.
To do that, visit the Code & Layout page in your DropInBlog account, click on the Verify Integration button, and, if prompted, add the URL of your blog page.
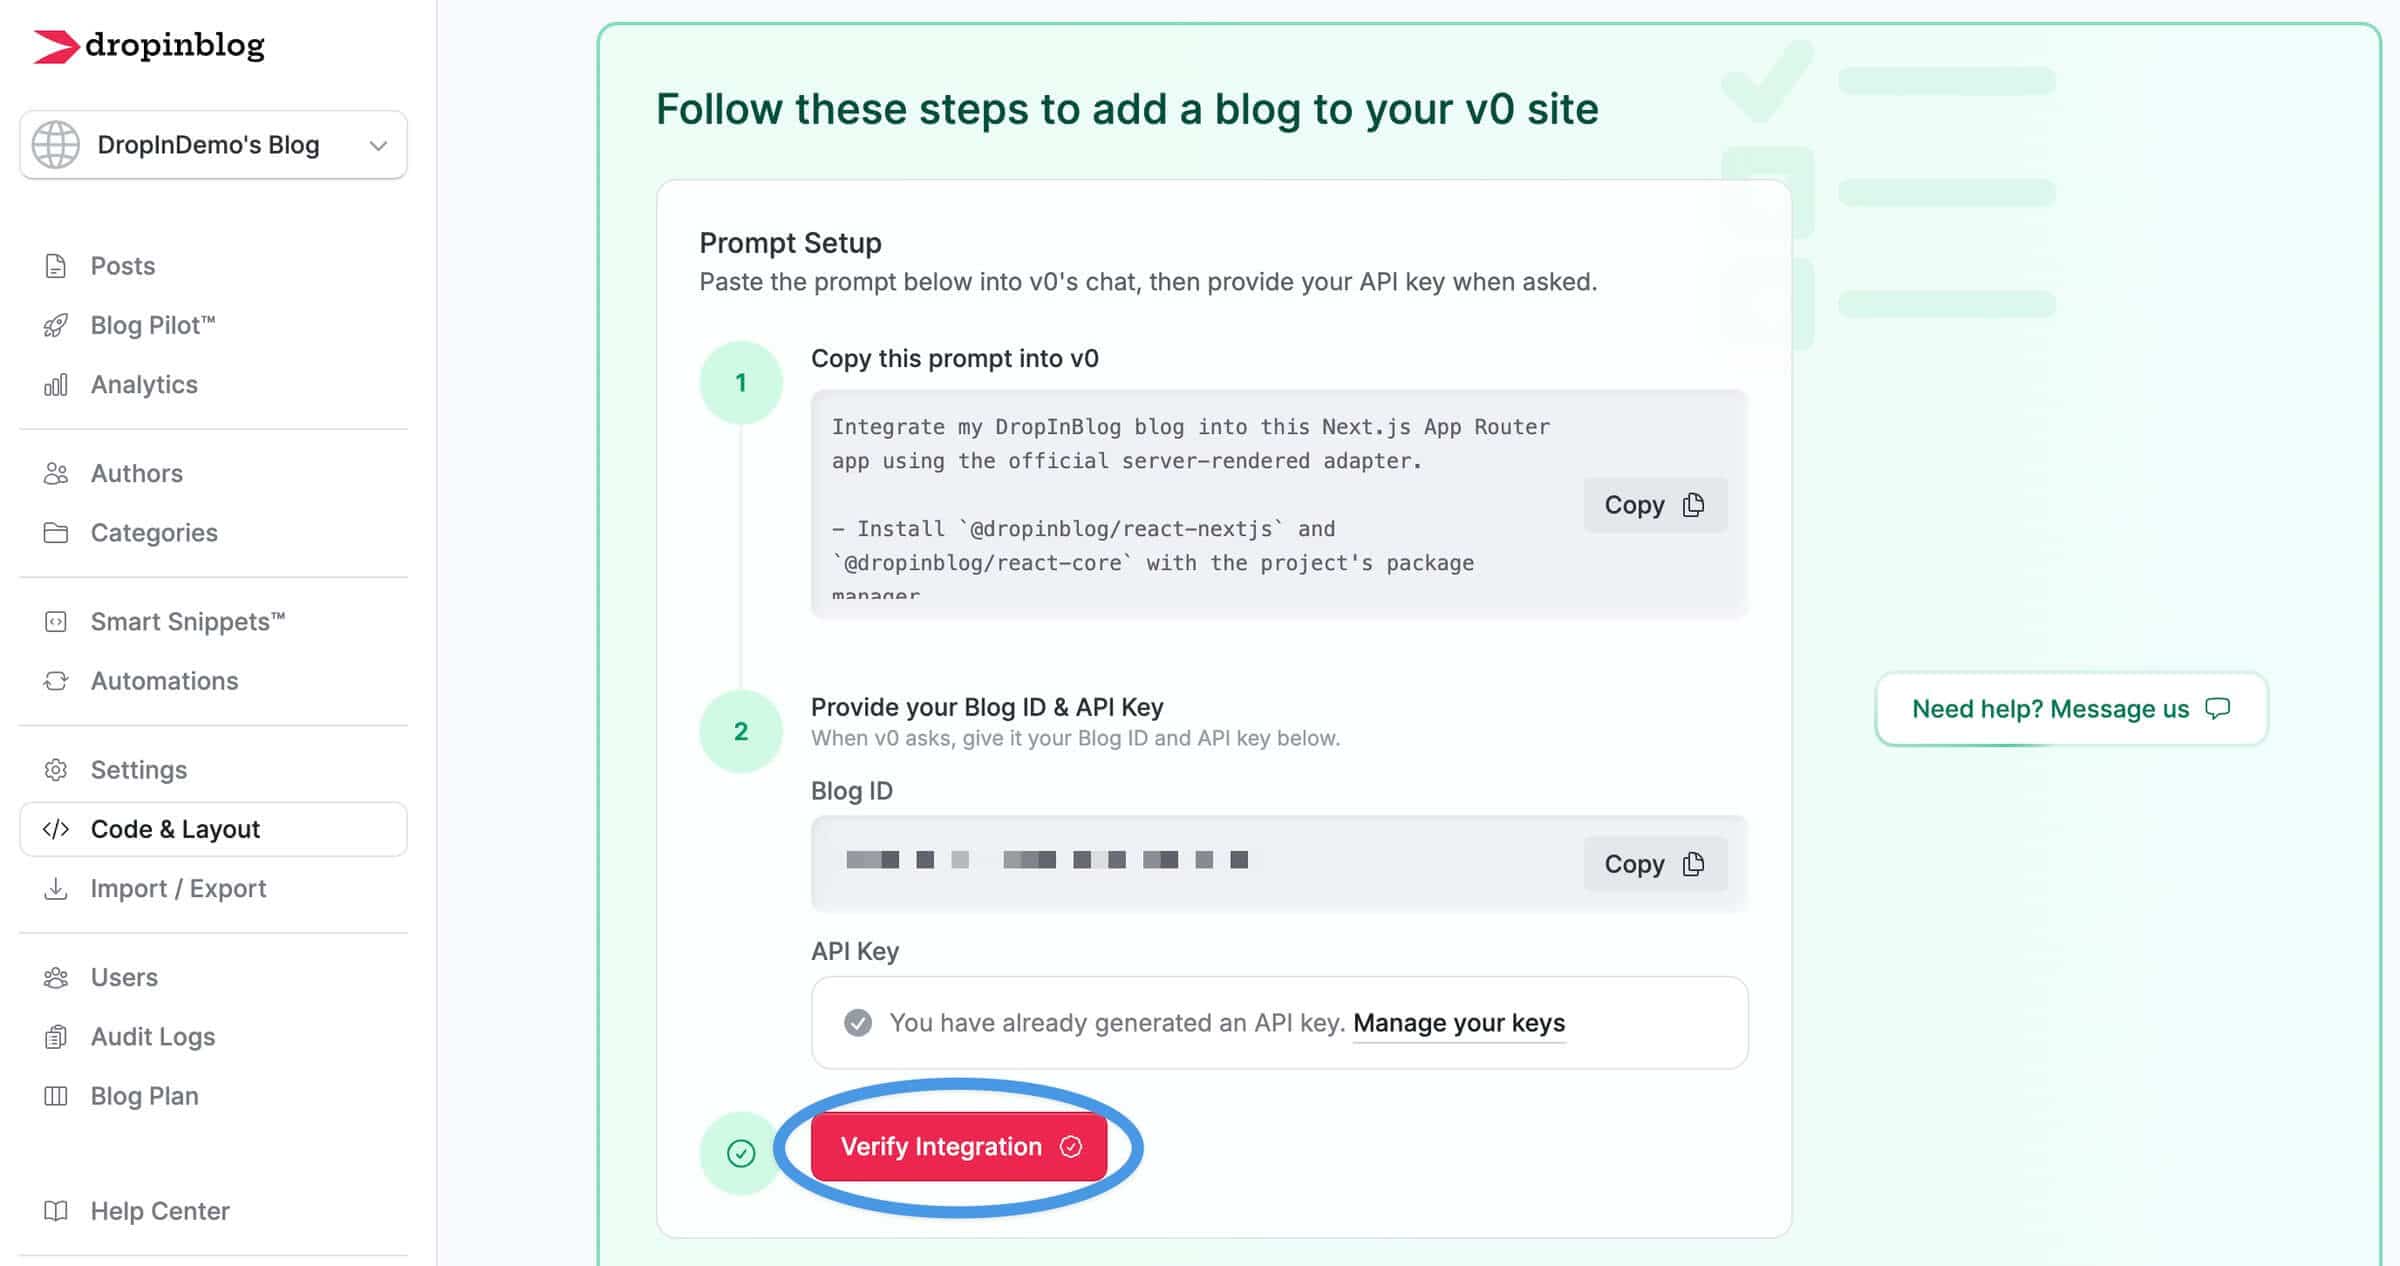
If you’ve done everything correctly, you’ll see a message that your blog is live.
Managing Your New v0 Blog
After you’ve added a blog to your v0 project, you’ll manage all your blog content from your DropInBlog account. And everything you create in your DropInBlog account will automatically sync with your v0 site. That means that you won’t have to add your content via prompts or code. Instead, you’ll work with a visual text editor in your DropInBlog account.
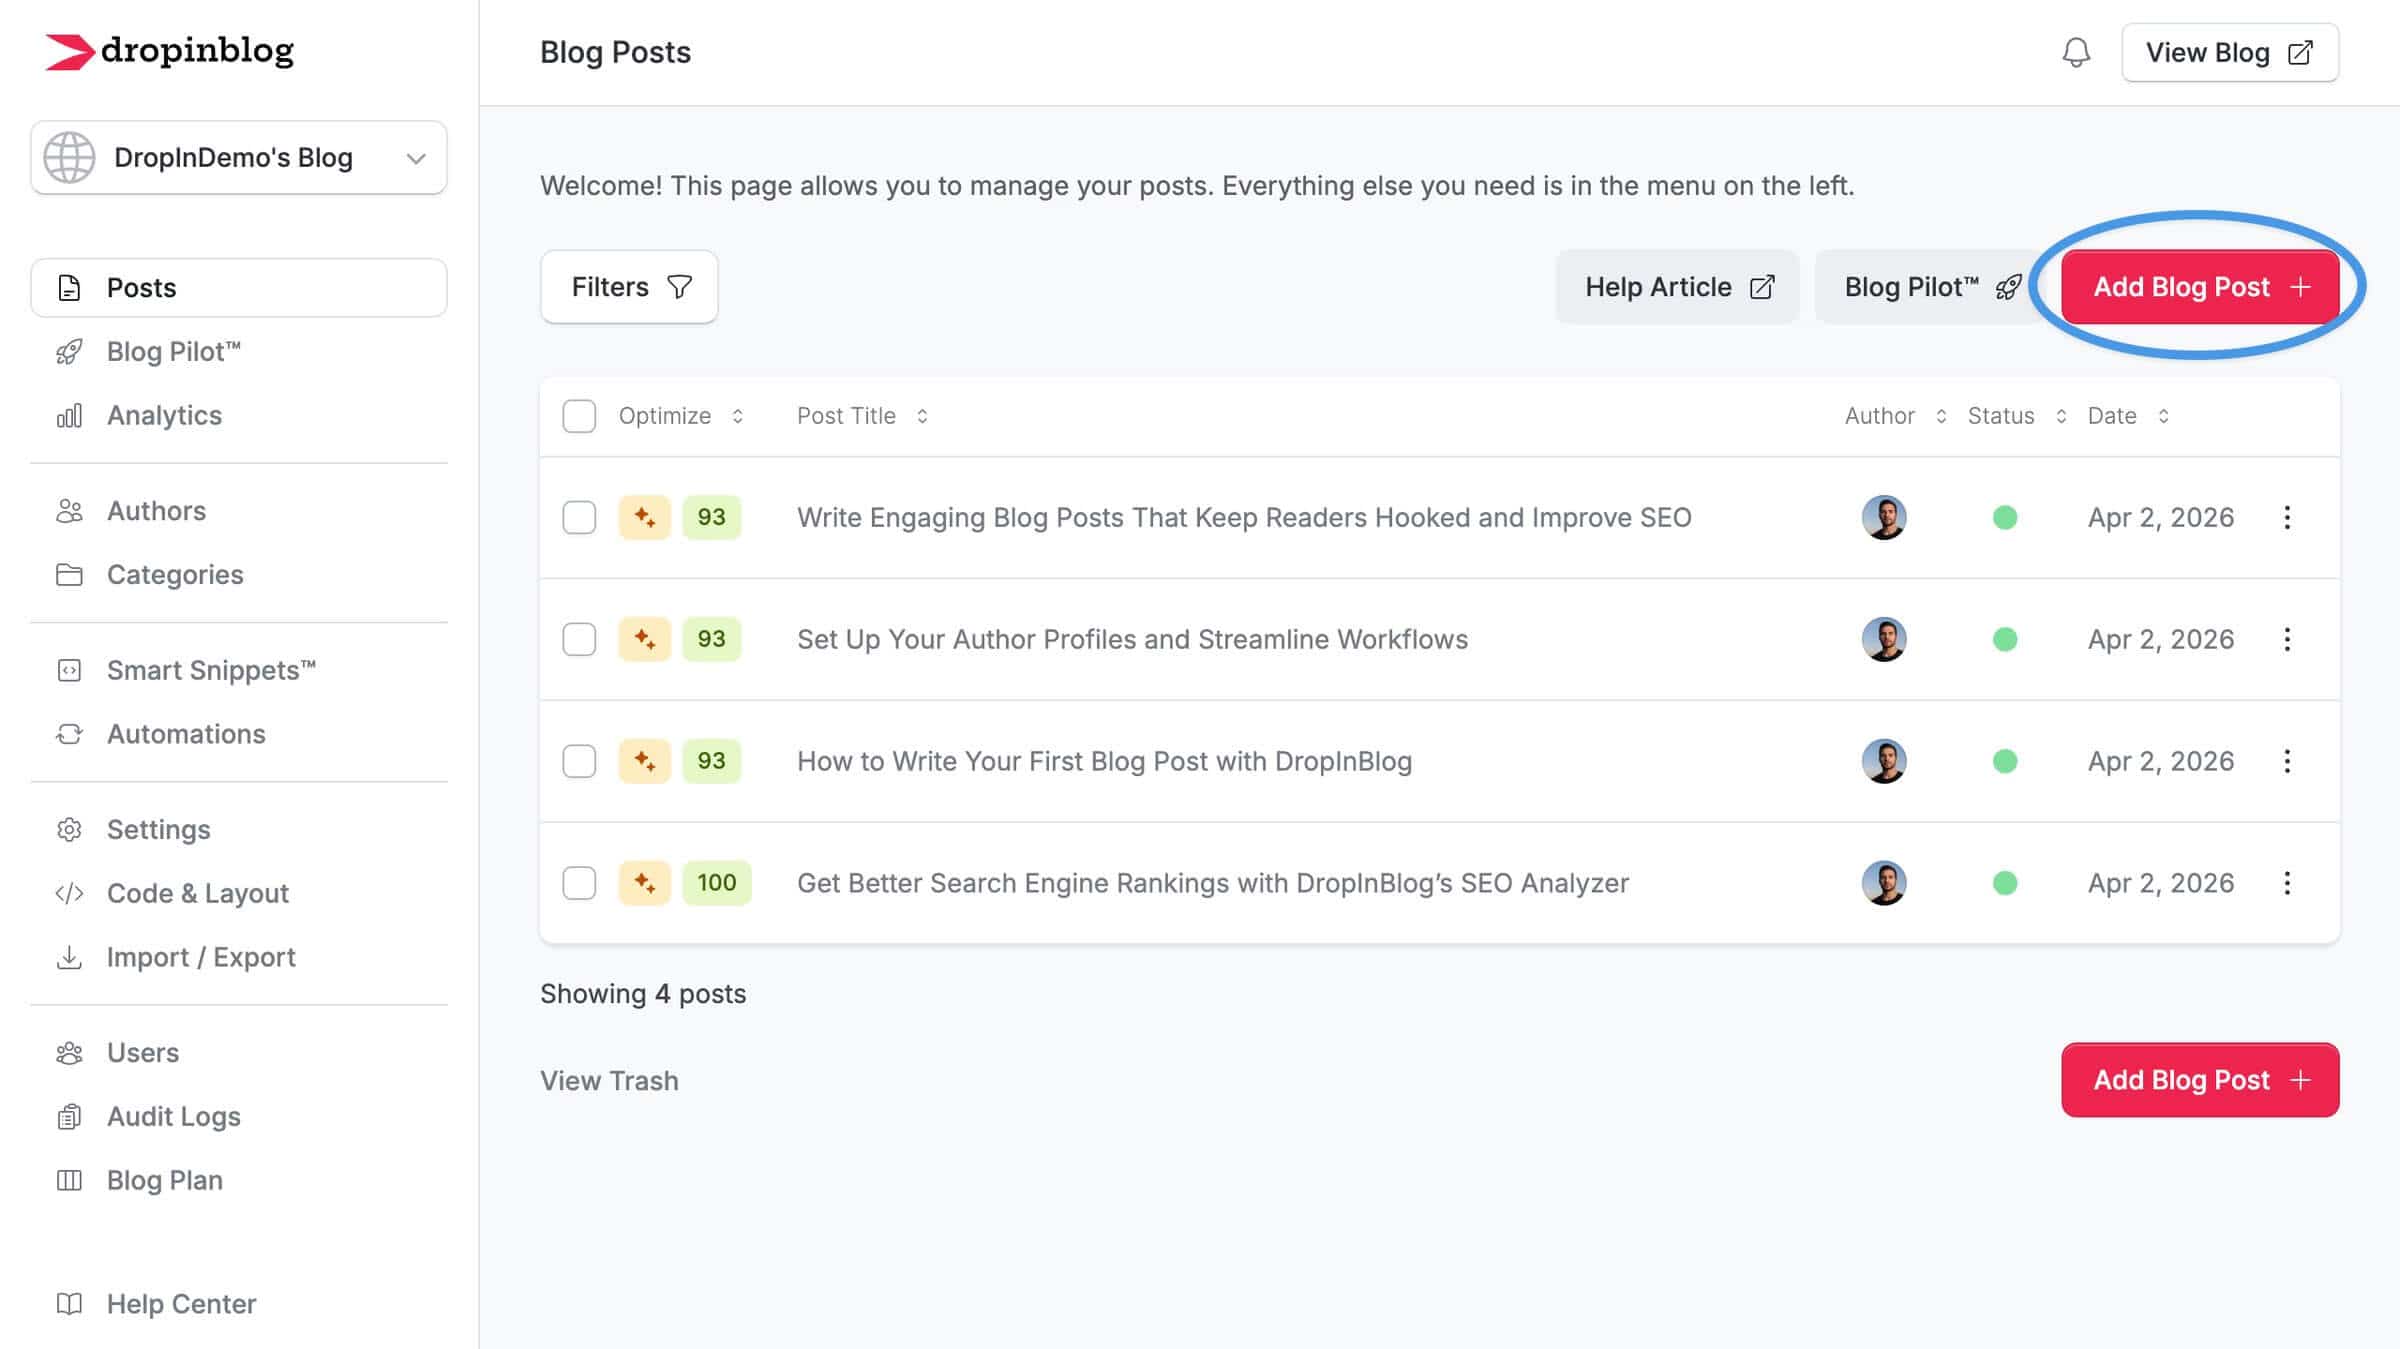
When you’re ready to add your first blog post, visit the Posts page in your DropInBlog admin panel and click on the Add Blog Post button.
Alternatively, you can start with DropInBlog’s Blog Pilot™, an AI-powered content planning tool. The tool is quite helpful if you don’t know what to write about, as it retrieves topic suggestions based on your site’s niche. You can easily access it from the left-hand side menu in your admin panel and start the analysis by clicking on the Build My Roadmap button.
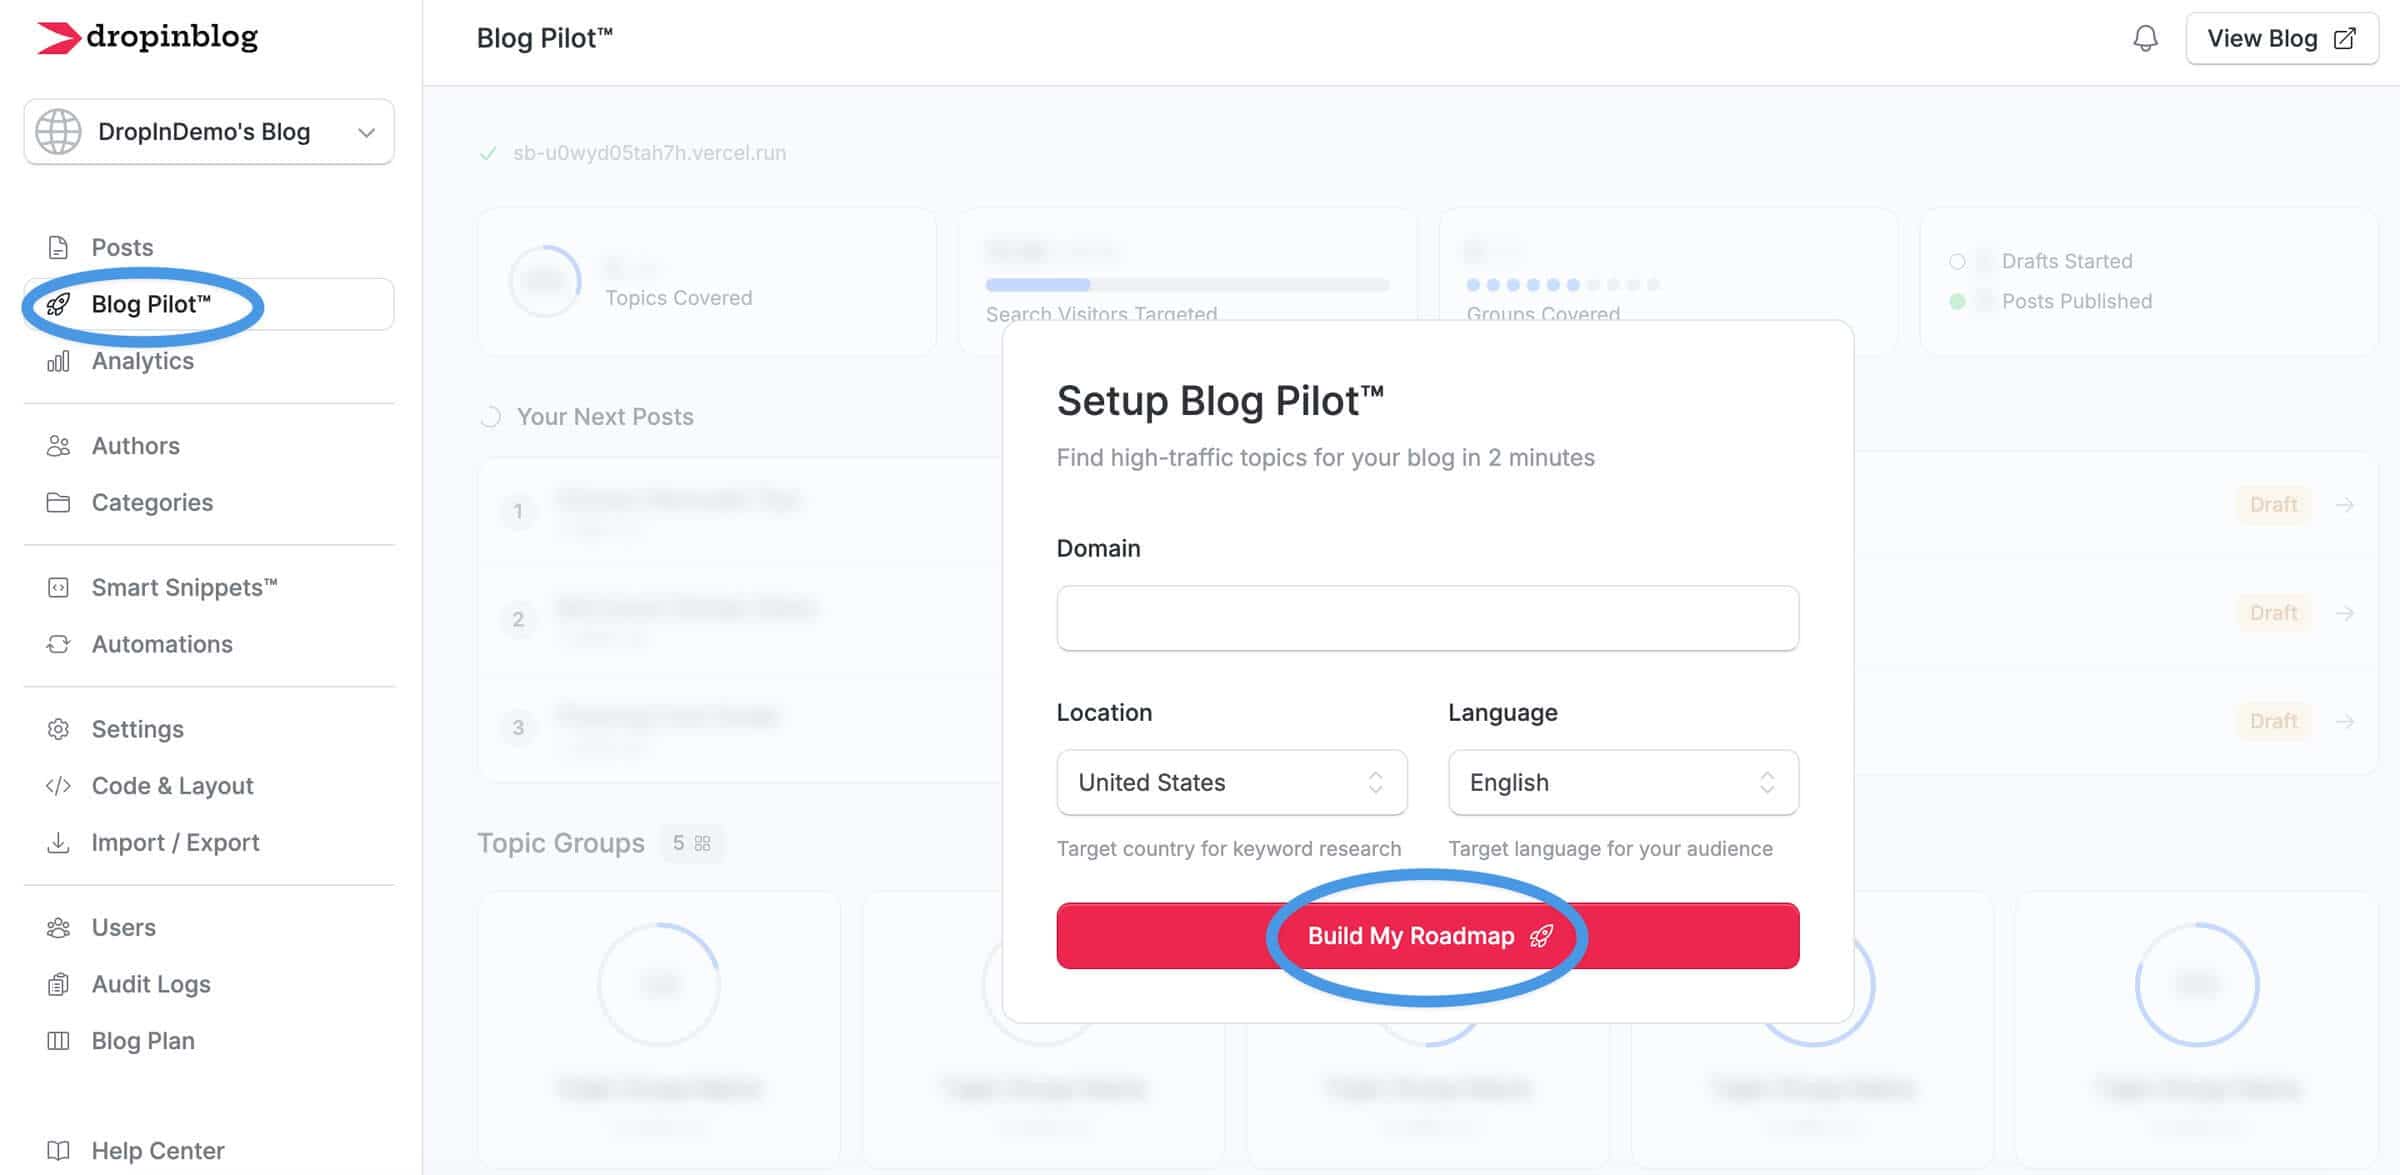
Selecting the former option and clicking the Add Blog Post button will launch DropInBlog’s WYSIWYG editor, which allows you to easily add text and media to your content.
Apart from simple content creation, the editor supports the following features:
Automatic table of contents: It automatically generates ToC entries from your blog post’s headings.
Authors and categories: You can assign authors and categories to your content from within the editor.
Related posts: You can display related content on your blog under every blog post.
Prepare Your Blog for Traditional and AI Searches
Within the DropInBlog editor, you’ll find an as-you-type SEO analysis tool that offers suggestions for optimizing your content for search engines like Google.
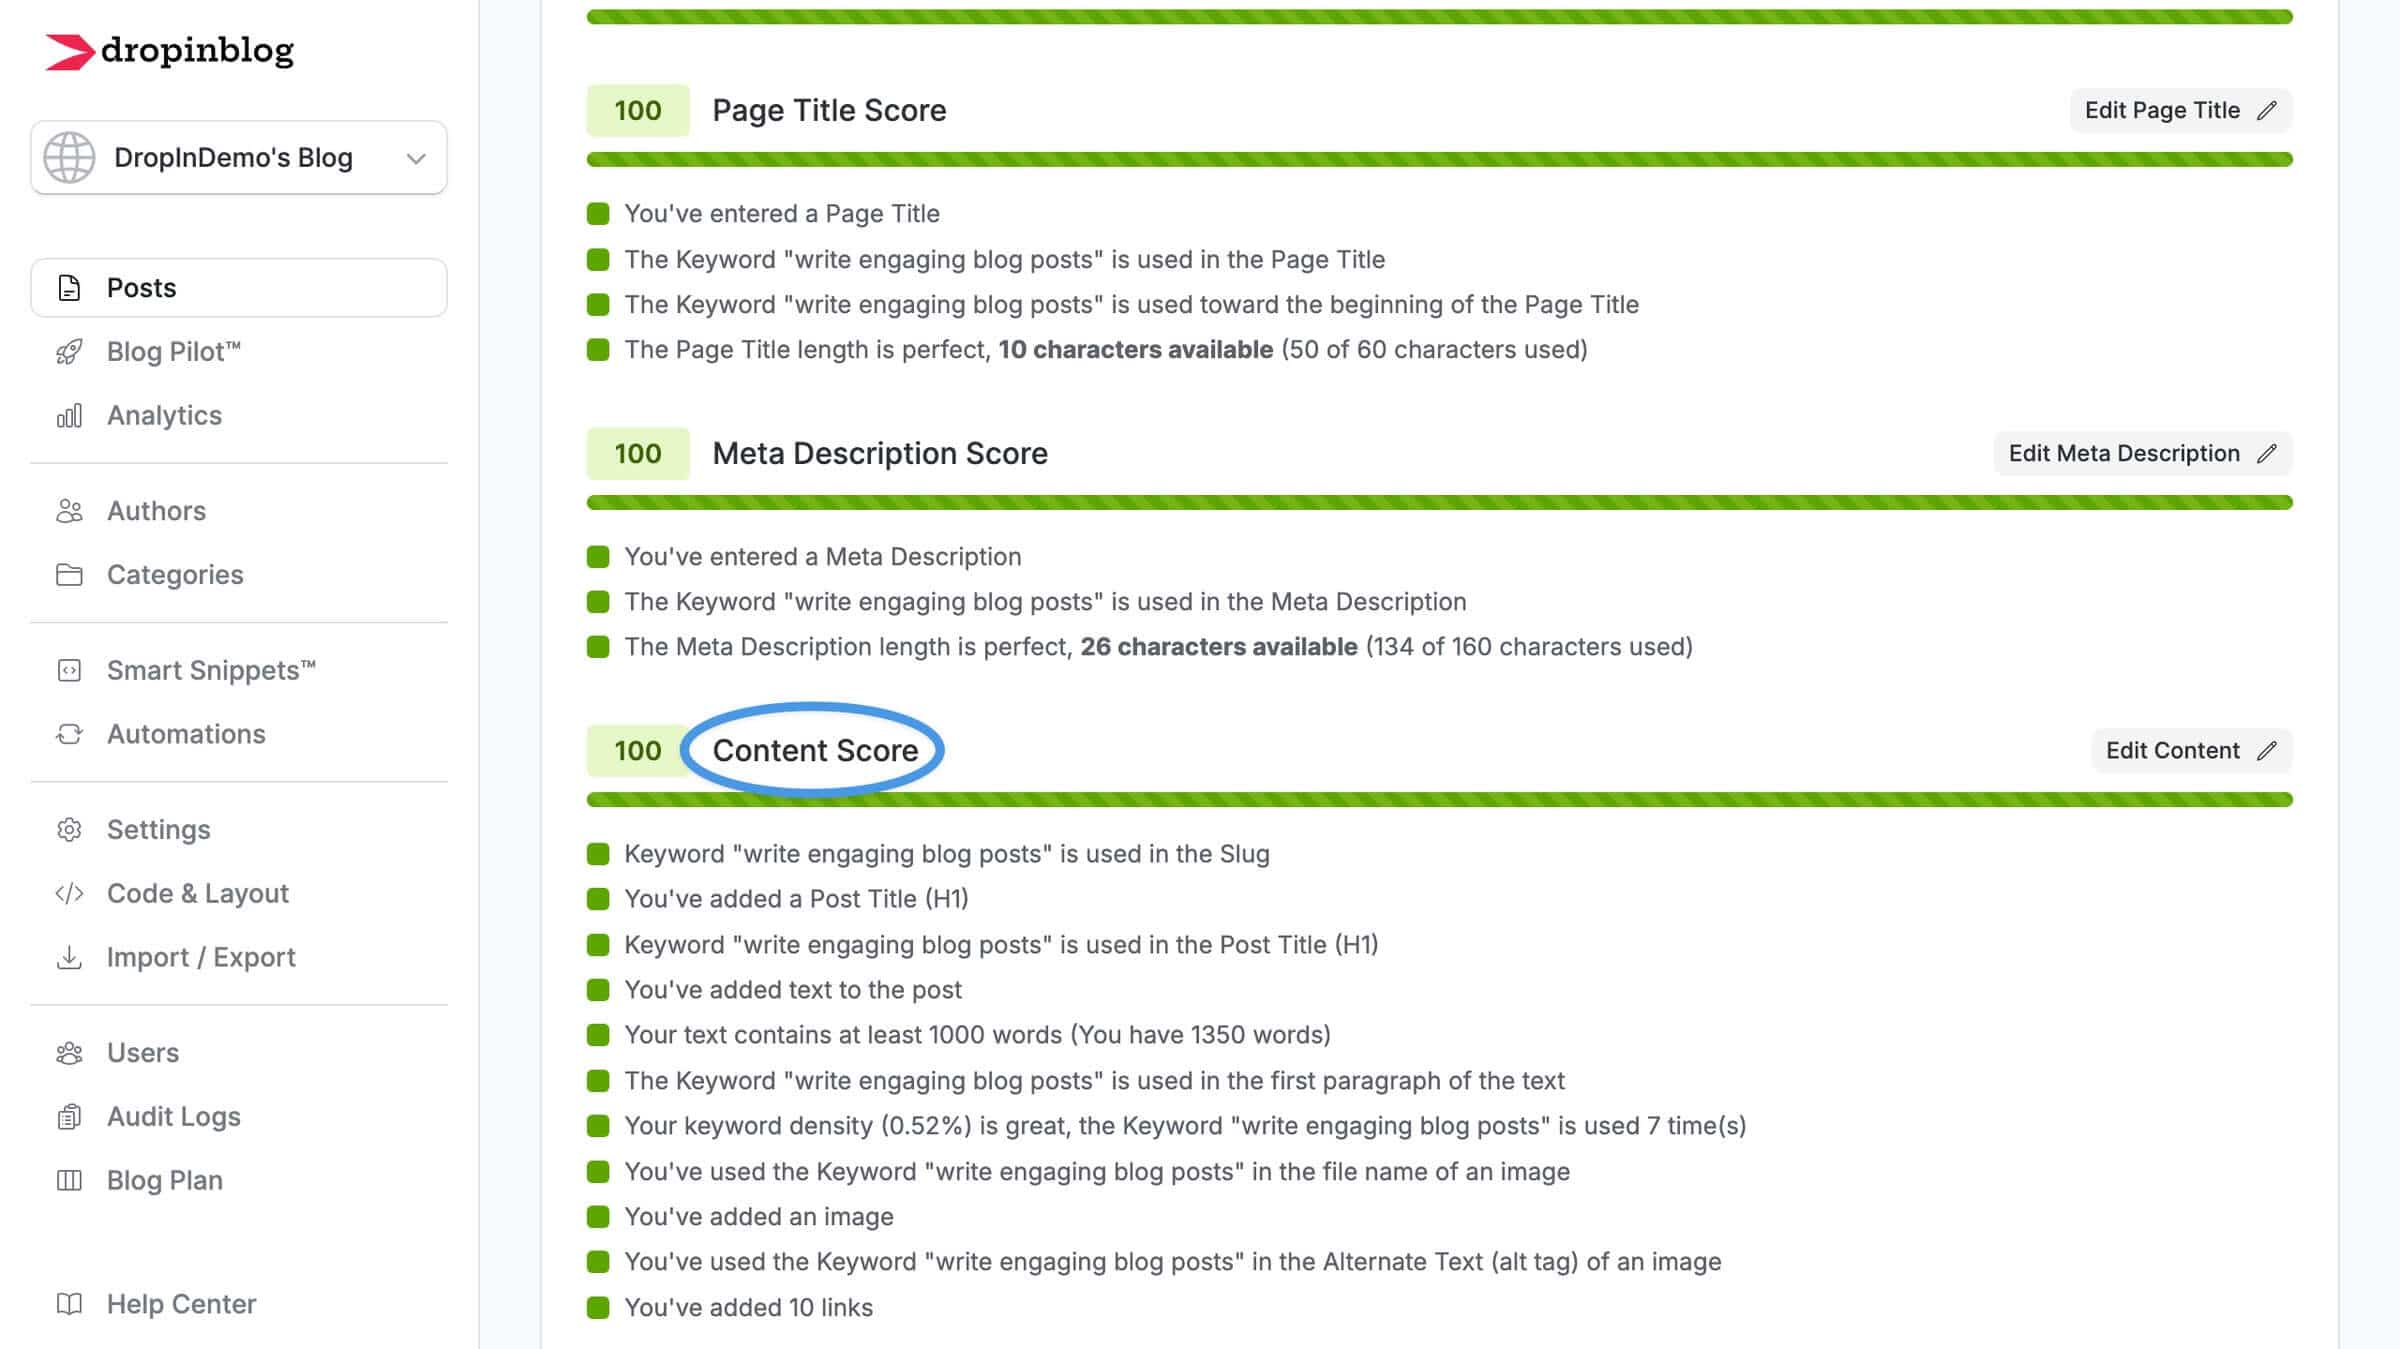
You only need to add a keyword you want to rank for, then follow the tool’s suggestions to get a high SEO score. Some of the suggestions include meeting the minimum word count, strategically placing your keywords throughout your content, and including links to other blog posts.
If you don’t want to do your own keyword research, use Blog Pilot™. While generating blog topic ideas, the tool automatically researches keywords relevant to your site and niche and, alongside topics, displays keyword volume and difficulty. If you use the tool to create a draft for a blog post idea, it will also prepopulate the post’s SEO fields. That way, it’ll be much easier for you to get a high SEO score.
Another tool available inside the DropInBlog editor is Mention Boost™. It’s designed to help you prepare your content for AI-based search tools like Google’s AI Overviews.
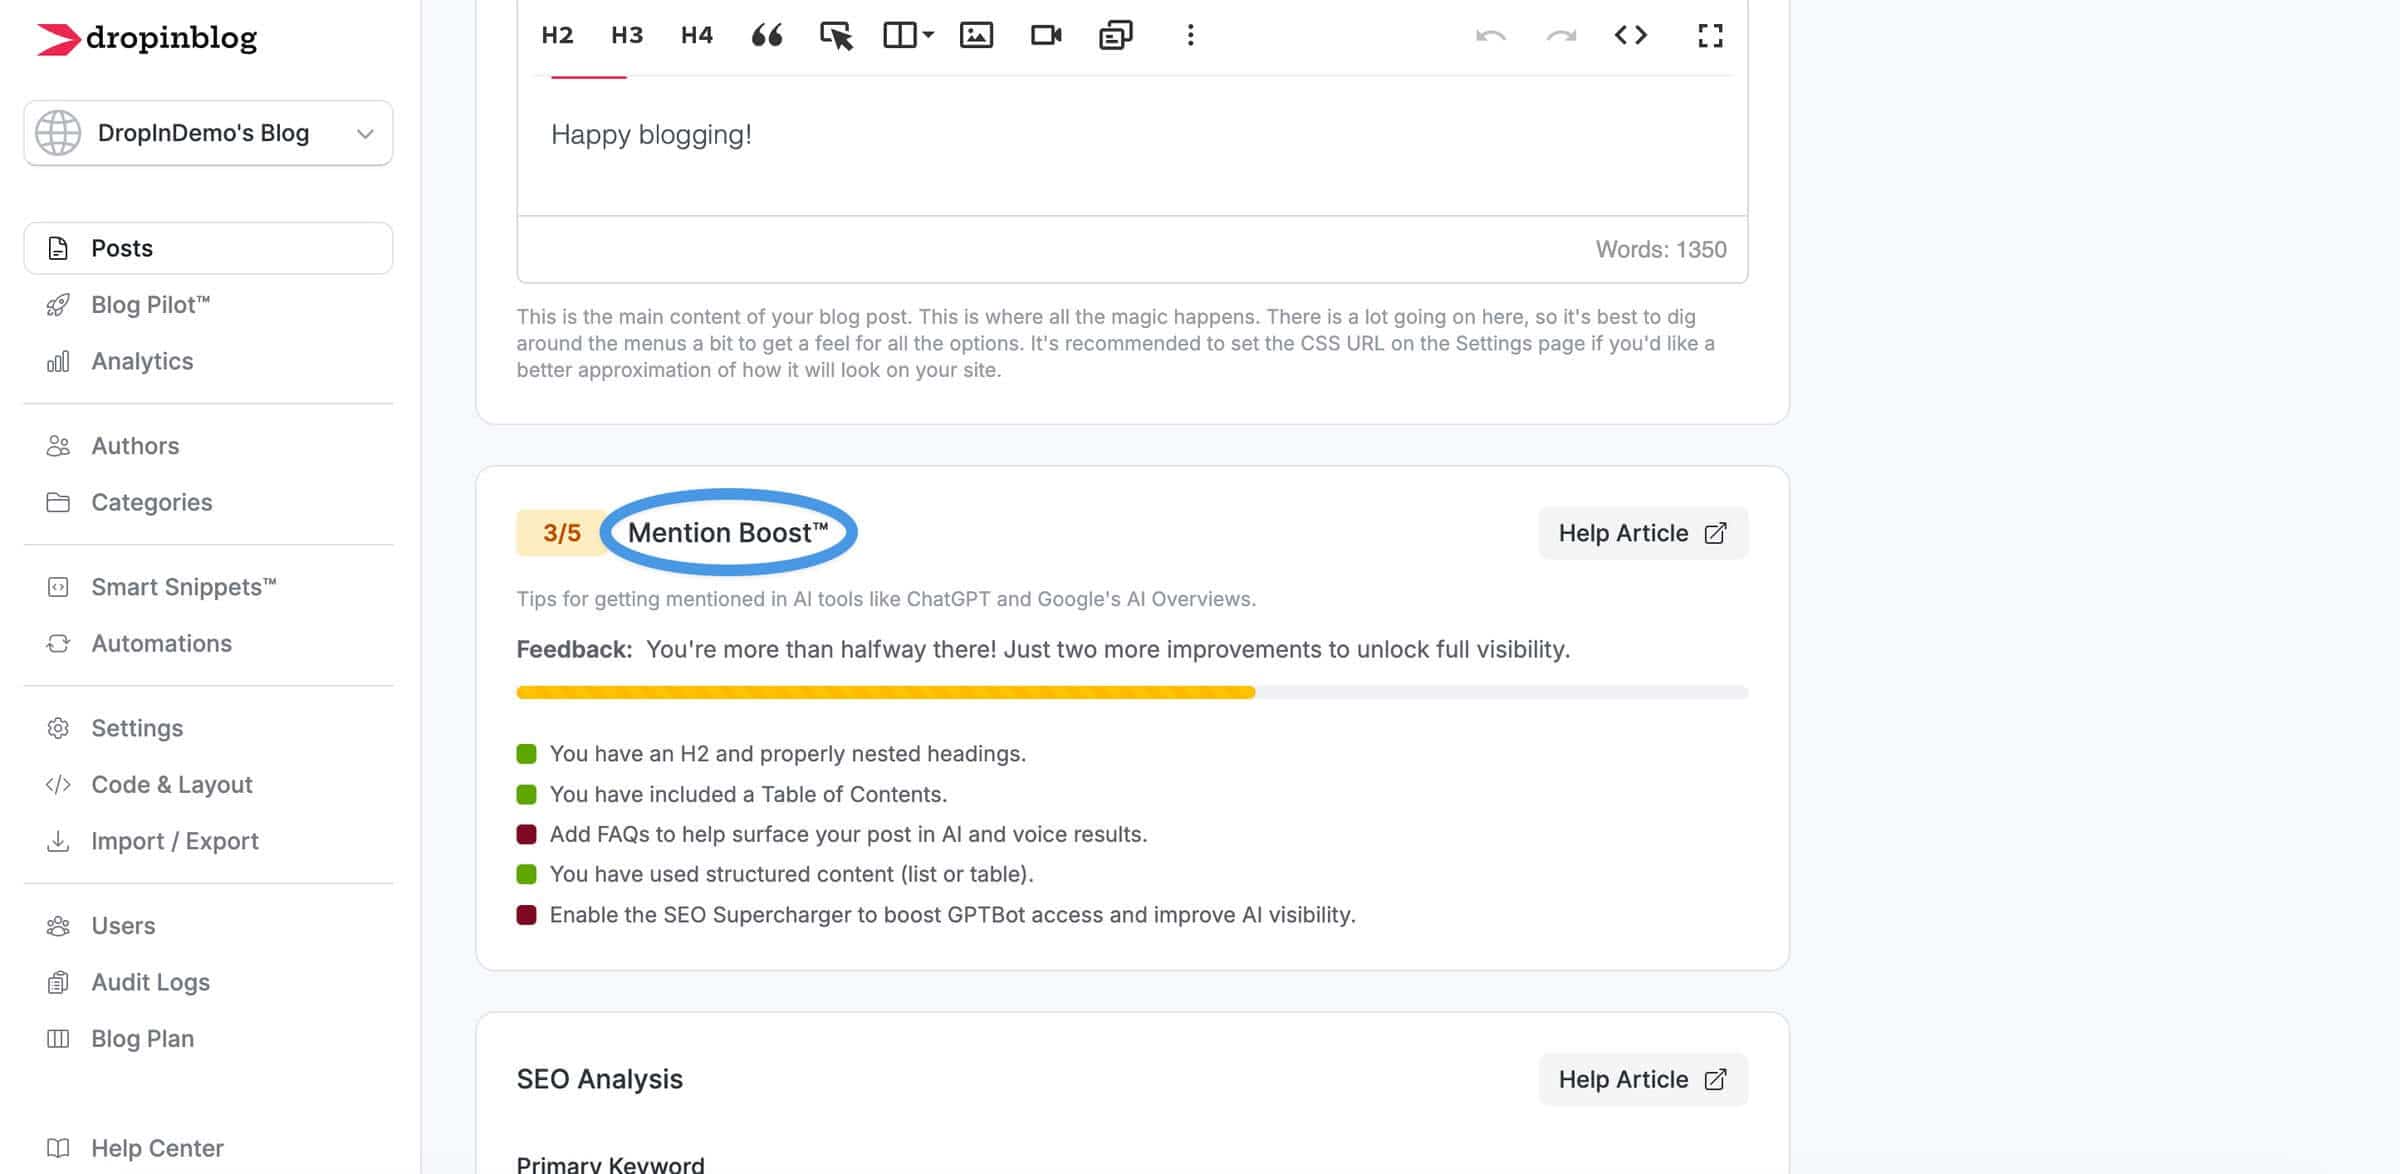
Based on your content’s structure, it will suggest ways to make your content more AI-search-friendly. These suggestions range from adding FAQs and tables to using a proper heading structure in your blog post. The higher your score, the more likely your blog is to earn citations and mentions in AI searches.
Styling Your v0 Blog
DropInBlog inherits your site’s design by default. If you want to make changes to your blog’s design, you can use the Design Customizer tool, located on the Code & Layout page of your DropInBlog account.
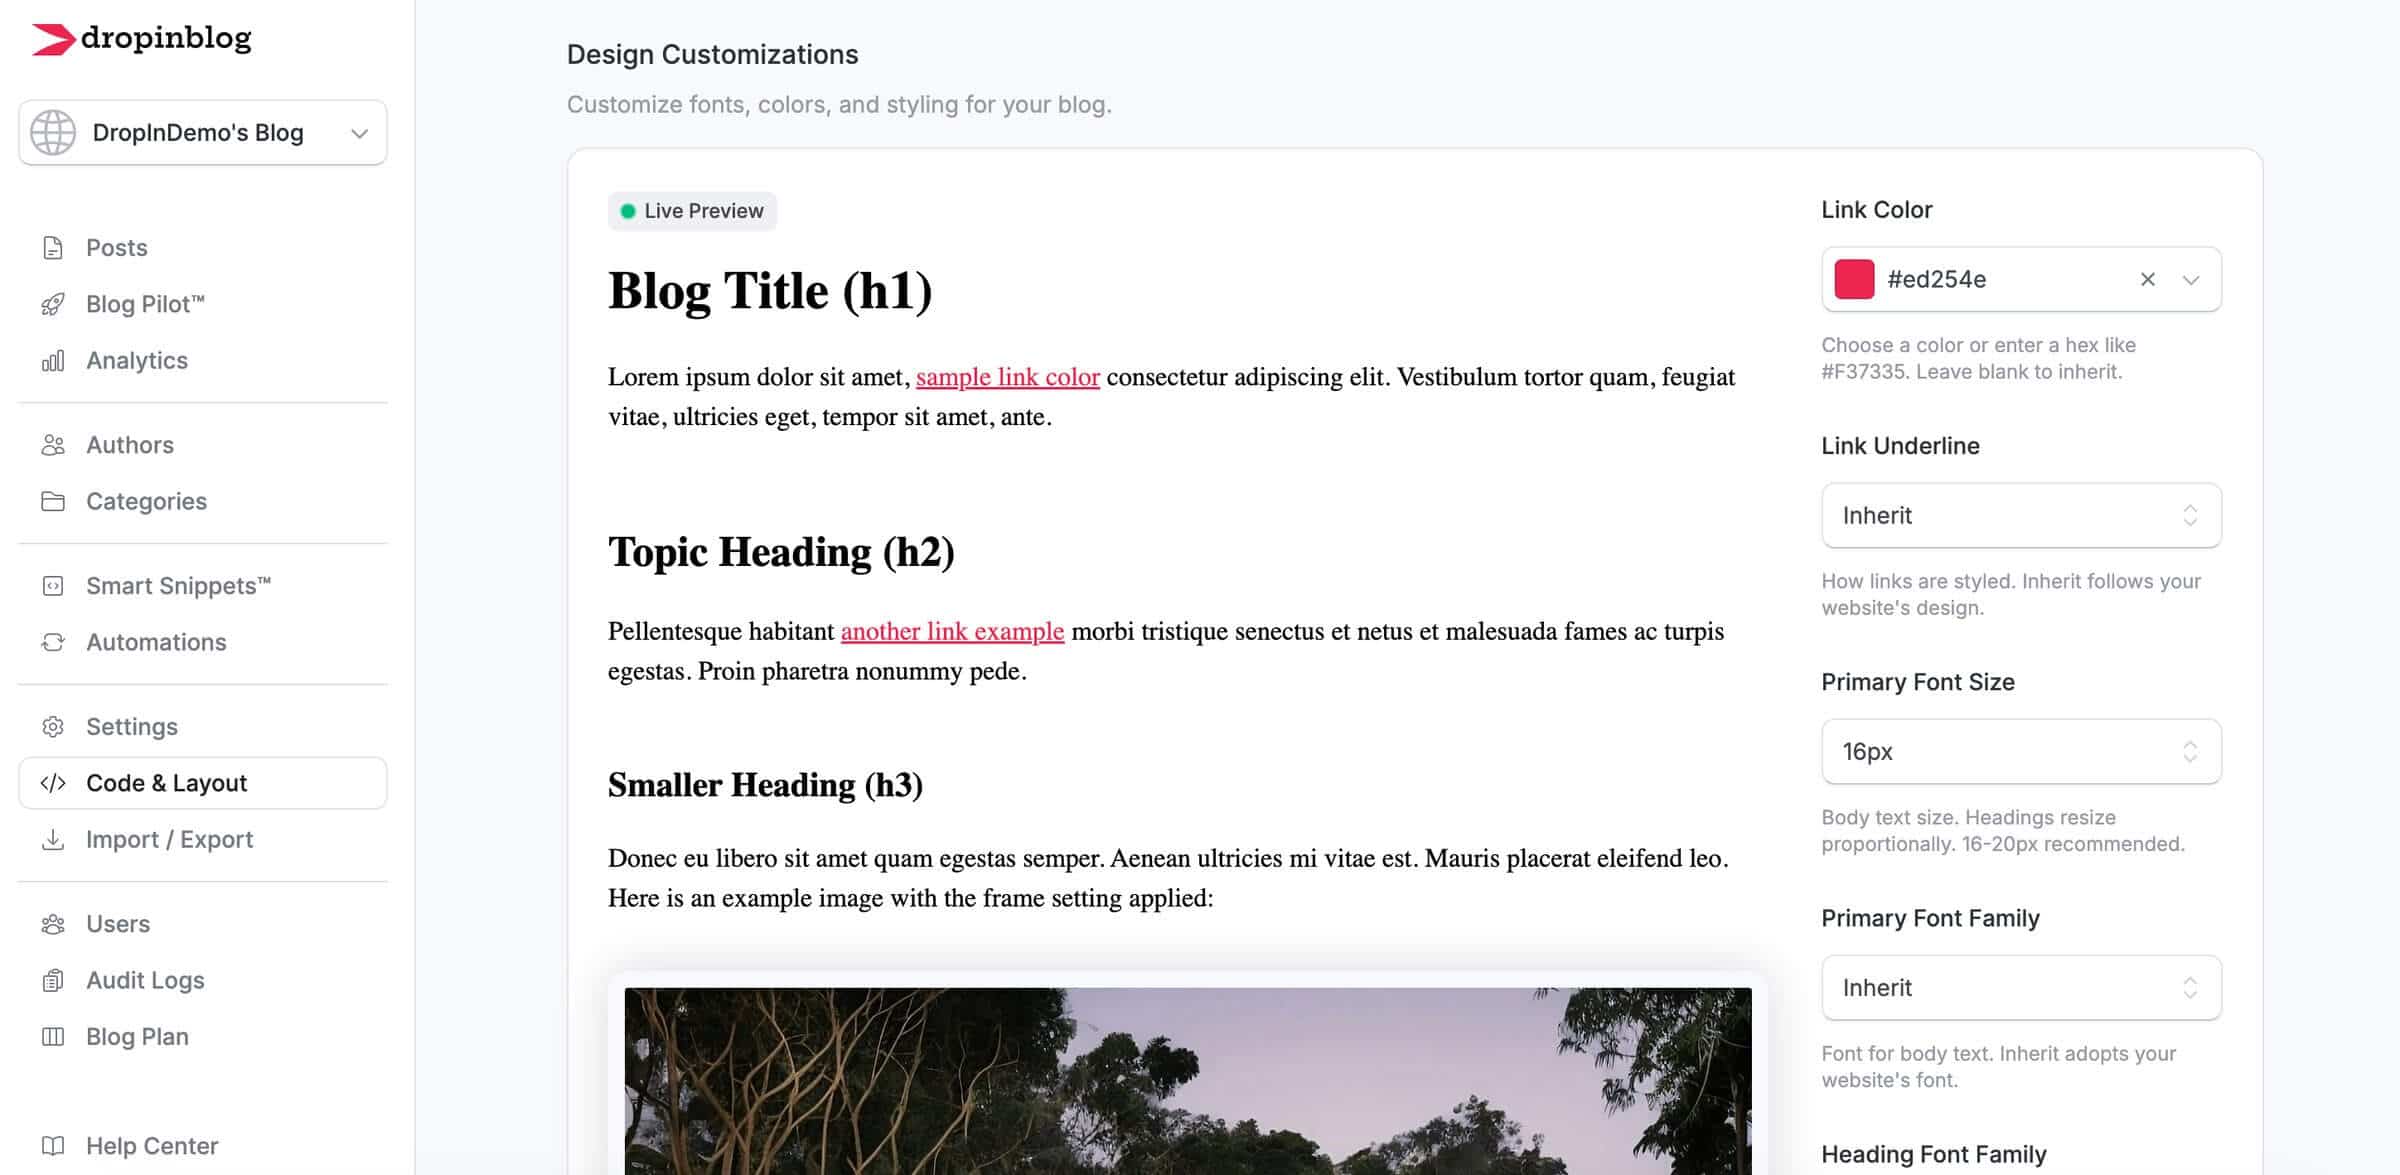
From here, you can change your blog’s font family, adjust the color of your CTA buttons, and set the aspect ratio for featured images. Then, if you want to make bigger changes, you can add your own CSS in the Custom CSS section under Advanced Options. And right under this section, you’ll find your blog’s current layout, which you can easily change.
Other DropInBlog Features You’ll Like
Apart from an intuitive content editor, built-in SEO features, and styling options, DropInBlog further simplifies blogging by allowing you to:
Create content faster with reusable content blocks.
Build trust and engage your audience with E-E-A-T-friendly author pages and an audio version of your blog.
Control access to your blog and simplify workflows with custom roles and Zapier.
FAQs
Can you build a blog on v0?
Yes, you can build a blog on v0 in a few different ways: by describing the type of blog you want to create in natural language, using a pre-built blog template, coding it from scratch, or integrating your v0 project with a professional blogging app like DropInBlog.
Does v0 have a built-in blog?
While you can create a blog on v0, the AI builder doesn’t have a traditional content editor or features such as authors, categories, or comments. To add new content to your blog, you’ll need to use the code editor or natural language prompts.
Is v0 good for blogging?
v0 works well for simple blogs or proof-of-concept projects. If you plan to publish content regularly, manage multiple authors, or grow your blog over time, pairing v0 with a dedicated blogging platform provides a much better workflow.
Does v0 have good SEO?
v0 has solid SEO foundations, including server-side rendering and structured metadata. If you want to connect your v0 project to a third-party SEO tool, you’ll have to manually add the code to your project’s files or ask v0 to add it for you via prompt. However, technical SEO is only one part of ranking. Consistently publishing optimized content and maintaining internal structure are equally important.
Is v0 better than Lovable?
Lovable is often considered better than v0 for non-technical users, while v0 is a better fit for developers who already work with React/Next.js. Also, Lovable is a better fit for building full-stack applications, whereas v0 is more focused on components and front-end development.
Is v0 free to use?
Yes, v0 has a free plan that includes $5 in free credits. You can also subscribe to one of the three paid plans: Team ($30/month), Business ($100/month), or Enterprise (custom pricing).
Start a Blog on v0 Today
If you want to increase your site’s organic traffic, you’ll need a blog. Luckily, creating one on v0 doesn’t have to be difficult. Instead of managing blog posts through prompts or code, you can focus on creating content while DropInBlog handles the blogging experience. Start your free trial today and have a production-ready blog running on your v0 site in minutes.
If you need any help along the way, feel free to get in touch with us.
Happy blogging!