
At a glance, Webflow and Bubble may seem like two sides of the same coin, just like Wix and Squarespace, for instance. In that case, a Webflow vs. Bubble comparison would be like any other site builder comparison: we would approach them as platforms with the same purpose, enumerate their most important features and integrations, and investigate how they provide customer support – the usual for a site builder comparison.
However, when it comes to Webflow vs. Bubble, things are not that simple. That’s why we’ll take a slightly different route here. For the most part, we won’t go over typical topics discussed in site builder comparisons. Instead, we’ll do the following:
- We’ll look at Webflow's and Bubble’s primary functions and strong sides, and explore how they differ in that regard.
- We’ll look at what each of the platforms offers in the area where it’s most at home, but also in comparison to the other platform’s strong side. For instance, if Webflow’s strong side is design, we’ll investigate how Bubble performs in this area as well.
So, without further ado, let’s get down to business.
Table of Contents
The Primary Functions of Webflow and Bubble
Webflow
We can refer to Webflow as a site builder, but it differs quite a lot from standard site builders.
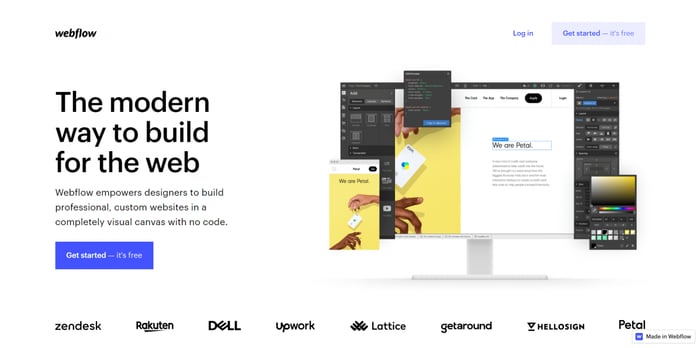
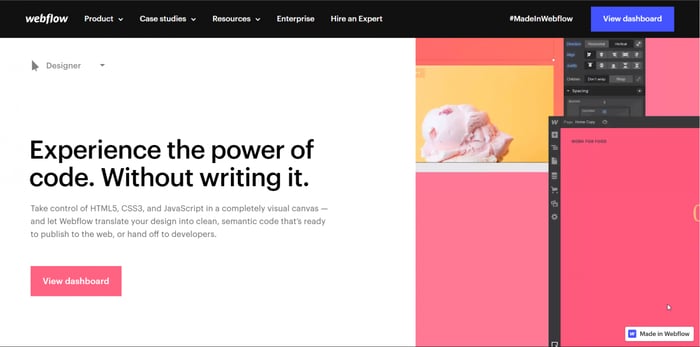
Fundamentally, Webflow is a no-code front-end development and professional design platform. It adheres strictly to front-end and web design principles. This means clean and semantic code under the hood, just as a diligent professional web developer would write it. Moreover, the pixel-perfect design is also there, just like a meticulous web designer would do it. You create pages and sites without the use of HTML and CSS, but elegant code is what Webflow translates your creations into.
To summarize:
- Webflow requires some understanding of web development and design. It takes prior knowledge, learning, and time to get the hang of it. On Webflow, you can’t just go from zero to hero overnight.
- Most importantly, Webflow should be used where front-end, design, and aesthetics are crucial. Visually stunning websites, design prototypes, unique product showcases, alluring blogs, marketing that requires a strong aesthetic appeal – this is where this platform shines. In short, Webflow’s primary function is to create powerful visuals.
Bubble
Bubble is a different world.
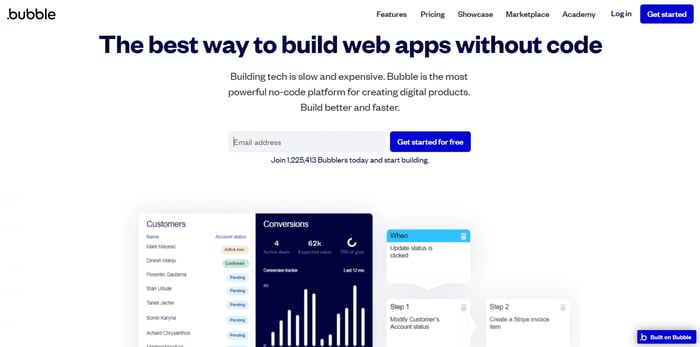
Regardless of how unusual it sounds, Bubble is a no-code programming platform that includes a full-fledged database. It has the potential of a programming language like Python that allows you to work on front-end and back-end simultaneously. It’s no wonder that Bubble is sometimes referred to as a “visual programming language.”
It’s things like the included database tools that show Bubble’s true nature and separate it from Webflow and other competition. These tools have two important consequences. Let’s see what they are.
Complexity
The first one is complexity. Simply put, the tools make Bubble a complex platform since it deals with the back-end along with the front-end. So, you should definitely expect a steep learning curve if you opt for Bubble.
Web Apps
The other and more important one is building web entities like web apps – something that Bubble is ideal for. Web apps are different from websites in the sense that websites are static while web apps are dynamic.
Web apps allow a much higher level of user interaction and allow you to work seamlessly with dynamic content. Dynamic content can be explained as user-relevant and user-defined content.
...And How They Work
Let’s explain this a bit better. Users can change apps’ state by affecting the data that apps contain and show. What we mean by this is that you, as a user, can directly influence data, content, and content representation on an app, which for the most part is not the case with a website.
Think of Instagram for a moment. It’s a web app that changes dynamically according to users’ interactions with the app and users’ online behavior. It looks different for every user; the posted content, suggested content, uploaded media, user communication, and ads vary from user to user.
This is in sharp contrast to, say, Webflow’s official website. This website looks phenomenal, but it only shows the content it’s supposed to show. There’s hardly anything you can do (unless you’re a highly-skilled hacker!) to change what you or anyone else sees, as opposed to Instagram where you change the app every single time you interact with it.
This leads us to our main point: Bubble’s primary function is to create different types of web apps – from e-commerce marketplaces and social network apps to CRMs (customer relationship management systems). This is where it shines and this is primarily how it should be viewed and used. Not as a site builder or blogging platform, but as a platform for creating full-on, front-end and back-end included web apps.
Design
Webflow Designer
The Designer is where all the important things in Webflow happen. It’s the area where you create your websites, pages, and storefronts. The Designer is the first thing you see when you open your Webflow project.
The Designer Overview
The Webflow Designer is a visual interface “where you can interact with the page in real-time,” as Webflow says. It allows you to handle HTML, CSS, and JavaScript code graphically, but in the same fashion as if you were writing code. You can add raw HTML elements by dragging and dropping them onto the canvas, style them visually the way you want, and experiment with animations. Also, you can use prebuilt elements with a more complex nature, such as sliders.
Webflow follows the box model. This essentially means that when you work on a page in the Designer, every page element is a box that interacts with other boxes. So, for instance, when you reposition existing elements or add new ones, they’re arranged in line with the principles of this web development model.
Speaking of arrangement, the Webflow Designer utilizes two different CSS layout systems: flexbox and grid. Without getting too technical, flexbox is a one-dimensional layout model, meaning that it lets you arrange elements in one direction, either rows or columns, but not both. In contrast, the grid system is two-dimensional; it allows you to align elements both in rows and columns, similar to when you work with tables.
Designer’s Structure
This is how our Webflow Designer looks (yours will be the same minus the image and page details):
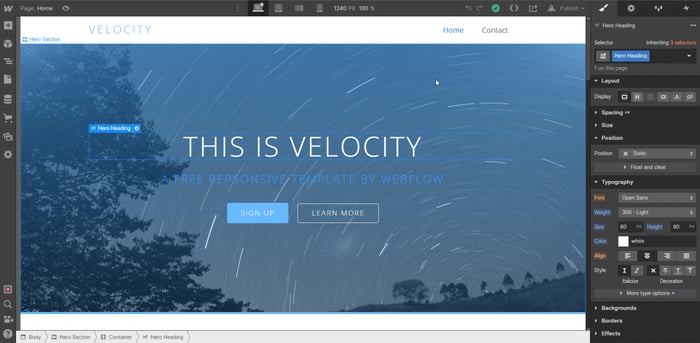
The Designer is divided into multiple segments. On the left sidebar, you can find various functions:
- A place from where you can add new elements and layouts.
- Symbols (reusable entities for applying global changes from a single place in a few clicks).
- Navigation.
- Your site pages.
- The already familiar Webflow CMS.
- Webflow Ecommerce.
- Assets (images and icons).
- Audits that evaluate your site and tell you if you need to make any improvements.
- A search bar.
- Access to video tutorials.
- Access to Webflow help.
On the right side, you can activate the following three panels:
- Style
- Element settings
- Style manager
- Interactions
On the top bar, you have the opportunities to:
- Preview your site on desktop, tablet, and mobile devices.
- Undo or redo operations.
- Export code.
- Share your project.
- Publish your project.
The hamburger icon in the left upper corner gives you the opportunity to:
- Head over to your dashboard.
- Open your project settings.
- Open the Editor.
More Designer Features
Since it’s neither possible nor necessary to list every single Designer feature in a short article, here we’ll mention only a small part of what the Designer allows you to do.
In the Webflow Designer, you can:
- Create fully responsive designs.
- Make use of CSS classes to apply changes to multiple elements simultaneously.
- Make subtle and delicate changes to text and fonts.
- Select, add, remove, and thoroughly edit any element you want.
- Make and publish changes on the go.
- Build sites and pages that work consistently in all main browsers.
Custom Code
In the spirit of its full dedication to customization and flexibility, Webflow allows you to make site modifications by adding an embed code or writing custom code.
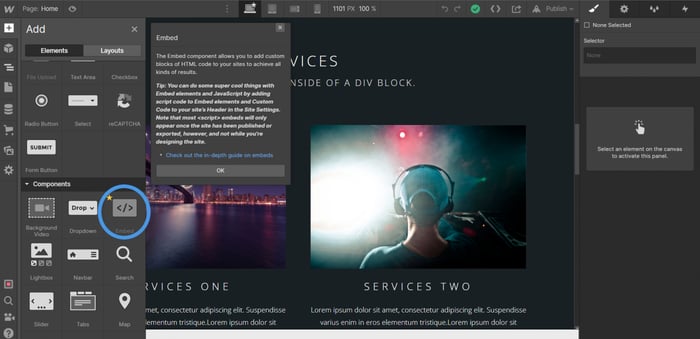
Every now and then, these features can come in very handy, especially the embed code. However, frequent and extensive use of custom code on a platform like Webflow defeats the purpose of using a no-code solution.
As far as writing your own code is concerned, it’s recommended to use this feature primarily for smaller-scale and subtle changes. Webflow is more than flexible enough to let you do any kind of changes without code. That’s why we all love it in the first place, don’t we?
Bubble’s Design and Styles Tabs
Bubble is complex, but compared to what creating a web app by writing code looks like, it’s a breeze. Well, almost a breeze.
Bubble’s Graphical Interface
Bubble offers a graphical interface that has a similar role to its Webflow counterpart – the Designer. It’s drag-and-drop and, although a far cry from the elegance of the Webflow Designer, it’s practical and it offers a host of options. It’s what you see when you open Bubble for the first time.
You can start building your app by clicking the Design tab, which presents you with two options: the UI Builder sub-tab and the Responsive sub-tab.
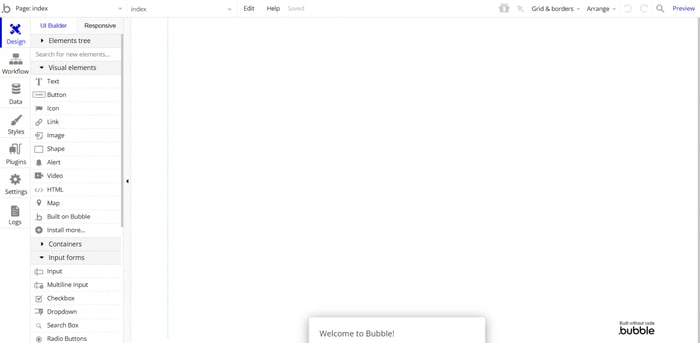
As far as design is concerned, you’ll do the majority of your work in the UI Builder. The Responsive sub-tab allows you to see how your app looks on different devices: a phone, tablet, and desktop. So, let’s explore the UI Builder.
UI Builder’s Structure
The UI Builder is divided into seven segments:
- Elements tree – allows you to see all existing elements on a page and shows you their relationship (for example, parent-child) through indentation and nesting.
- Search bar
- Visual elements – a menu with elements you can add to your app, such as text, button, link, image, video, map, HTML embed, and more.
- Containers – special elements that play various roles:
- Group: contains other elements.
- Repeating Group: shows list items from a database or an API.
- Pop-ups: users can’t see them until you decide to unhide them; they’re always shown in the middle of the visible area of your app’s page.
- Floating Group: stays on top of the viewport as users scroll up and down; suitable for creating headers, “Scroll to the top” buttons, and similar floating elements.
- Group Focus: an element that disappears when a user clicks outside of its area; suitable for dropdown menus. These come out of the box, but Bubble allows you to install more containers.
- Input forms – elements that allow users to enter information and interact with the app in different ways: through checkboxes, multiline inputs, date and time pickers, etc.
- Reusable elements– enable you to create elements like pop-ups that can be used in multiple places, which saves you time and makes your app elements easier to handle.
- Element templates – templates that enable you to quickly create some very common elements like signup and login forms.
Summed up, the UI Builder sub-tab allows you to add and create a variety of your app’s elements.
Styles
As you might expect, this tab lets you edit and apply styles to your app’s page and elements. This is how editing an element looks:
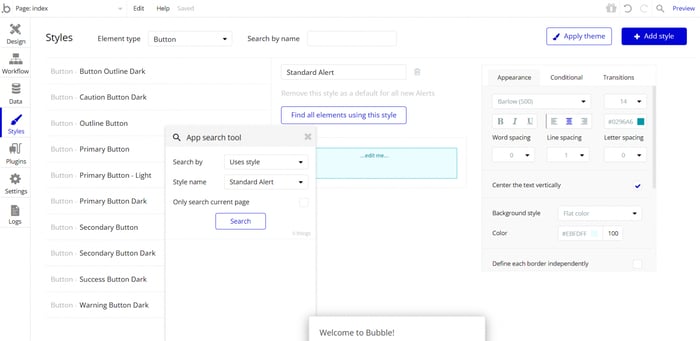
Now, this is where things start to get a bit unintuitive and perplexing, at least for someone who’s used to working with standard drag-and-drop editors. Bubble is known for the abundance of functionalities it offers, and the truth is it doesn’t disappoint in that regard even when it comes to design. Rather, the problem is that the interface is not as user-friendly and clean as you’d expect it to be. At times, it looks like a small space overcrowded with options.
Design is not one of Bubble’s strong sides, especially in the light of what Webflow offers. By this we mean the entire experience, not the number of options. Nevertheless, looking at some of the examples of Bubble-built apps, it seems that this platform can perform fairly well in the realm of design as well.
The tricky part then is to manage to find your way around Bubble’s interface and learn how to get the most out of the myriad of options it offers.
Database
Webflow CMS
Blog
Blogging is probably the first thing that pops into your mind when someone mentions CMS. This is not without reason. One of the primary roles of a CMS is to let users create content and work out their content marketing strategy efficiently.
Webflow offers a built-in blog that you can use creatively to reach a wider audience, demonstrate your expertise, explain your product to users, and more.

However, Webflow doesn’t stop there. Even though it has its own built-in native blog, it allows you to add a third-party blogging solution like DropInBlog. It takes a few simple steps to add DropInBlog to your Webflow project, witness its power, and feel the advantages of an elegant blogging integration with a user-friendly interface.
The Power of Webflow: Creative Ways to Use the Webflow CMS
A good CMS will allow you to perform multiple powerful operations seamlessly, along with blogging.
Dynamic content requires a database to pull the necessary data intelligently when it’s needed. Webflow doesn’t include a separate data management tool like Bubble does. Nonetheless, there’s a workaround: this function can be performed by the Webflow CMS.
To avoid going overboard with technical detail and jargon, we’ll just say that to work with dynamic content in Webflow CMS, you have to use its feature called CMS collections.
Collections function as databases managed from within the Webflow CMS. Using this term very loosely, they’re like data containers “where content can be stored and referenced throughout a project dynamically.” This allows you to create your design template once and then apply it as you see fit.
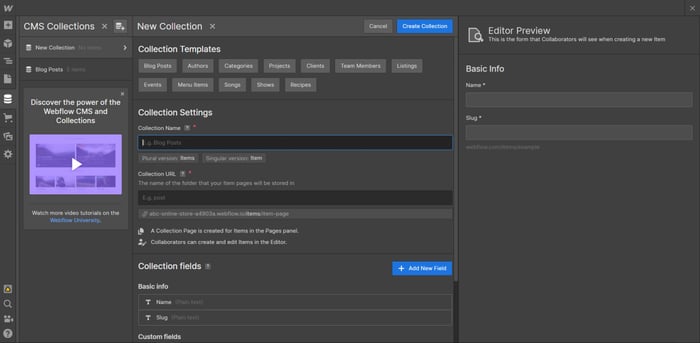
Webflow offers various collection templates for most common use cases, but it also gives you absolute freedom to create as many custom collections as you need.
One amazing example of creative template use is Upwork’s landing pages built with Webflow CMS (with the help of Webflow experts).
Bubble’s Data Tab
Positioned on the left sidebar of Bubble’s graphical interface is the Data tab responsible for data management.
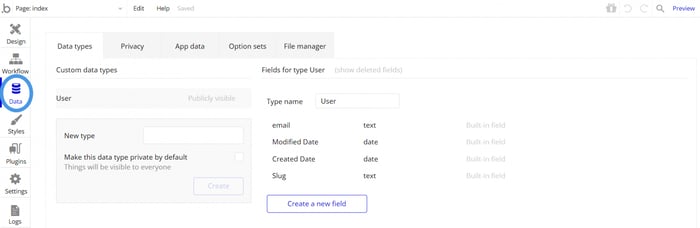
The Data tab leads to five sub-tabs each offering a variety of options:
- The Data type sub-tab allows you to structure your data conveniently through custom data types and fields. A data type is something like a main category of things you store information about (for instance, “Instrument” if your app is about musical instruments), while a field refers to a specific characteristic of your data type (for instance, the family an instrument belongs to: woodwind, string, brass, etc.).
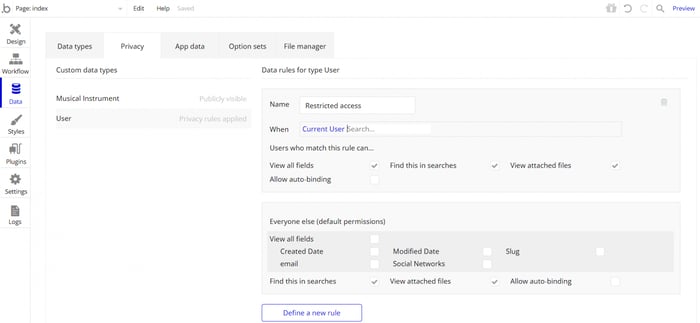
- The Privacy sub-tab enables you to create custom types of users and define rules that give them different permissions and levels of database access.
- The App data sub-tab gives you access to your entire app data and allows you to search different values, create new entries, change existing data, remove rows, perform bulk actions, export data in a CSV file, and more.
- The Option sets sub-tab allows you to define lists of limited static options that are accessible from anywhere in your app, and that load very fast because they don’t involve database reads. Users can’t change option sets on the front-end hence the attribute static. A simple, but illustrative enough example of an option set is a list of the days of the week. For instance, maybe your app needs a dropdown menu with a list of days from which users can select a specific day. You can define in advance an option set “Days of the week” and use it in your app.
- The File manager sub-tab allows you to store and view files (say, images and text files ) that you or your users upload to the app.
Even this short review is sufficient to show how powerful Bubble is when it comes to dealing with data. The sheer number of options speaks of the vast potential that Bubble has to handle and manipulate data. Despite Webflow’s creative use of its CMS, truth to be told, it has nowhere near this potential.
Price
Price is an inevitable topic when comparing any two web platforms. It’s something we always take into account when weighing things up. So, let’s explore the most important facets of Webflow’s and Bubble’s pricing systems.
Webflow’s Pricing Plans
Webflow’s pricing system is pretty complex. To save time and space, we’ll focus only on its most general features. For more details, check out this in-depth review.
Webflow’s Pricing System Overview
Webflow offers two main types of pricing plans: Account and Site. In addition to these, there’s an enterprise offering as well. Since Webflow offers a forever-free plan, a free trial is redundant.
As far as billing is concerned, you can choose between a monthly and a yearly subscription. If you can afford higher upfront costs, a yearly subscription always pays off more in the long run, since it includes a discount.
Account Plans
The Account plans allow you to build different types of sites and pages, but you can’t publish them on a custom domain. You can build from two to unlimited projects depending on your plan and publish them to a free webflow.io subdomain.
The Account plans’ prices vary from forever-free to $42/month (month-to-month subscription) or $420/year (annual subscription). If we don’t count the free Account plan (by the way, this is the default plan you start with when you sign up for Webflow without selecting a specific plan), the cheapest paid Account plan costs $24/month or $192/year.
Site Plans
In contrast to the Account plans, the Site plans allow you to publish your sites on a custom domain. This is basically the key difference between these two.
The Site plans give you the tools to build and publish standard websites as well as e-commerce sites. Prices range from $15/month or $144/year to $235/month or $2,544/year. The e-commerce plans have steeper prices mostly due to the greater functionality they include.
Enterprise Offering
Webflow’s enterprise offering is a custom type of plan with custom pricing, where a lot (including the price) depends on your business needs, personal requirements, how much traffic and bandwidth you need, and other custom solution implementations.
Bubble’s Pricing Plans
Bubble’s pricing system is more straightforward. It offers four standard plans and two billing options:
- Free: forever free
- Personal: $29/month (monthly) or $300/year (annual, includes a discount)
- Professional: $129/month or $1,380/year
- Production: $529/month or $5,700/year
In addition to the standard plans, there are two more offerings: one for enterprises and another for agencies. Similar to Webflow, the enterprise offering has custom pricing. The Agency plan costs $78/month per designer or $852/year per designer.
Overall, Bubble is more expensive than Webflow, which is not that surprising considering that it’s a complex and robust platform that offers a ton of features missing from the bulk of (if not all) the platforms that allow you to build sites and pages. Webflow falls within this group as well. Despite being an advanced design system and a powerful web platform, it’s not quite a programming no-code solution for web apps like Bubble, which explains the lower price.
Over and Out
Hopefully, this Webflow vs. Bubble comparison showed how different these two platforms are and what they should be used for.
They’re flexible, so you can push their limits and make them do things other than their primary functions. However, why do that, when there’s so much choice out there? We’re sure you’ll find a platform that’ll allow you to do exactly what you want to without forcing it into a Procrustean bed.
On the other hand, if you need a robust web app or an exceptional website, you know where to look. Because, there’s no doubt, Webflow and Bubble are some of the best in class.