

Key Takeaways
- The best way to add a blog to your Square site is with DropInBlog!
- The free trial and quick setup let you test it in a few minutes.
- DropInBlog has different pricing plans for individuals and teams.
There are two ways to blog on Square Online: the built-in Stories feature or embedding a dedicated blogging app like DropInBlog from the Square App Marketplace. In this guide, we'll cover both: how Stories works, where it stops being enough, and the step-by-step DropInBlog setup.
Quick note before we start: this guide is about Square (squareup.com, the commerce platform), not Squarespace, the website builder. If you're looking for Squarespace blogging, that guide is here.
TL;DR: Add a Blog to Square
- Square Online includes a basic blog feature called Stories available on all plans, but with page-level SEO settings only.
- For a blog with real SEO features (schema, content scoring, AI-search optimization), install DropInBlog from the Square App Marketplace — no code needed.
- The embed step requires Square Online Plus or higher. Start with the free trial and test it in minutes.
Table of Contents
- Key Takeaways
- TL;DR: Add a Blog to Square
- What Is Square Online?
- Does Square Offer a Blog?
- Prerequisites
- How to Create a Blog on Square
- Step 1: Open App Integrations in Your Square Dashboard
- Step 2: Find DropInBlog in the Square App Marketplace
- Step 3: Create Your DropInBlog Account
- Step 4: Connect DropInBlog to Your Square Website
- Step 5: Add a Blog Page in the Square Online Editor
- Step 6: Paste Your Blog Code into an Embed Section
- Step 7: Publish and View Your New Square Blog
- What You Can Do Once Your Square Blog Is Live
- FAQs
- Thank You, and Happy Blogging!
What Is Square Online?
Square Online is the website and online store builder inside the Square platform (owned by Block, Inc.). It grew out of Square's 2018 acquisition of Weebly, which also means if you're currently on Weebly, Square is where Weebly sites are headed. When we say "Square" in this guide, we mean Square Online, because that's where blogging lives.
Does Square Offer a Blog?
Yes, Square offers a blog, or more precisely, something similar to blogging functionality, called Stories.
To get a taste of the Square Online Stories:
Log in to your Square account and open your e-commerce website for editing in the Square Online builder.
Click the plus sign and then “Page.”
Click “Show more” if you don’t see “Stories overview” among the available page types.
Add a “Stories overview” page.
Stories is available on all Square Online plans, including Free, and it's improved recently: you can edit page-level SEO settings (title, description, social preview), use Square's Rewrite with AI to draft or polish content, and even pull an external blog into your site via an RSS feed section.
For posting occasional updates, that's fine. But if you want your blog to bring in organic traffic, Stories still has hard limits:
No categories or author profiles: everything lives in one flat list.
Page-level SEO only: no content analysis, no keyword guidance, no feedback on whether a post can actually rank.
No structured data: no BlogPosting, FAQ, or video schema to help Google and AI search engines understand your content.
No reusable blocks: CTAs, signup forms, and banners must be rebuilt post by post.
Square Stories vs DropInBlog
Square Stories | DropInBlog | |
Available on | All Square Online plans | Plus plan or higher (embed section) |
Post editor | Basic, with Rewrite with AI | Full editor with SEO Analyzer & content scoring |
Meta titles & descriptions | ✓ Page-level | ✓ Full control, per post |
BlogPosting, FAQ & video schema | ✗ No | ✓ Yes, automatic |
Categories & authors | ✗ No | ✓ Yes |
Related posts/internal linking | ✗ No | ✓ Yes, automatic |
Reusable blocks (Smart Snippets™) | ✗ No | ✓ Yes |
AI search optimization (Mention Boost™) | ✗ No | ✓ Yes |
Text-to-speech (Blog Voice AI™) | ✗ No | ✓ Yes |
Prerequisites
There’s only one prerequisite for adding DropInBlog to Square: a subscription to at least the Plus plan. This mid-tier Square pricing plan allows you to add an embed code section, which is a necessary step in the integration process.
If you’re wondering whether you also need a separate DropInBlog account beforehand, wonder no more: You don’t need it. As you’ll see in a minute, when you add DropInBlog from the Square App Marketplace for the first time, the blogging platform lets you create an account during the integration process.
It’s a free trial account, which is just enough to start loving how DropInBlog and Square work together. If you like what you’ve experienced by the end of the trial, you can choose between different DropInBlog subscriptions.
How to Create a Blog on Square
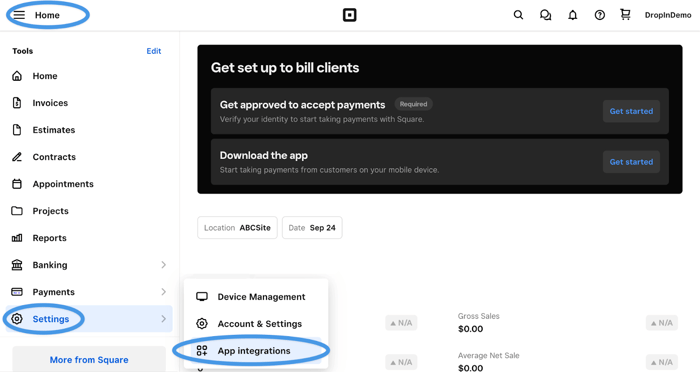
Step 1: Open App Integrations in Your Square Dashboard
From the Home area of your Square dashboard, click Settings and then App integrations.
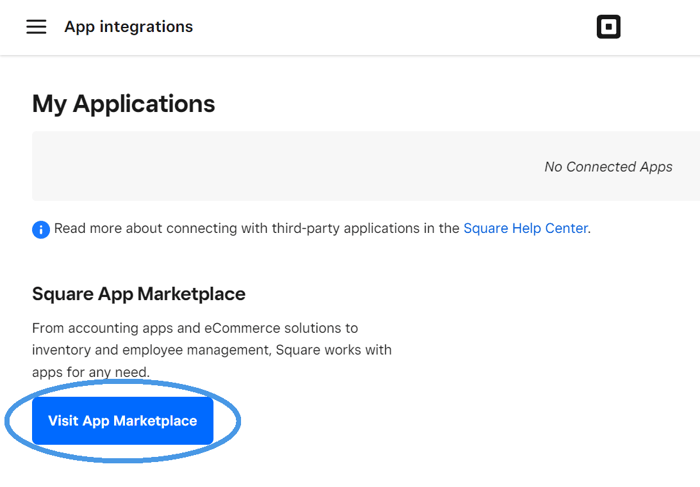
Now, click the big blue button Visit App Marketplace. Note that before you add DropInBlog, if it’s your first integration, you’ll see “No Connected Apps” under My Applications. We’ll change that in a jiffy.
Step 2: Find DropInBlog in the Square App Marketplace
Clicking Visit App Marketplace opens another page in a new tab. In the search bar on the newly opened page, type in DropInBlog. Even before you finish typing, you’ll see the DropInBlog logo; click it.
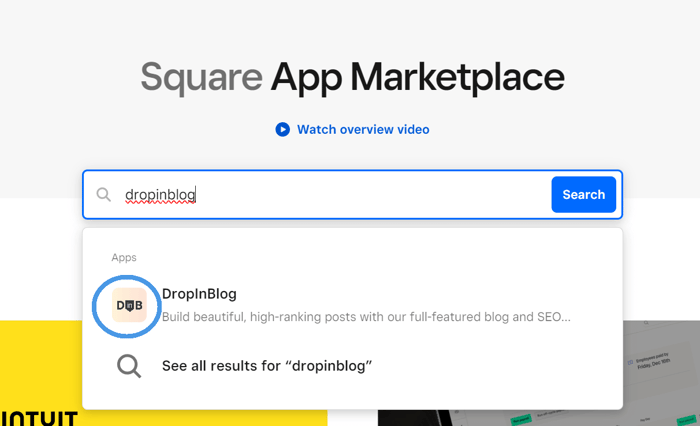
That will take you to a page dedicated to the DropInBlog app. Now, click the blue Get Started button.

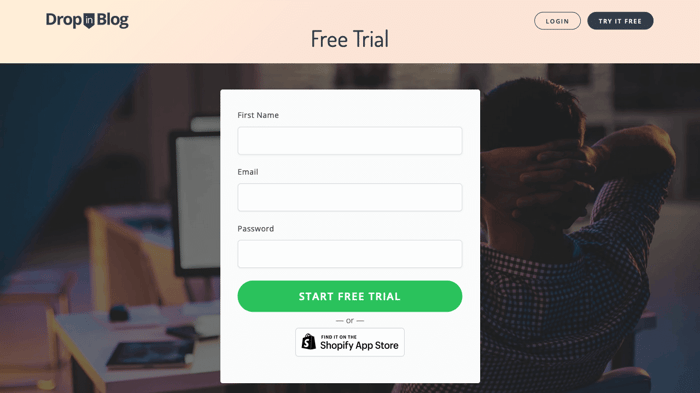
Step 3: Create Your DropInBlog Account
This step will lead you to the DropInBlog registration page. Enter your first name, email, and password in the form fields, and click the green Start Free Trial button. If you can’t see the button immediately on your screen, scroll a tiny bit down, and it’ll show up.
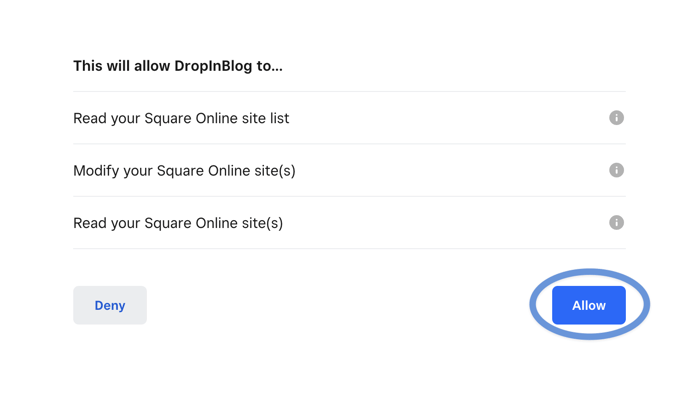
You’ll need to enter your Square login information once again. When you do that, you’ll see that DropInBlog requires reading and modifying permissions to continue the integration process. Click Allow.
Step 4: Connect DropInBlog to Your Square Website
Next, you’ll find yourself in DropInBlog. Click Add DropInBlog to choose the Square website where you want to install your blog.
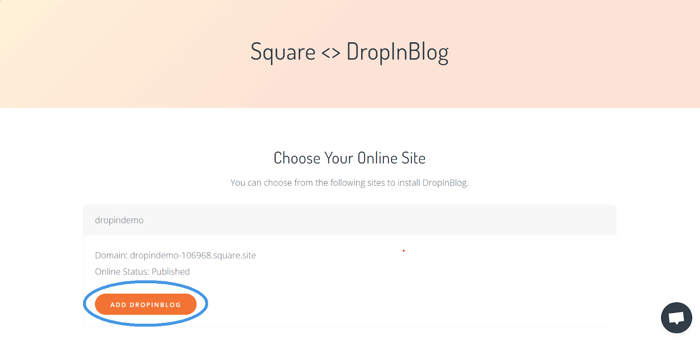
If you have more than one Square website, they’ll all show up here, so be careful to choose the one you want to connect with DropInBlog.
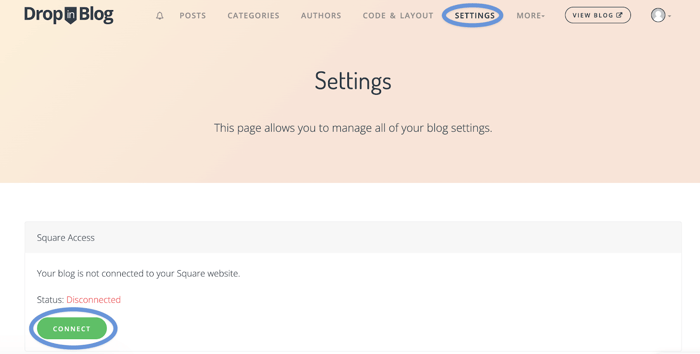
Now click Settings in the navigation menu and then click the green Connect button.
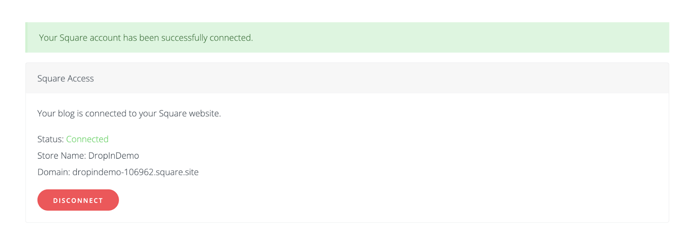
When you do that, you’ll see a confirmation that:
Your Square account has been successfully connected.
Your blog is connected to your Square website.
A change in status from Disconnected to Connected.
Step 5: Add a Blog Page in the Square Online Editor
Head back to your Square dashboard. Click More Tools and Online under Sales Channels.
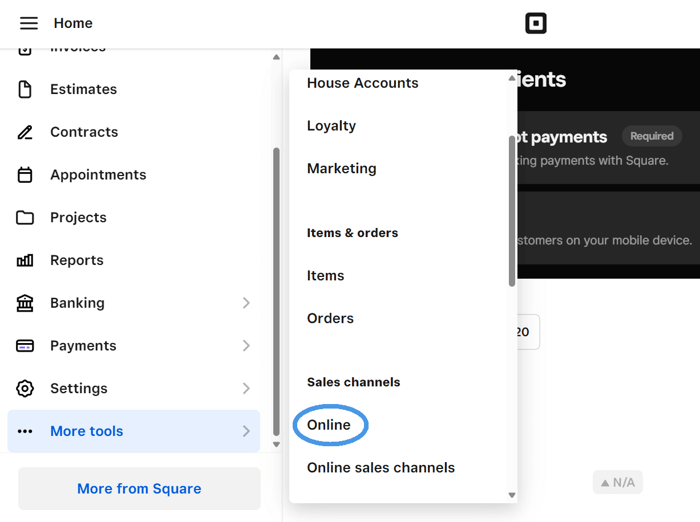
Don’t get confused if your Square dashboard doesn’t look exactly like the image above. It’s customizable, and its look can vary. The most important thing is to find and click Online because that’s how you open Square Online.
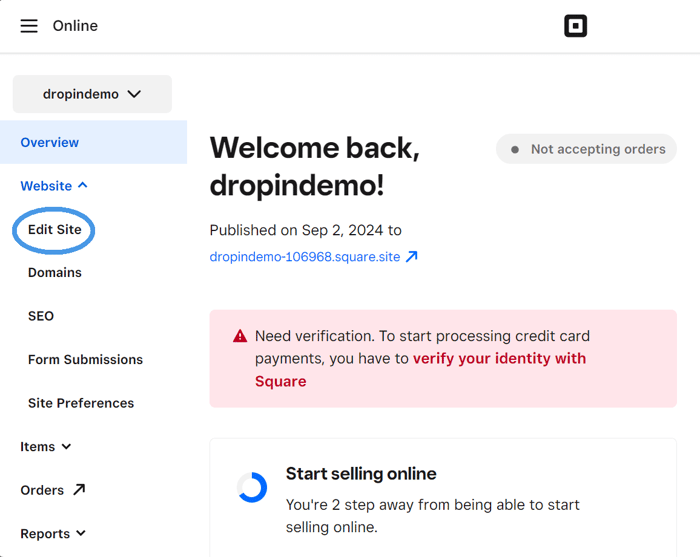
When you open Square Online, click Website and select Edit Site.
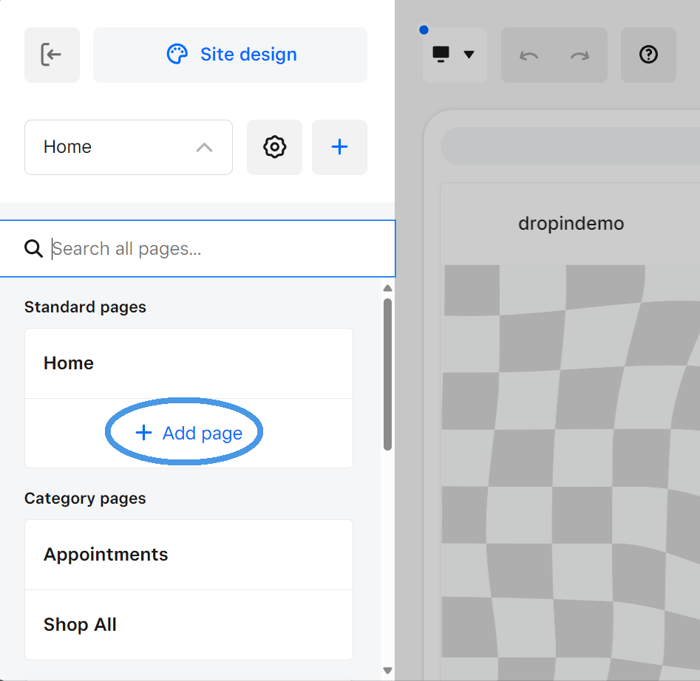
Now, in the Square Online editor, click Home and Add page.
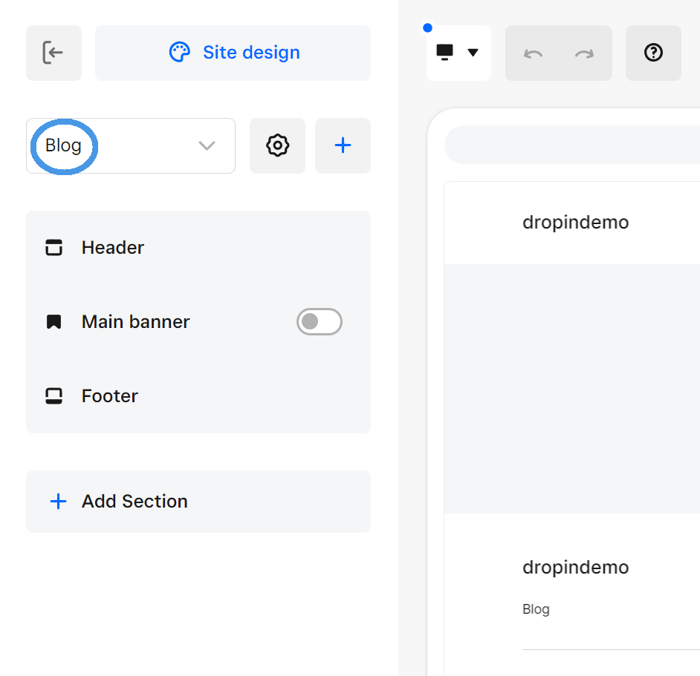
Since we’re adding a blog, we want a separate, dedicated blog page. Click [blank page] and give your blog page a suitable name. We’ll call ours Blog. Tick the Add page to navigation box and click Add.
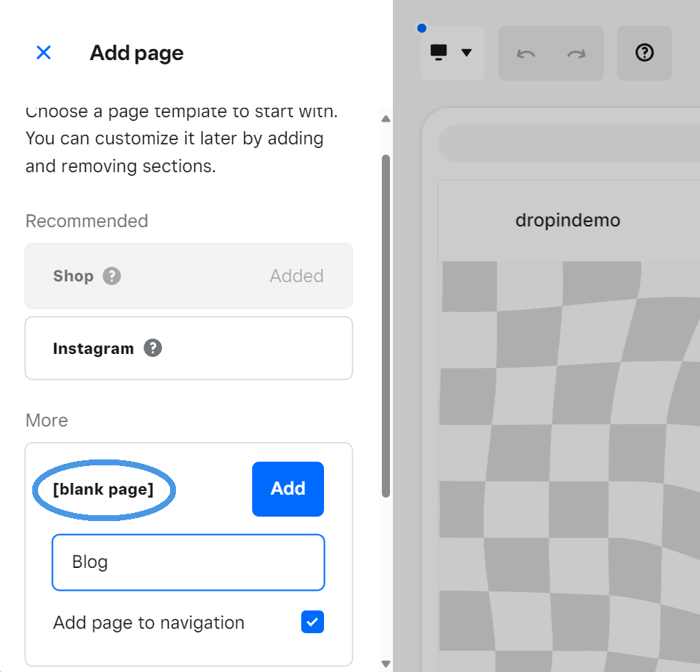
Next, select your Blog page.
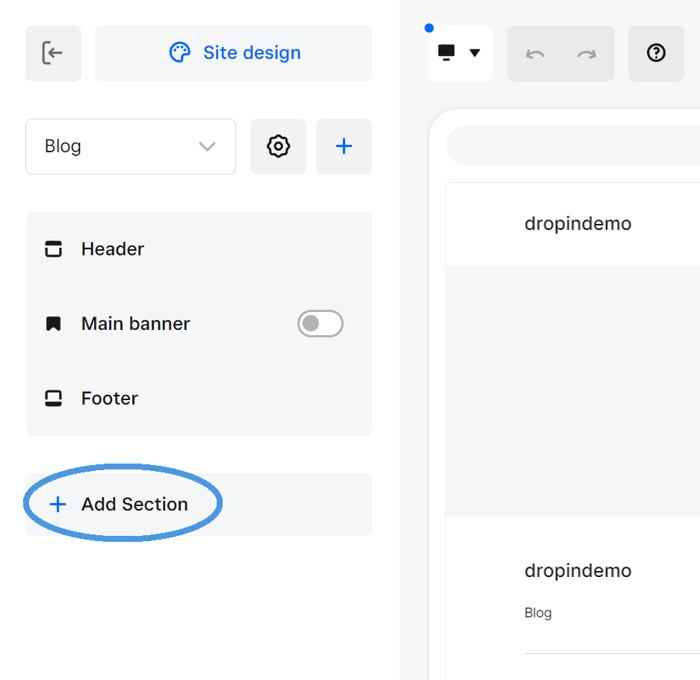
Step 6: Paste Your Blog Code into an Embed Section
Click Add Section.
Scroll down until you see Embed code.
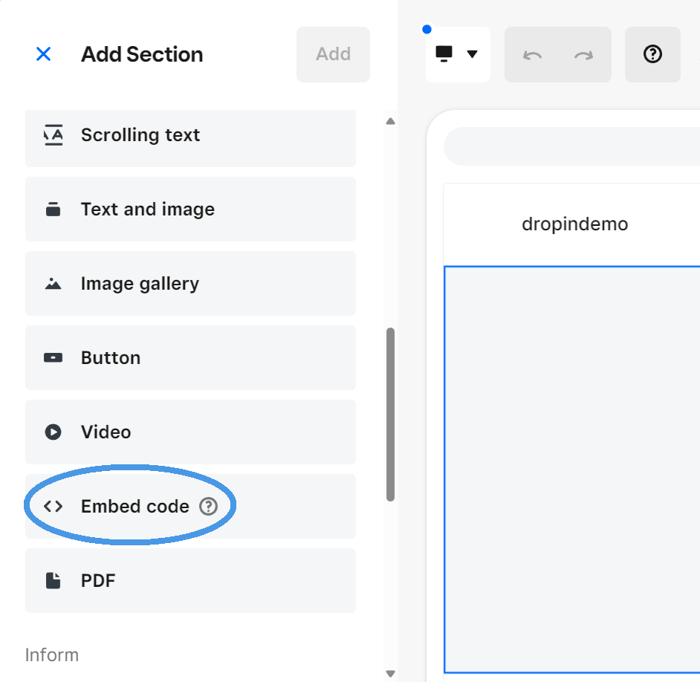
Click it and choose one of the three section layouts.
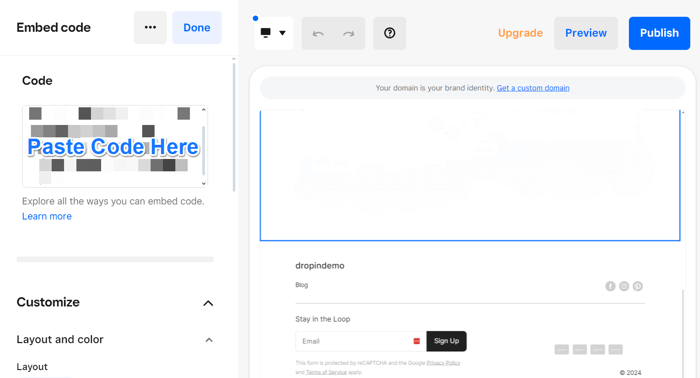
Now, head over to DropInBlog again. Click Code & Layout in the navigation menu and copy the code under Blog Code.
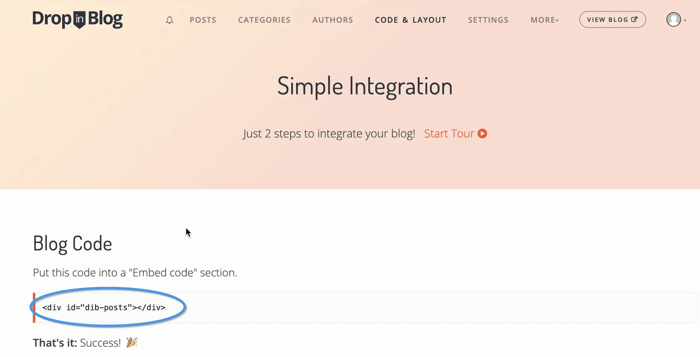
Head back to the Square Online editor and click inside the new page section you added. Paste the code you copied in the text area, that is, the box under Code.
Step 7: Publish and View Your New Square Blog
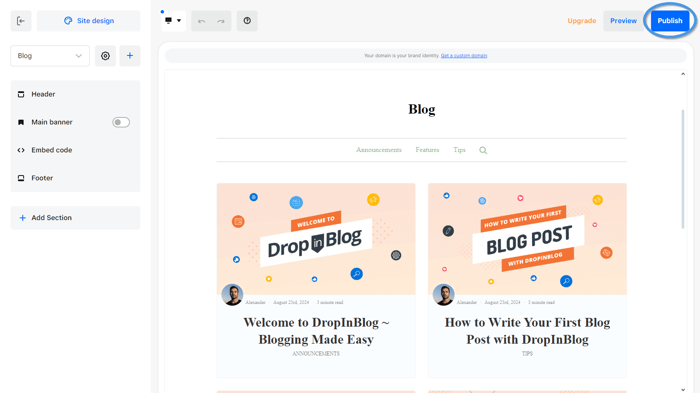
Click Done, then click Publish.
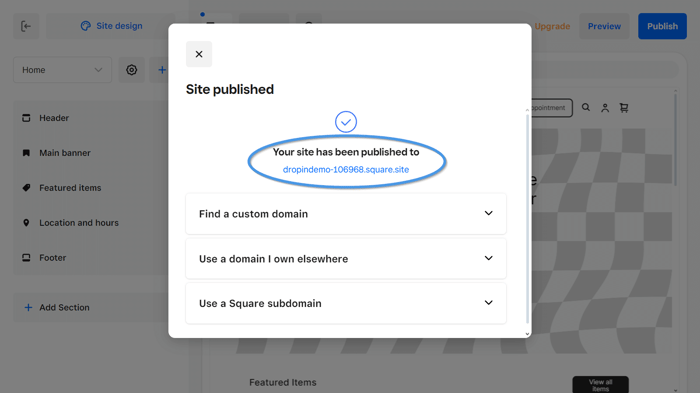
You’ll see a popup window telling you that your site has been published and showing you the domain where it’s been published. Click on the link to view your site.
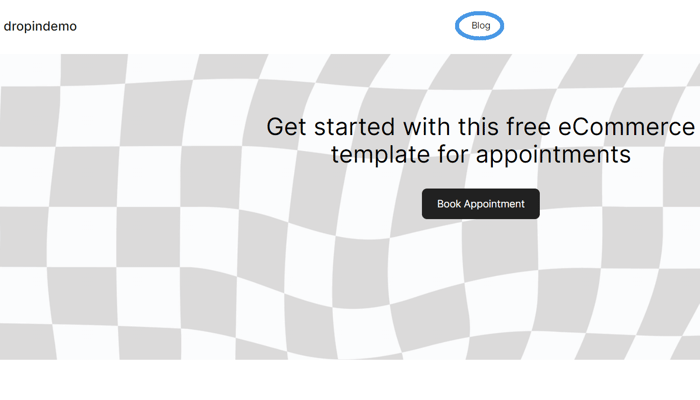
When you click the domain, you’ll see what your website looks like to your visitors. Click Blog in the navigation menu to check out your blog.
Last but not least, to access your DropInBlog account directly from Square, click Settings in your Square dashboard and then App Integrations. Clicking Visit will take you to the Blog Posts page of your admin area, where you can manage your existing blog posts or add new ones.

What You Can Do Once Your Square Blog Is Live
With the integration done, everything content-related happens in DropInBlog:
Optimize every post with the SEO Analyzer: real-time content scoring against your target keyword.
Get found in AI search: Mention Boost™ suggests the structure and formatting that ChatGPT, Perplexity, and Google's AI Overviews favor.
Organize with categories and authors: build reader trust and internal linking automatically.
Reuse CTAs and signup forms across posts with Smart Snippets™.
Track results: connect Google Analytics and see your blog metrics inside DropInBlog.
Let visitors listen: Blog Voice AI™ turns posts into audio automatically.
FAQs
Does DropInBlog on Square get indexed by Google?
Yes, blog posts made on your DropInBlog account are indexed by Google, and all traffic is linked to your site. You can also make use of the SEO Analyzer tool to optimize your posts further to get the best rankings possible.
Can I add a blog to my Square website?
Yes, in two ways. Square Online's built-in Stories feature handles basic posts on any plan. For a full blog with SEO tools, schema markup, and categories, install DropInBlog from the Square App Marketplace (requires the Plus plan or higher for the embed section). Setup takes about three minutes.
Does Square Online have a free blog feature?
Yes. Stories is included on all Square Online plans, including Free. The embed-code section needed for a third-party blog like DropInBlog requires Plus or Premium.
Thank You, and Happy Blogging!
That's both ways to blog on Square Online: Stories for the basics, DropInBlog for a blog that's built to rank in Google and AI search.
If you’d like to ask us anything, don’t hesitate – we’re always here for you. Happy blogging, and all the best with your online venture!


