
Key Takeaways
The best way to add a blog to your Thinkific site is with DropInBlog!
The free trial and quick setup let you test it in a few minutes.
DropInBlog has different pricing plans for individuals and teams.
Thinkific doesn't have a native blog feature, and Thinkific's own support docs recommend DropInBlog as the official blog solution.
In this guide, you’ll learn what the best way to add a blog to Thinkific is and how to easily create one.
Table of Contents
- Key Takeaways
- TL;DR
- Does Thinkific Have a Blog Feature?
- How to Add a Blog to Thinkific Using DropInBlog
- What Happens After You Install the DropInBlog App
- Link to an External Blog from Your Thinkific Site
- Use Custom Pages Instead of Adding a Blog
- DropInBlog vs. Custom Pages vs. External Blog Links
- Thinkific Blog Examples
- Why a Real Blog Matters on Thinkific
- The Best Blogging Option for Thinkific: DropInBlog
TL;DR
Thinkific doesn’t have a native blogging feature.
DropInBlog is Thinkific’s recommended solution for adding a blog to your online school. It is also the most complete blog integration method.
Otherwise, you can link to an external blog or create a blog using the platform’s custom pages.
Adding a blog to Thinkific with DropInBlog takes only a few steps and, in turn, gives your Thinkific online school a full-featured blog.
Does Thinkific Have a Blog Feature?
Thinkific doesn’t have a native blogging system. You can create a blog on Thinkific by using one of the following three methods:
Use custom pages in Thinkific. However, custom pages only mimic a blog and aren’t a real substitute for a full-featured blog.
If you’ve already created a blog on another platform, link to your blog from Thinkific’s navigation.
Create a blog using the DropInBlog app, a complete blogging solution you’ll find in Thinkific’s App Store.
How to Add a Blog to Thinkific Using DropInBlog
To create a blog on Thinkific, you'll need to install the DropInBlog app and follow a few simple steps to add a full-featured blog to your site.
Step 1: Install the DropInBlog App
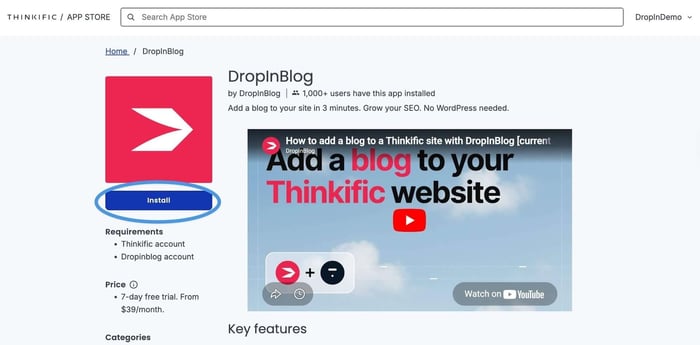
Find the DropInBlog app on the Thinkific App Store.
To access the App Store from your Thinkific account, go to Integrations --> Explore Apps.
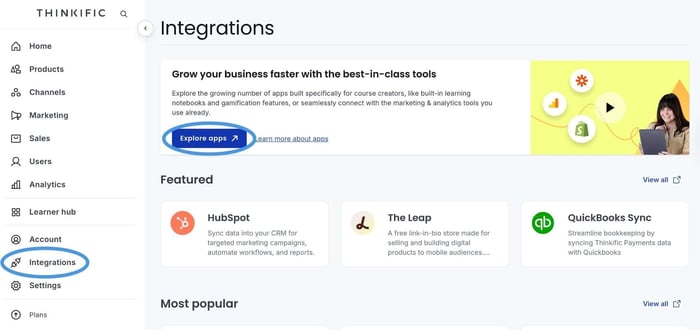
Once you locate the DropInBlog app, proceed to install it.
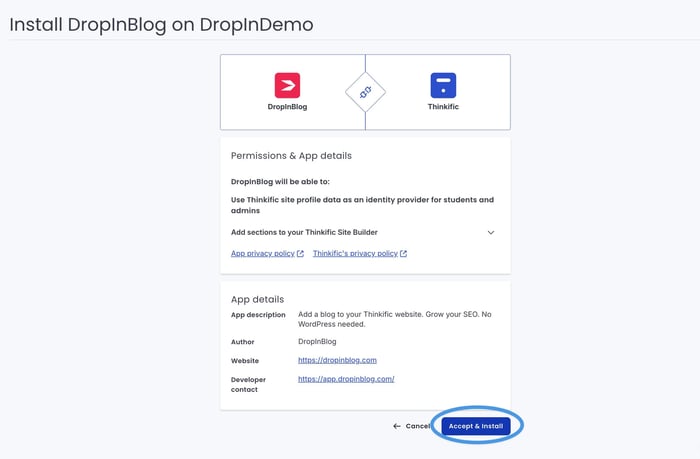
You will be prompted to allow DropInBlog to use your Thinkific data to create an account. Select Accept & Install.
On the following screen, you’ll have the option to invite your team members to help you manage your blog.

Add their email address in the text field, and use the dropdown on the right to assign them a role. You can also leave this step for later and invite your team members after you’ve added a blog to your Thinkific site.
During the installation process, a DropInBlog account will automatically be created for you, and you’ll be directed to the Code & Layout page of your DropInBlog account. You won’t be able to manage your blog content yet, as you’ll need to create a blog page in your Thinkific account first.
Step 2: Create a Blog Page
Once the DropInBlog app is installed, you need to create a new page on your site where you'd like to show off your new blog.
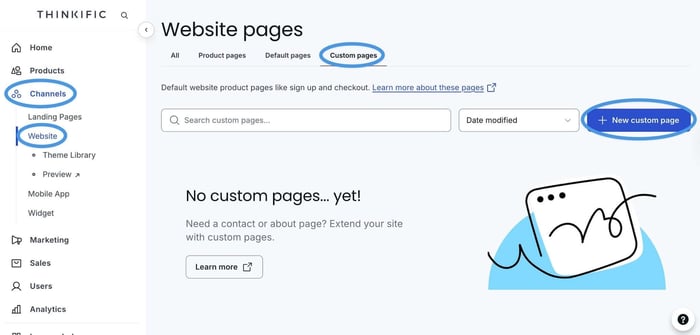
From within your Thinkific account, navigate to Channels on the left sidebar and select Website. Then, click the Custom Pages tab at the top of the page, and select the New Custom Page button on the right side of the screen.
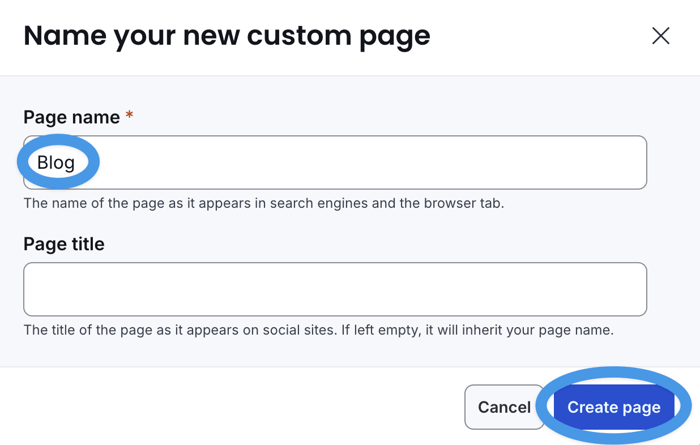
The purpose of this step is to create a new Thinkific page where you’ll add your blog. Before Thinkific takes you to its page editor, you’ll see a pop-up where you should customize your page name and title. Name your new page “Blog,” or choose any page title you like, then click on Create Page, and your new page will be created.
Step 3: Add DropInBlog to Your New Thinkific Blog Page
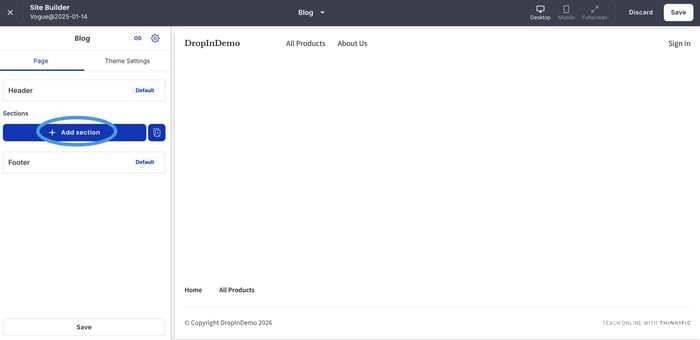
After creating a new custom page for your blog, you’ll be automatically directed to the page editor.
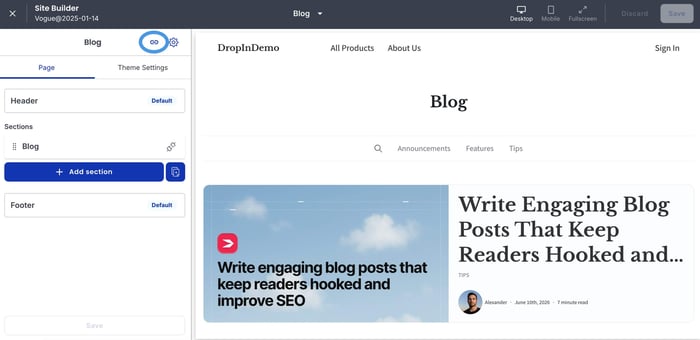
Once inside the editor, delete any elements that are added to the top of the page by default, like the banner section. You should remove it so that the first thing your blog visitors see when they open this page is your blog content.
Then, look for the Add Section option on the left sidebar and click on it.
Scroll to the bottom of the pop-up and click on Blog, which is listed under DropInBlog. The four demo posts from your DropInBlog account will automatically be pulled into your new page!
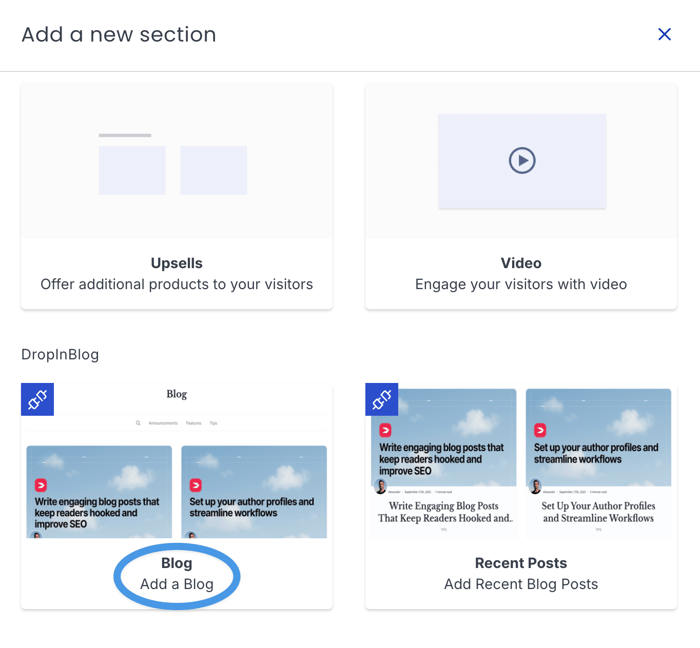
Click Save, and a blog will be added to your Thinkific website!
Before you proceed to the final step, you should double-check if the DropInBlog-Thinkific integration was successful.
To do that, click on the link icon in the menu on the left to copy your blog URL.
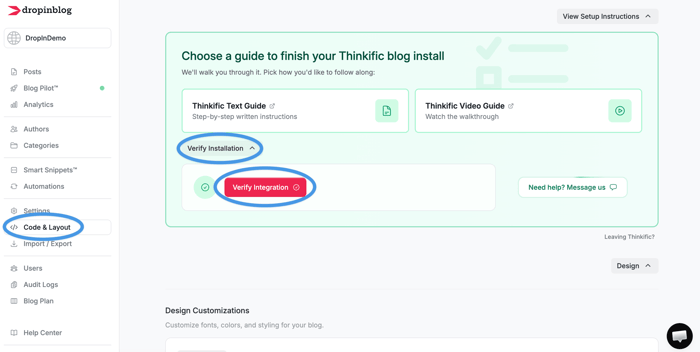
Next, navigate to the Code & Layout page of your DropInBlog account, expand the Verify Installation menu, then click on Verify Integration.
Next, paste your blog URL in the text box under Blog Page URL, then click on Check Integration.
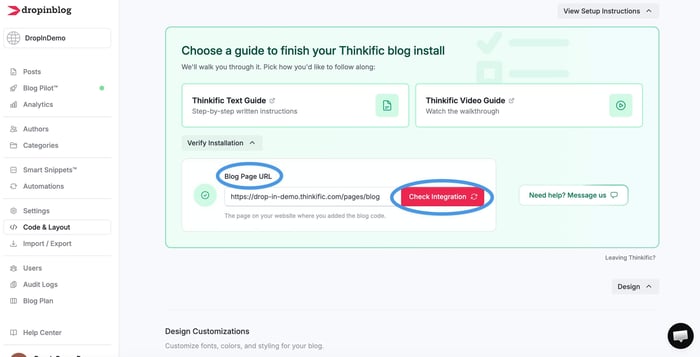
If everything is set up correctly, you’ll see a success message saying that your blog is live.
Step 4: Add Your New Blog Page to Your Website Menu
Once you're ready to show off your new blog to the world, you need to add a link to it from your navigation menu. Our advice is to delete the demo blog posts first, and then add your own content from the Posts page of your DropInBlog account. Once you have some content on your blog, you can link it to your navigation menu within the editing section of any page you've created for your Thinkific site.
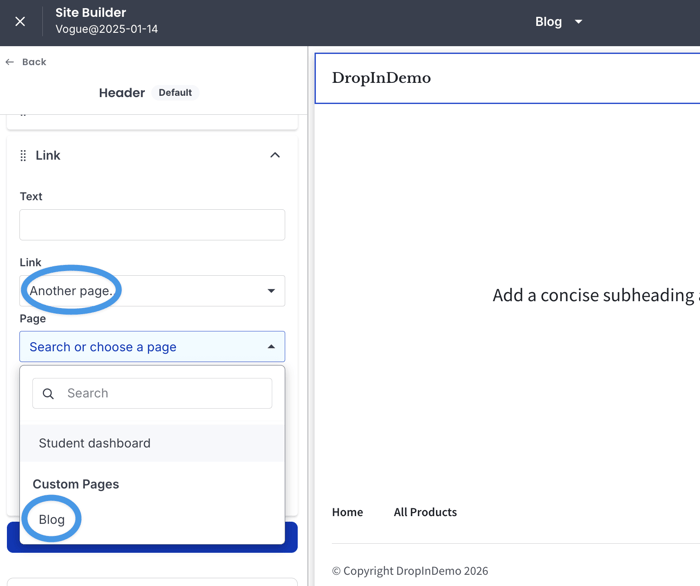
To do this, open Thinkific’s page editor, then add a link to the header block. You’ll see a few options to customize your new menu link, including where it will take your visitors. To direct them to your blog, select Another page in the Link dropdown, and find your blog in the Page menu.
To watch a video tutorial or read a step-by-step guide on how to add a blog link to your Thinkific site menu, read our Thinkific support doc.
What Happens After You Install the DropInBlog App
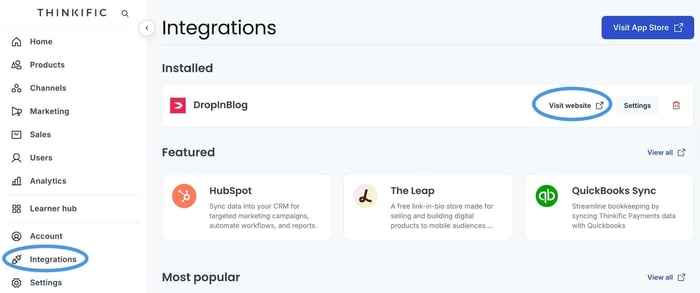
As we mentioned earlier, when you install the DropInBlog app at your Thinkific school, a new DropInBlog account will be created for you automatically. You can access your account by selecting Integrations from your Thinkific dashboard, then clicking the Visit website link to the right of DropInBlog.
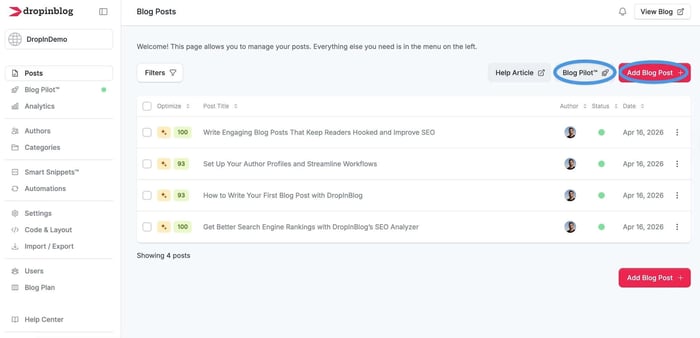
Doing so will take you to DropInBlog’s Posts page, which is where you’ll add all your blog content. Don’t worry – everything you create from within your DropInBlog account will automatically sync with your Thinkific site.
You can start a new blog post in two ways:
By clicking the Add Blog Post button in the upper-right. Selecting this option will take you to the DropInBlog editor, where you can easily add and structure your content.
By clicking the Blog Pilot™ button, which will open DropInBlog’s content planning tool. It will scan your website, conduct keyword research, automatically identify topics relevant to your blog, and sort them by search volume and keyword difficulty.
The second option, launching Blog Pilot™, is a good choice if you don’t know what to write about. The content tool will suggest topic groups, and once you find a topic you like, it will generate blog post title ideas and outlines. You can move all the data into the DropInBlog editor and use its features to create visually-appealing and SEO-friendly content.
Inside the DropInBlog content editor, you can:
Start writing inside the content area or paste your content from Google Docs without losing the original formatting.
Optimize your blog posts for Google with the built-in SEO analysis tool, which offers real-time suggestions to improve your content.
Assign authors and categories to your content, show related posts below your content, customize your blog URL slug, and much more.
DropInBlog is also designed to automatically take on the look and feel of your Thinkific theme. It uses your fonts and colors to blend seamlessly into your site. If you want to make more changes to your blog’s design, open the Code & Layout page of your DropInBlog account.
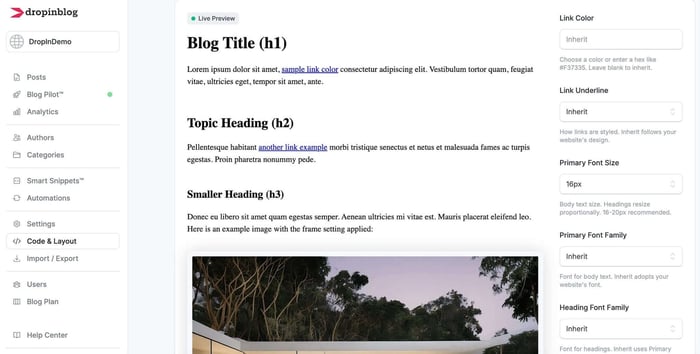
Here, you can make some small design tweaks to your blog using the Design Customizer, add your own CSS, and change the blog layout to make your blog look exactly how you want.
If you want to increase your blog’s visibility, add your recent posts to any page on your Thinkific website. Here’s how:
Open the page where you want to display your recent blog posts.
Once in the editor, click on Add section, and select DropInBlog’s Recent posts widget.
You’ll find more detailed instructions in our support doc.
Now, let’s see the other two methods of embedding a blog on Thinkific.
Link to an External Blog from Your Thinkific Site
This blog integration method might be a suitable solution if you already have a blog and want to display it on your Thinkific website.
Alternatively, you can import your existing blog into DropInBlog and add a blog to your site using the first blog integration method. If your blog is hosted on WordPress, you can easily move all your content over to DropInBlog with its WordPress plugin. Or if your blog is hosted elsewhere, you can use the CVS-based import tool to switch to DropInBlog.
Keep in mind that linking to an external site is less effective for SEO, since your blog lives on a separate domain. Additionally, the user experience isn’t optimal as moving between two platforms breaks the cohesiveness of the visitor’s journey.
To add a blog to Thinkific this way, follow these steps:
Visit the blog you created on another platform, and copy the page link.
Open the Thinkific editor, then click on the Header element on the left to open its settings.
Once in the Header settings, click Add Link.
Add the details of your external blog: under Text, add the name of your blog, select A custom URL from the Page dropdown, and paste your blog link in the field underneath it.
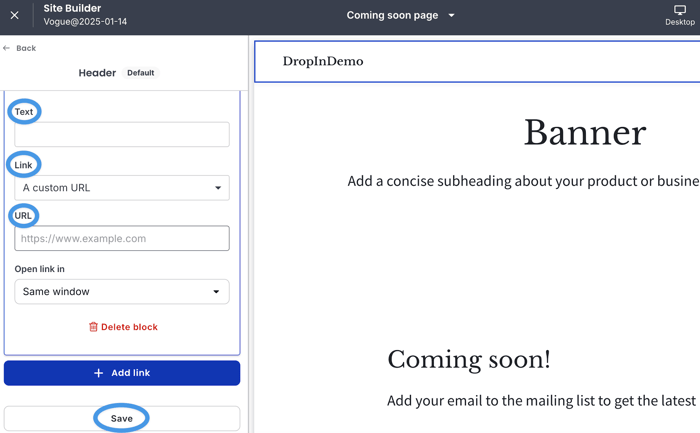
When you save your changes, the link to your external blog will appear in your Thinkific site menu.
If you don’t want to use this method, custom pages are a workaround for Thinkific’s blog limitation.
Use Custom Pages Instead of Adding a Blog
Using Thinkific’s custom pages, you can create a blog – well, sort of. In practice, this would mean creating one page where you’d list the links to all your posts, and adding a new page for each blog post, which, at the very least, is time-consuming. Again, this method isn’t a real solution for blogging on Thinkific, but only a workaround that may be useful if you post once every two or three months.
Here’s how you can do that:
Create a new custom page by going to Channels → Website → Custom pages → New custom page. In the pop-up that appears, add your blog’s name.
Once in the page editor, click Add section on the left, then select Text & Media. This will serve as your blog homepage, where you’ll add titles, descriptions, and links to full-length articles for all your blog posts.
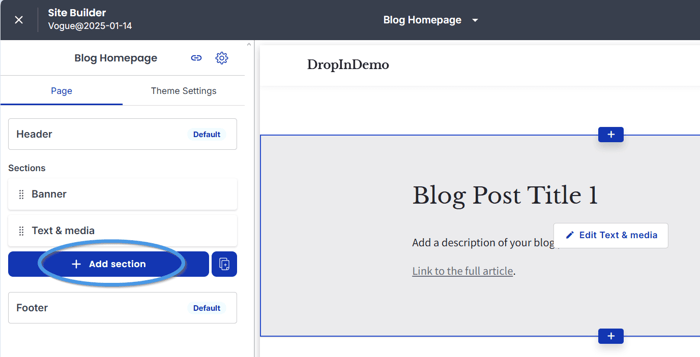
To add a new blog post, create a new custom page, and add the Text & Media section where you’ll add all your post content. Publish the page and copy the page URL.
Return to the first custom page you’ve created and paste the link to your blog post to the corresponding section. Repeat the steps for every new blog post.
This method is the closest thing to the Thinkific blog feature, and it has several downsides, including:
It’s only a workaround, and it can’t replace a blogging feature.
Manually creating pages and managing your blog this way is time-consuming.
Some basic blogging features (e.g., categories, E-E-A-T-friendly author pages) are missing.
Blog navigation can be tricky.
Recent blogging statistics from Marketing LTB show that 60% of bloggers post at least once a week. With a similar posting schedule, your blog would have 50+ blog posts every year. Now, imagine your site’s menu and the links to individual blog pages after 2–3 years. This makes this method a non-scalable option.
DropInBlog vs. Custom Pages vs. External Blog Links
If you’re unsure about the best way to add a blog to your Thinkific site, the following use cases might help you decide:
If you want a fully-featured blog with built-in SEO features, use DropInBlog.
If you don’t want to change your blogging platform and are established elsewhere, linking to an external blog should meet your needs.
Thinkific’s custom pages will serve you well if you post only occasionally.
To help you even further, we included a brief comparison of the blog integration methods discussed in this guide below.
Feature | DropInBlog | Thinkific Custom pages | External blog links |
Best for | Thinkific schools that need a full-functioning blog | Thinkific schools that blog several times per year | Thinkific schools that have an established blog on another platform |
Easy to set up | ✓ | ✗ | ✓ |
SEO value | ✓ | ✗ | ✗ |
Scalability | ✓ | ✗ | ✓ |
Centralized content management | ✓ | ✓ | ✗ |
Low maintenance | ✓ | ✗ | ✗ |
Seamless user experience | ✓ | ✗ | ✗ |
Branding consistency | ✓ | ✓ | ✗ |
Thinkific Blog Examples
Take a look at some Thinkific sites that have created full-featured blogs. Each of these schools has a blog with a clean content hierarchy and a design that matches the rest of the site.
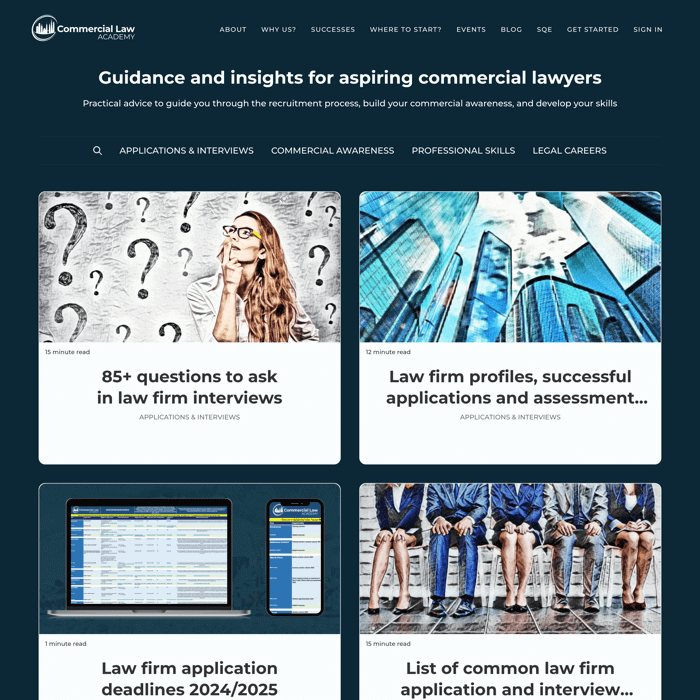
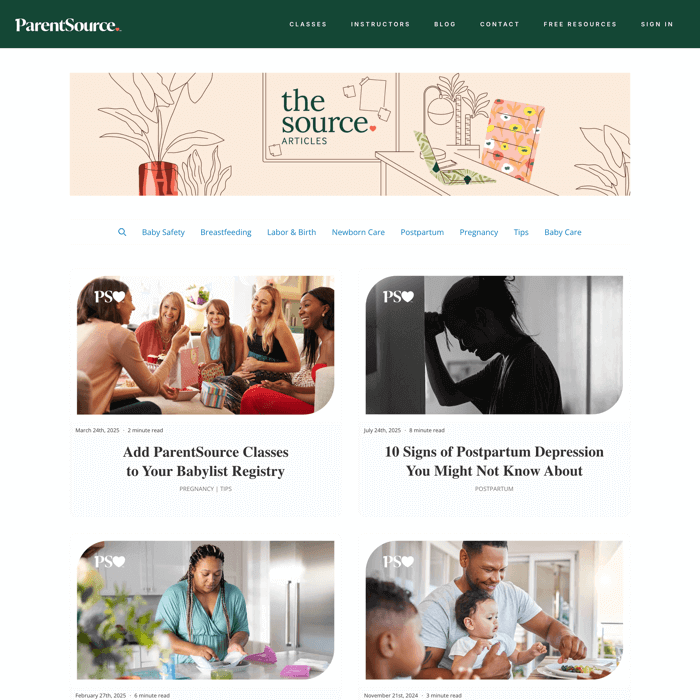
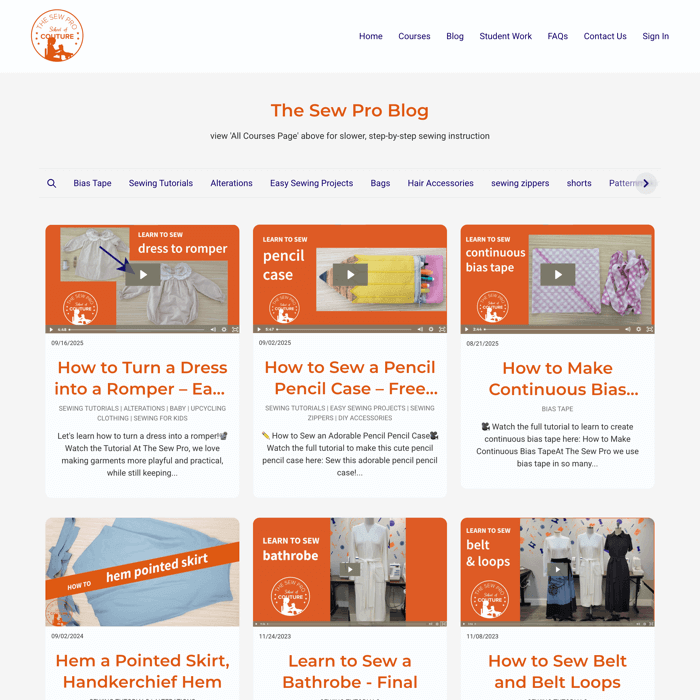
For more Thinkific blog examples, visit DropInBlog’s Thinkific examples page.
And if you want to enhance your SEO results, this detailed guide on optimizing your Thinkific site and courses for better Google rankings will help you with that.
Why a Real Blog Matters on Thinkific
Adding a fully functional blog to your Thinkific site gives you a new channel to build relationships with both new and existing audiences.
Your Thinkific blog is a place where you:
Share the information about your new online courses.
Answer the questions your future students might have before enrolling in your course.
Build trust with your audience by sharing your knowledge and experiences.
Offer discounts and early-access offers exclusively to your blog visitors.
In turn, your Thinkific school will benefit from:
Increased online course signup rates
Better visibility in search results
Building an engaged audience
Attracting and nurturing leads without relying on paid advertising
Thinkific vs Teachable for Course Creators Who Blog
Both Thinkific and Teachable have similar gaps, as neither has a real native blogging engine. The differences for content-driven creators:
Thinkific officially recommends DropInBlog for blogging (in their support docs); Teachable doesn't have an officially-endorsed blog partner.
Thinkific's Communities integrate more tightly with course content, while Teachable focuses more on direct course sales.
For SEO-led course funnels, both platforms work.
Here's a quick guide on how to add a blog to your Teachable site, if you already use it.
The Best Blogging Option for Thinkific: DropInBlog
Creating a blog on Thinkific can help you attract and educate your visitors and turn them into customers. You can accomplish all of this with a full-featured blog, DropInBlog.
The professional blogging app is easy to install, fits your Thinkific site design perfectly, and has all the features you need to run a successful blog.
Here’s a 30-second video of the DropInBlog blog installation showing just how quick and easy it is to add a blog to Thinkific with DropInBlog:
And, remember, DropInBlog is always here to assist you in every step. So, if you have any questions, let us know.
Happy blogging!