
Key Takeaways
- The best way to add a blog to your Jamstack site is with DropInBlog!
- The free trial and quick setup lets you to test it in a few minutes.
- DropInBlog has different pricing plans for individuals and teams.
In this tutorial, I'll show you how to switch from using client-side JavaScript to power your DropInBlog blog to using it as a fully functioning “headless blog” with the assisted power of Eleventy and Netlify on the Jamstack.
Jamstack and the use of headless CMSs are extremely modern methods of web development. These modern methods abstract the complexity of websites away from the website code itself to other services.
As a DropInBlog user, you're already abstracting the blog on your website by using the DropInBlog embed code. However, using embedded client-side JavaScript means you rely on your audience's web browser, and that restricts your ability to work on SEO.
One of the great features of DropInBlog is that it can be used as a fully functioning headless blog. This means that we can pull your blog content from DropInBlog and use Jamstack methods to generate a fully functioning blog, removing the need for that client-side JavaScript and opening you up to all the available SEO options.
The following tutorial will guide you through the process of switching from a client-based JavaScript blog to a Jamstack-built blog.
Sometimes it's great to go with static hosting because it is simple, fast, and secure. But you don't want to give up features like having a blog. DropInBlog fits the bill perfectly here. JAMstack!
Table of Contents
Prerequisites
This tutorial is for people who already have experience using Git and GitHub, as well as JavaScript and npm with a CLI tool. If you get stuck during this tutorial, you're welcome to hit us up on chat, and we'll be happy to help. 😊
Getting Started
Before we can begin making changes to the code itself, we'll need to switch to a hosting platform better designed for static site hosting and deployment, which in this case, is Netlify.
Hosting options have come a long way since SFTP. Netlify can host and automatically deploy changes you make to your project without the need to drag and drop files into an FTP application.
To get set up, create a Netlify account using your GitHub login and use the New site from Git option in the dashboard. By using this option, you'll be selecting an existing Git repo on your GitHub account to source the files for your website. The official Netlify blog has a full guide for these steps if you need more assistance.
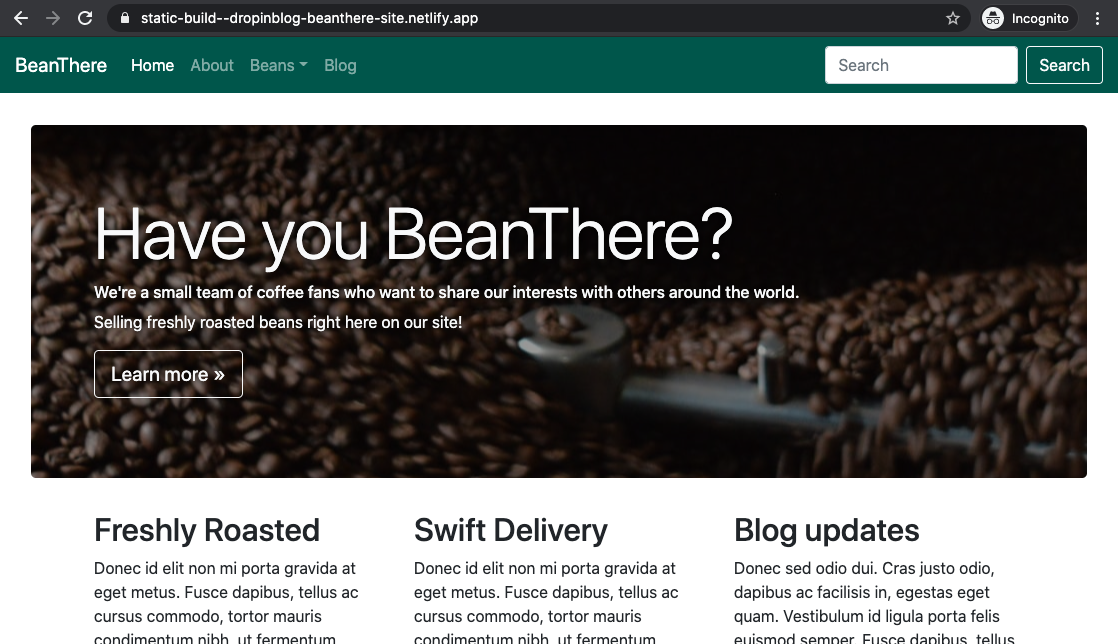
To help you follow along, I've created a site so you can see what's happening at each step of the process: Welcome to BeanThere, my example website selling a varied selection of freshly roasted coffee beans. The above screenshot shows my website hosted on Netlify. Follow this link to my GitHub repo, or check out the screenshot below to see what the file structure and files within look like.
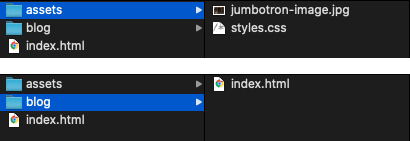
As shown in the screenshot, my site is constructed of some HTML, CSS, an image, and some JavaScript, which is my DropInBlog embed code. You can check out the live version of the blog I made using the embed code.
Using a Static Site Generator
Rather than inserting the blog content into our site using JavaScript and embedding it, we're going to use Jamstack technology to generate the blog page and all the blog post pages.
To generate those pages, we're going to use a Static Site Generator. For this tutorial, we'll be using Eleventy, a static site generator that gives us just the right amount of power to automatically generate our blog page and blog posts.

To kick things off, create a file at the top level of your site project called .eleventy.js. This file is how we'll control how Eleventy behaves and what data it has available – that data will be the posts from DropInBlog. If you have more questions about Eleventy (e.g., what it is and how it works), check out the official Eleventy documentation.
Because we're dealing with an API external to the site we're building, we'll need to bring in node-fetch as a dependency. Create a new package.json file and use npm to install the dependency:
npm install node-fetch --saveOnce the dependency is installed, return to the package.json file. It should now include something like this:
{
"devDependencies": {
"node-fetch": "^2.6.0"
}
}
Pro tip: You can use the command npm init to initiate the npm setup process and create your package.json file. However, you can also create the file and add a pair of empty curly brackets {}. You might find this easier to maintain with smaller projects. 🧰
Fetching Blog Content in Eleventy
We can now start using node-fetch that's installed in our main Eleventy file. Let's put together some JavaScript to fetch your posts from DropInBlog:
// Bring in node-fetch dependency from installed packages
const fetch = require("node-fetch");

// Create an asynchronous function that will retrieve the DropInBlog content
async function getPosts() {
  // The content will eventually arrive, so we'll have to wait for it
  return await fetch(
    // DropInBlog API endpoint
    // Update this line here 👇👇👇
"https://api.dropinblog.com/v1/json/?b=XXXXXXXXXXXXXXXXXXXXX&includecontent=1"
  )
    // Clean up the response and return just the posts
    .then((res) => res.json())
    .then((json) => {
      return json.data.posts;
    });
}
I've gone through the code and added comments to provide more detail. If you're not super familiar with the code, then feel free to copy this directly into your .eleventy.js file. You can also visit my GitHub repo and copy the whole JavaScript file.
To briefly explain, we're using the fetch dependency we installed to head over to the DropInBlog API and grab all our blog content, then format it into JSON, and finally into a JavaScript object.
The only part of the code you'll need to change is the DropInBlog API endpoint, which is noted in the code comments:
"https://api.dropinblog.com/v1/json/?b=XXXXXXXXXXXXXXXXXXXXX&includecontent=1"You can find your own DropInBlog API endpoint by logging into your DropInBlog account, clicking on Code & Layout, and then clicking on Alternate Integrations. There you'll find a link to the JSON API documentation.
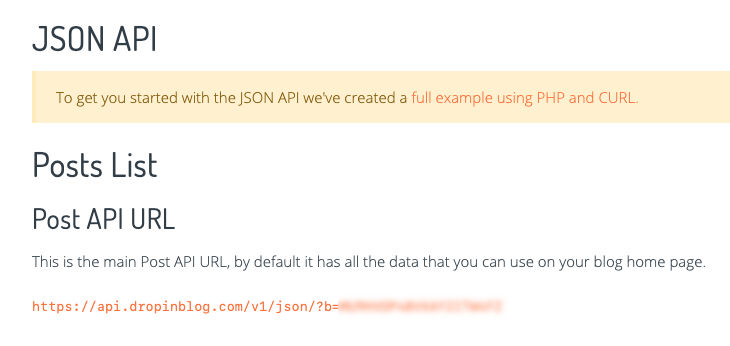
Copy the URL and replace the URL in the JavaScript code, making sure &includecontent=1 is added to the end of the URL, like in the code example.
The code we've added will retrieve the blog posts, but we need to pass it on to Eleventy to expose it to the files in our project. Let's do that with a combination of JavaScript and some Eleventy-specific code:
// Start of configuring Eleventy for the project
module.exports = function (eleventyConfig) {

  // Copy `assets/` to `_site/assets`
  eleventyConfig.addPassthroughCopy("assets");

  // Create an Eleventy collection from DropInBlog posts
  eleventyConfig.addCollection("posts", async function (collection) {
    collection = await getPosts();
    return collection;
  });
};
As you'll see above, we're exporting an Eleventy configuration we've set that will get passed to Eleventy itself, as well as to our whole website project. Within this configuration, we're making sure our assets folder is included in the final generated website.
Additionally, we're creating a collection in Eleventy. These collections are a group of items that can be referenced and iterated over; in our case, the collection is a group of blog posts.
The next thing we need to do is test the code and output the blog content.
Templating
The previous steps and code we've added will allow us to start using template code. Template code, if you're not familiar, is something we can use alongside standard HTML to output data. For our purposes, the data is the collection of blog posts we created in the previous step.
Open your existing blog HTML page and add the following code somewhere visible, such as next to your existing DropInBlog embed code, directly into the page:
<code>
  <pre>{{ collections.posts | dump }}</pre>
</code>
The default templating language in Eleventy is Nunjucks. Find out more about templating in the Eleventy docs.
Once you've added this code and saved the file, run the following command in your CLI tool:
npx @11ty/eleventy --serve --watchIf everything is set up right, Eleventy will take the files in your project, pass the DropInBlog data to those files, generate the website, and launch a local server to view the resulting website.
Navigate to localhost:8080 in your web browser, and you'll see your static website running. Next, navigate to the blog page and check the position where you added the template code, and instead, you should see a long string containing all your blog post content and data.
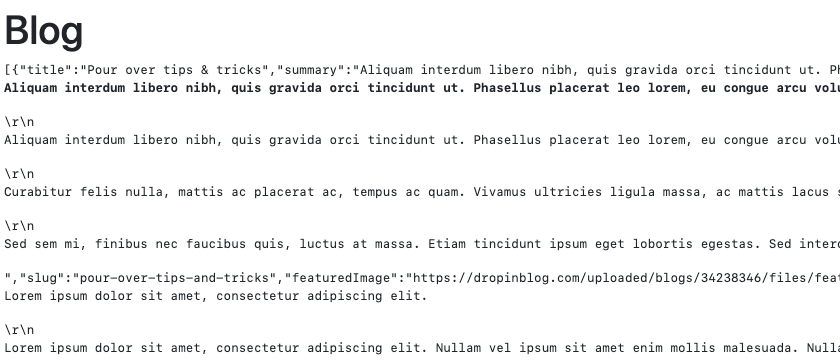
Congrats! You just pulled live data down from an API and served it up on a running website. 🔥
Template Loops and Routes
Let's turn that big long string of data into a blog index page and single blog post pages with some more template code.
Return to your blog page HTML file and locate a position in the code to show your blog, which will most likely be the same place where your existing DropInBlog embed code is. We're going to replace that code with a Nunjucks “for loop.” Here is a simplified example of my blog post list code:
<h1>Blog</h1>
<div>
  {% for post in collections.posts %}
  <article>
    <img src="{{ post.featuredImage }}" alt="{{ post.title }} feature image" />
    <div>
      <h2>
        <a href="/blog/{{ post.slug }}/">{{ post.title }}</a>
      </h2>
      <p>{{ post.summary }}</p>
      <aside>
        <time datetime="{{ post.publishedAt }}">
          Published on {{ post.publishedAt }}
        </time>
        <span> by {{ post.author.name }}</span>
      </aside>
    </div>
  </article>
  {% endfor %}
</div>
Within this code, you can see the various data points that match up with your blog post data. Things like featuredImage and author.name with curly brackets around them are placeholders for Eleventy to feed in the data and replace when the HTML page is generated.
The for post in collections.post will iterate over each blog post and generate each item as a post preview, along with a link to the blog post.
Switching back to the locally running site will let you see the results of what you just added. Make sure to keep the CLI window open and running, as it'll keep the local site running and will provide any error messages if you mistype something. Again, if you're having trouble getting the code running on your own project, check out mine on GitHub.
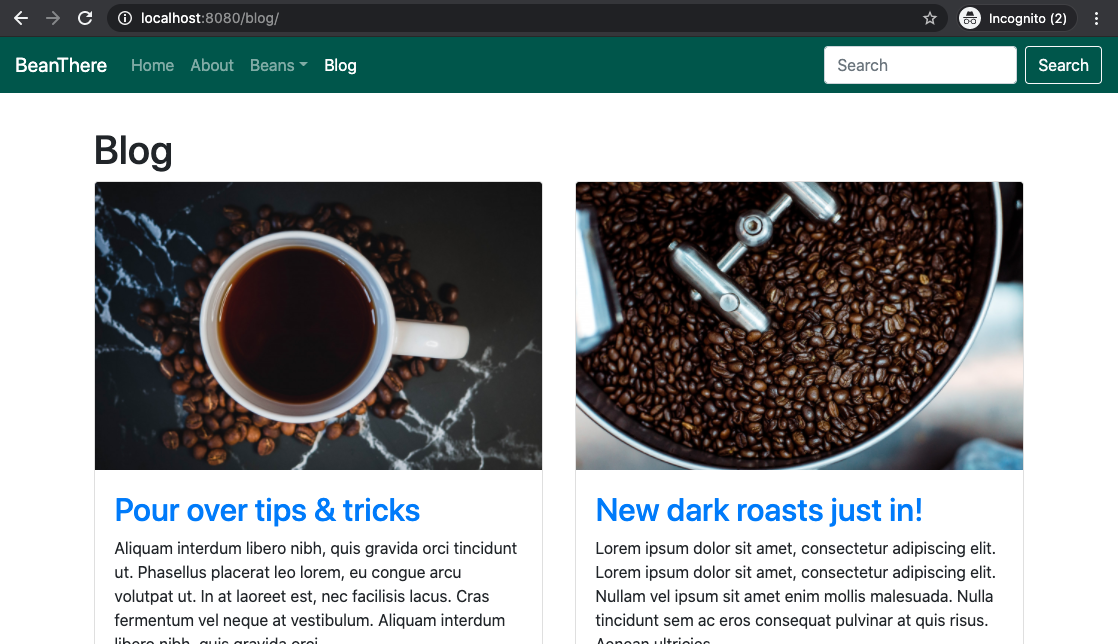
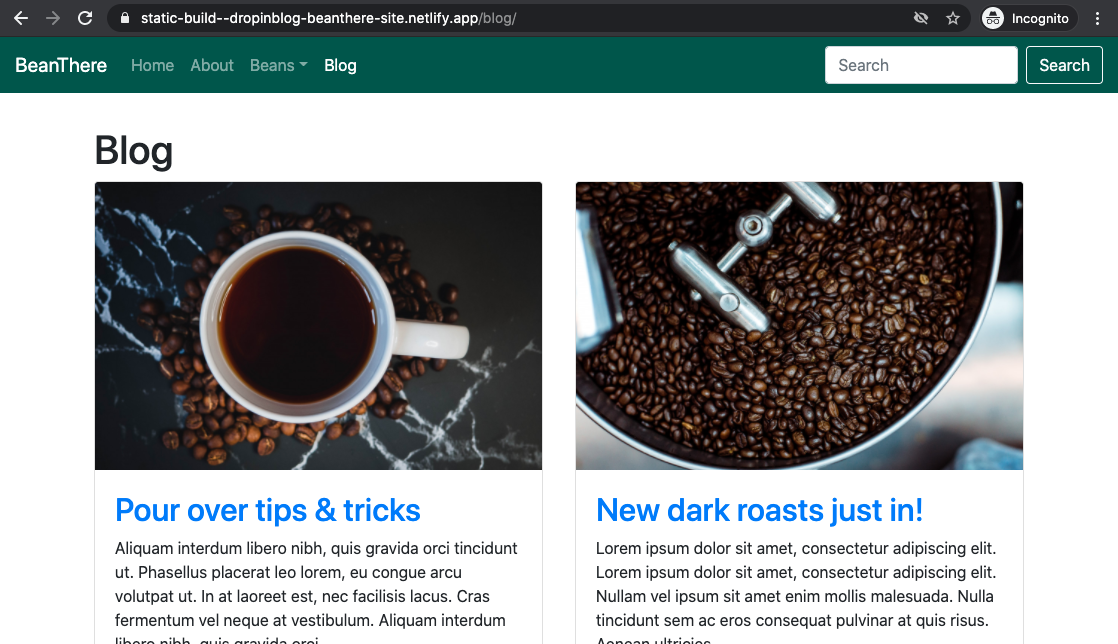
Above is what my blog looks like at this stage. I've also added some CSS to give it more of a “blog-esque” look.
If you've clicked on one of the blog posts, you may have noticed an issue: all the blog posts show an error. That's because we haven't created those single blog posts yet. We need to use the posts collection to generate those pages. Thankfully, Eleventy has a clever method of automatically generating pages from collections.
Generating Pages From Collections
To do this, create a new single blog post template called posts.html at the top level of your project. For my project, I duplicated the main blog.html file and renamed it to posts.html. I'll then remove the main blog list area and add the single blog post template code.
Because this template file will be used to generate all the blog post pages, we need to use some special Eleventy code to pass the collections data along. At the very top of the template file, before any other code, add the following:
---
pagination:
  data: collections.posts
  size: 1
  alias: post
  addAllPagesToCollections: true
permalink: "/blog/{{ post.slug }}/"
---
This code is what's known as “frontmatter,” a method of setting variables within a template file. Here, we're taking advantage of the pagination feature in Eleventy. Typically pagination shows a subset of maybe 10 posts before the posts are split onto another page.
Clicking to the next page would then show the next 10. In this case, we're setting the pagination to one, so one post per page. We're also setting the URL – the permalink – to be based on the post slug. All this working together means that each post will be outputted to its own HTML page and file named after the blog post slug.
To complete these single blog posts, we need to use some template code to output the post title, content, and any other attributes we want to show on the page. Here's an example:
<div class="single-post">
  <h1>{{ post.title }}</h1>
  <img
    src="{{ post.featuredImage }}"
    alt="{{ post.title }} feature image"
  />
  <aside>
    <time datetime="{{ post.publishedAt }}">
      Published on {{ post.publishedAt }}
    </time>
    <span>Posted by {{ post.author.name }}</span>
    <p><em>{{ post.readtime }}</em></p>
  </aside>
  {{ post.content }}
  <footer>
    Filed under: {% for category in post.categories %}{{ category.title
    }}{% endfor %}
  </footer>
  <hr />
</div>
Boom 💥! We just generated all our blog posts for the site. Switching back to your local running site and clicking on a blog post link should now show a single blog post.

Deployment
The blog is looking pretty good now. It's probably a good idea to push this code up to your Git repository for Netlify to grab and build out your new site. Before doing so, create a new netlify.toml file at the top level of your project and add the following:
[build]
  command = "npx @11ty/eleventy"
  publish = "_site/"
This is a small configuration file that Netlify will refer to so it understands how to generate the site. Push the code using Git, or if you're using GitHub and aren't familiar with Git, you can drag and drop your project straight onto the repository page.
Once everything is pushed up, Netlify will notice the change and begin the process of generating and deploying the site. Heading over to the Netlify dashboard will let you view the build steps and provide you with a link to the live site. You can see my site running on Netlify now.
The final component of this deployment process is making Netlify aware of content changes. Netlify will know when a developer makes a change to the site, but what if someone makes a change to the blog content in DropInBlog? Well, that's where Build hooks come into play.
Build Hooks
Build hooks are a method of services letting other services know something just happened on a site. Think of them as a pager: it buzzes that something important is happening, but it's up to them to go find out what's actually happened. Using a pager as a reference may cause legacy issues with this article. 😅
In your Netlify dashboard, navigate to Site settings and then Build & deploy. Scroll down to Build Hooks and click Add build hook. Give the build hook a name – something like “DropInBlog build hook” – and ensure the right branch in your repository is selected.
Once that's all set, hit Save, and you'll be shown a special build hook URL. This will be the URL that DropInBlog will “page” when there's a content change, Netlify will then hear that page and begin rebuilding the site.
Build Hooks are a brand new feature in DropInBlog – it was added specifically for using DropInBlog as a headless blog. Log into DropInBlog and navigate to Settings; you'll find a field for a build hook URL at the very bottom of the page. Copy the Netlify build hook URL and paste it into the field. Once you've saved it, it's done!
To see this in action and to test if it's all working, make a content change in one of your blog posts, and then check your Netlify dashboard for a new build hook deploy.
FAQs
Can I integrate DropInBlog with Eleventy?
It is very possible to integrate DropInBlog with your Eleventy site. Better yet, we’ve done all the hard work for you and provided all the code you need to fetch your content from DropInBlog.
Do static sites load faster?
In general static sites do load faster, simply because there are no complex, dynamic features to slow it down.
Is Jamstack better than WordPress?
Jamstack and WordPress are actually quite different when you dig down into it. For starters, WordPress is a CMS designed to be relatively easy to use, whereas Jamstack is a web development architecture system that uses a combination of Javascript, APIs, and Markdown.
WordPress is prone to attacks and generally considered less secure than Jamstack. Jamstack websites are super fast and highly scalable, but Jamstack is harder to set up and requires significant knowledge of Javascript.
Where can I host my Eleventy blog?
Firstly, Eleventy is a static site generator, and like all static site generators, it is self-hosted. Meaning you’ll have to find a hosting provider yourself. Some of the most popular hosting providers include GitHub Pages, Cloudflare Pages, Forge, Firebase, and Netlify.
Mission complete
Within this tutorial, we've taken a static website without any server code and added a live functioning blog, removing the need to use more fragile client-based JavaScript.
To explain the process at a high level, we've enriched a static site with a blog powered by DropInBlog and removed reliance on heavier code. By using headless CMSs and plugging their APIs into configurations like this, sites can become extremely powerful while bringing down the complexity.
There's much more to delve into with DropInBlog as a Headless CMS. Watch this space for more guides and tutorials.


