

Key Takeaways
- The best way to add a blog to your Swipe Pages site is with DropInBlog!
- The free trial and quick setup lets you to test it in a few minutes.
- DropInBlog has different pricing plans for individuals and teams.
In this guide, we’ll show you how to add a fully functioning blog to your Swipe Pages landing page by adding just a few lines of code.
Swipe Pages is a tool for creating elegant landing pages. But what if you want to add blogging functionality? It with a good selection of modules for adding static content but not a versatile, professional blogging system. Luckily, DropInBlog can extend your landing page functionality with a fully-functioning blog.
You’ll need to create a DropInBlog account, but you can also start with a free trial. You’ll also need your Swipe Pages account and a landing page to work with.
Table of Contents
Adding an Embed Module
Navigate to the dashboard and select the landing page you’d like to edit. Choose a place for your blog section to appear and use the inline UI to add a Section, or a Row, to that area.

After setting up your section or row, a large plus icon will appear. Clicking it will allow you to add a module to this area. Select HTML Code from the list of modules in the left sidebar.
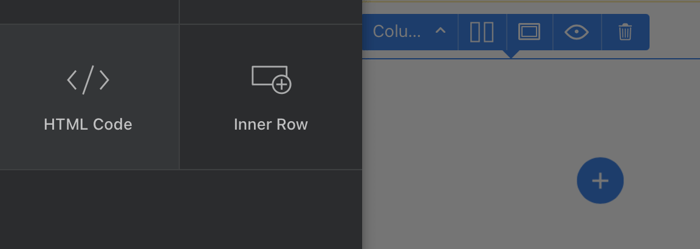
Within this module is where you’ll be adding your DropInBlog embed code.
Embedding Your Blog
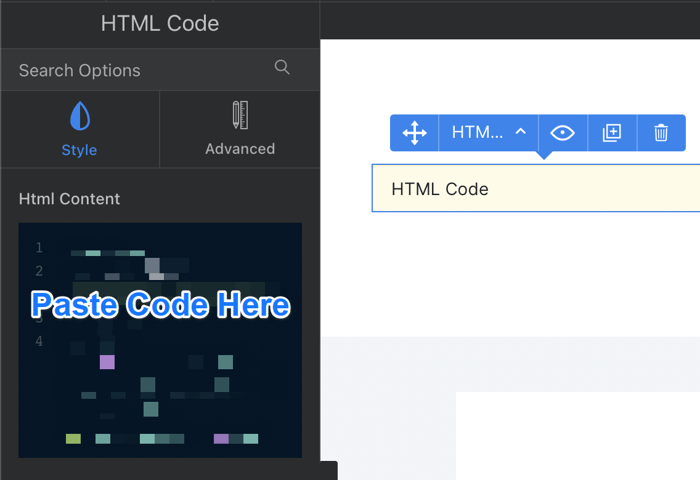
Open a new browser window, head on over to your DropInBlog account, and select Code & Layout from the main navigation. In the Blog Code steps, copy the code shown in Step 1 and Step 2. It looks something like this:
Step 1 code:
<script src="https://io.dropinblog.com/embedjs/XXXXXXXXXXXXXXXXX.js"></script>Step 2 code:
<div id="dib-posts"></div>Switch back to your landing page and paste the DropInBlog embed code into the HTML Code text area. Once you’ve added the code, hit the Save button in the top right corner of your browser window.
Connecting Swipe Pages to DropInBlog
Next, head back over to DropInBlog and select Settings from the main navigation. Locate the Blog URL field and add your Swipe Pages landing page URL. You can find your landing page URL in the Edit URL option (which is located under the arrow icon in the top right corner).
Hit Save All Changes in the DropInBlog settings and switch back to your the editing view.
Publishing Your Blog Enriched Landing Page
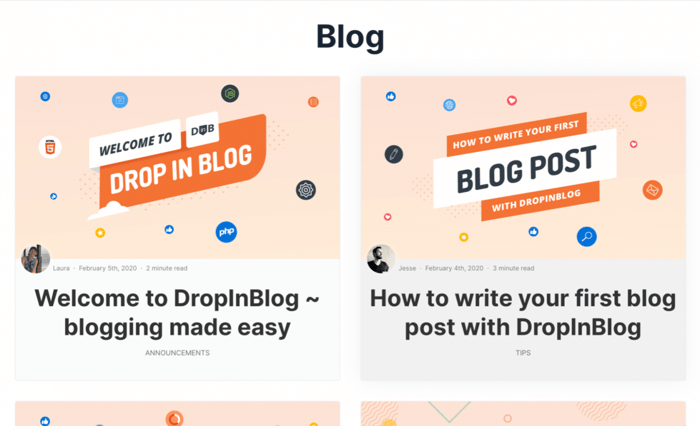
To publish your landing page with these new changes, click the Save button in the top right corner and then Publish. Use the Preview button to check out your new and fully functioning blog. ✨
Tips for Using Swipe Pages
Swipe Pages has a variety of different template designs, and DropInBlog will inherit the styles of those templates automatically. There’s no need to spend time reformatting after uploading blog content.
However, if you want to add more custom styling, you can use standard CSS to adjust the presentation. Use a new HTML Code module to add CSS within the <style></style> tags to begin customizing the design of your blog.
FAQs
Can I start an SEO-friendly blog on Swipe Pages?
Swipe Pages is an e-commerce platform designed to build landing pages. While you can start a blog directly on the site, it won’t necessarily be the most user-friendly, nor will it have all the SEO perks you want. That’s why we recommend integrating a third-party blogging platform like DropinBlog.
By integrating a third-party blogging platform, you’ll keep your landing pages light and fast, and you’ll save a lot of hassle with formatting. Not only that, but with DropinBlog, you get all the benefits of a built-in SEO tool.
What is the best way to start a blog on Swipe Pages?
If you choose to start a blog directly on Swipe Pages, you’ll be forced to create a subdomain for your blog. This is generally considered disastrous for SEO. The best way to start a blog is to connect to a specialized blogging platform.
That way, you can just drop your blogs nicely and neatly into your site, without causing any disruption to style or formatting. Even better, the hard work put into building SEO will remain together with your landing page.
How can I set up DropinBlog on my Swipe Pages site?
It’s a very easy process to integrate DropinBlog with Swipe Pages. You only need to copy and paste a couple of lines of code to connect the two accounts and place your blog in the desired location. Watch this short step-by-step tutorial video to guide you through the process.
Conclusion
If you were unsure about how the process of integrating DropinBlog was achieved, we hope you have it all sorted now. DropinBlog offers countless benefits to e-commerce store owners in the way of boosting marketing potential through blogging. Get on board and make the most of it.
If you have any further queries, please do get in touch, and we’ll be more than happy to help out! ⛑


