
Key Takeaways
- The best way to add a blog to your Yola site is with DropInBlog!
- The free trial and quick setup lets you to test it in a few minutes.
- DropInBlog has different pricing plans for individuals and teams.
Yola discontinued their native blog feature back in 2012, which means anyone building a Yola site today has to add a blog through a third-party tool. The good news: it's fast. This guide walks through installing DropInBlog on Yola using the platform's HTML embed block in about 5 minutes from start to finish.
One quick note before you start: adding custom code (which is how DropInBlog installs) requires a Business or Business Elite Yola plan. The Free and Personal tiers don't include the HTML embed capability. If you're on Free or Personal, you'll need to upgrade — check Yola's pricing page for current numbers.
Table of Contents
What Is Yola, and Can You Blog With It?
Yola is a website builder that includes e-commerce functionalities. It’s been on the market for more than twenty years, and it offers a variety of tools that make it easier for you to build and boost your online presence. However, there’s one thing that’s missing – built-in blogging functionality.
There used to be a way around this problem. The platform used to let you connect your Yola website to a Tumblr blog through a widget, but that’s not possible anymore, at least not if you’re using the Yola Sitebuilder+ editor.
Today, Yola completely lacks a blogging option, which is a shame. Regardless of your company's size, a serious business requires a modern blogging solution packed with the right features and tools.
DropInBlog fits this description perfectly. It provides you with all the necessary tools, and then some. You’ll be able to spread the word about your business, boost your site’s popularity, and generate more leads. What’s even better is it integrates easily with Yola.
How to Add A Blog to Your Yola Site
To add DropInBlog to a Yola site, you'll need:
A Yola Business or Business Elite plan. Custom code editing (the HTML embed block DropInBlog needs) isn't included on the Free or Personal tiers. Yola updated their plan names (what used to be Silver is now Business, what used to be Gold is now Business Elite).
A DropInBlog account. The free trial covers full setup and testing before you subscribe.
Step 1: Create a Blog Page
Now that you have your DropInBlog and Yola accounts set up, you’re ready to start a new blogging chapter.
The first thing you need to do is create a new page in Yola. You do this by clicking Pages on the left side of the navigation bar, right next to the Yola logo. When you click the round plus icon, you’ll see these options:
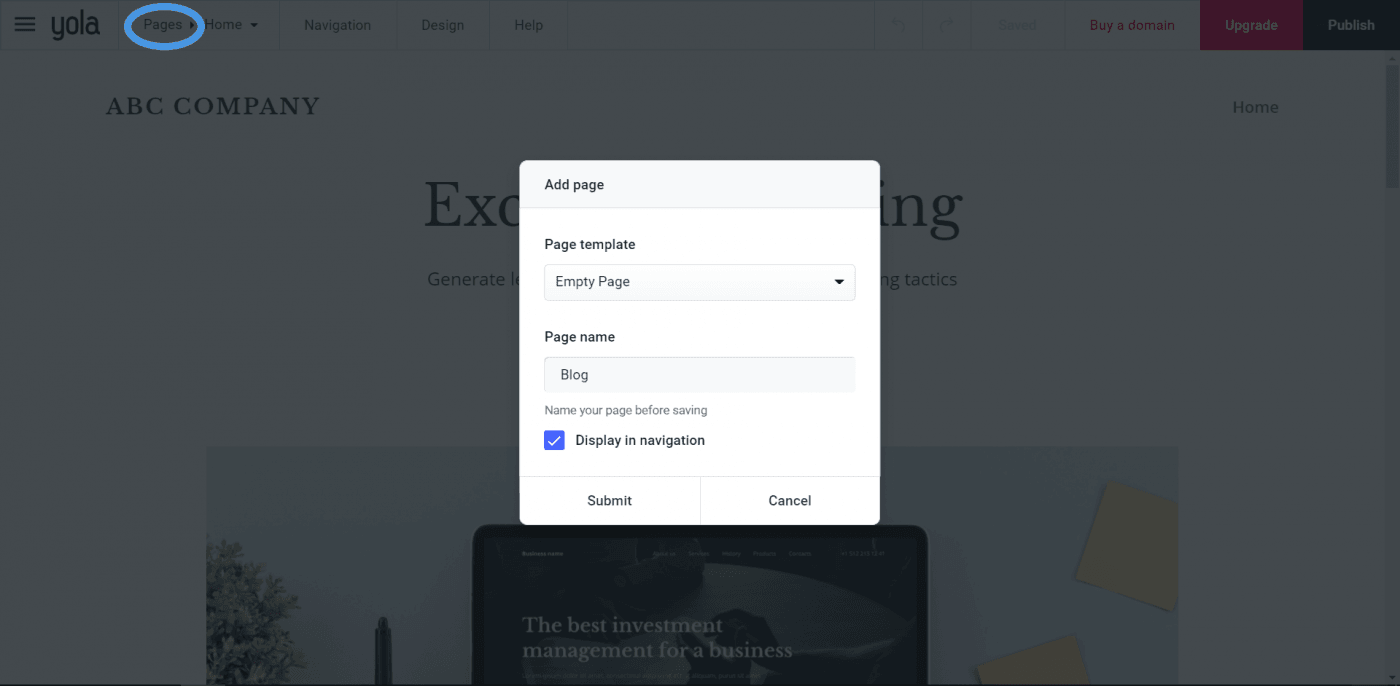
We thought naming the page “Blog” was most appropriate for our new page, but you can name it as you wish. You can keep the “Display in navigation” and “Empty Page” options unchanged.
Yola also has a range of templates to make use of. You can select one of these or leave the page blank for now. Page designs can be edited at a later stage. For the sake of this tutorial, we’ll keep things simple and start with a blank page.
Step 2: Add an HTML Block
After you’ve added a new page, which you can access by clicking the Pages button, you’re ready to start building your blog page by adding a block. A block is just a container for different types of content.
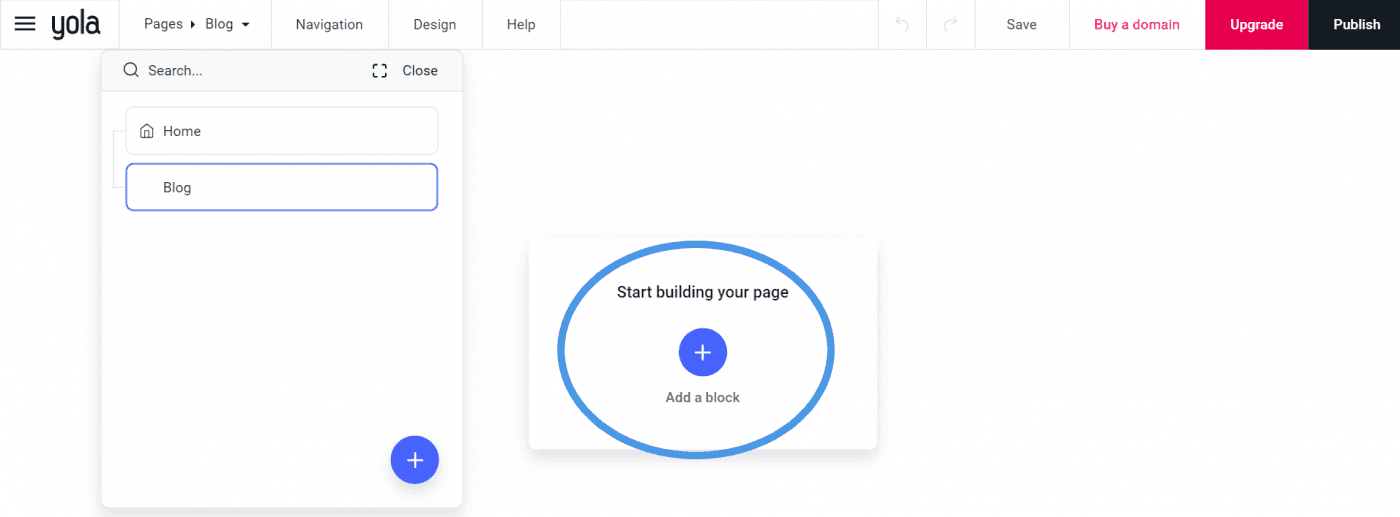
Clicking the plus button will take you to a page where you choose the block type you want to add. We’ll select the HTML embed option since that’s what we’re doing here: embedding HTML code.
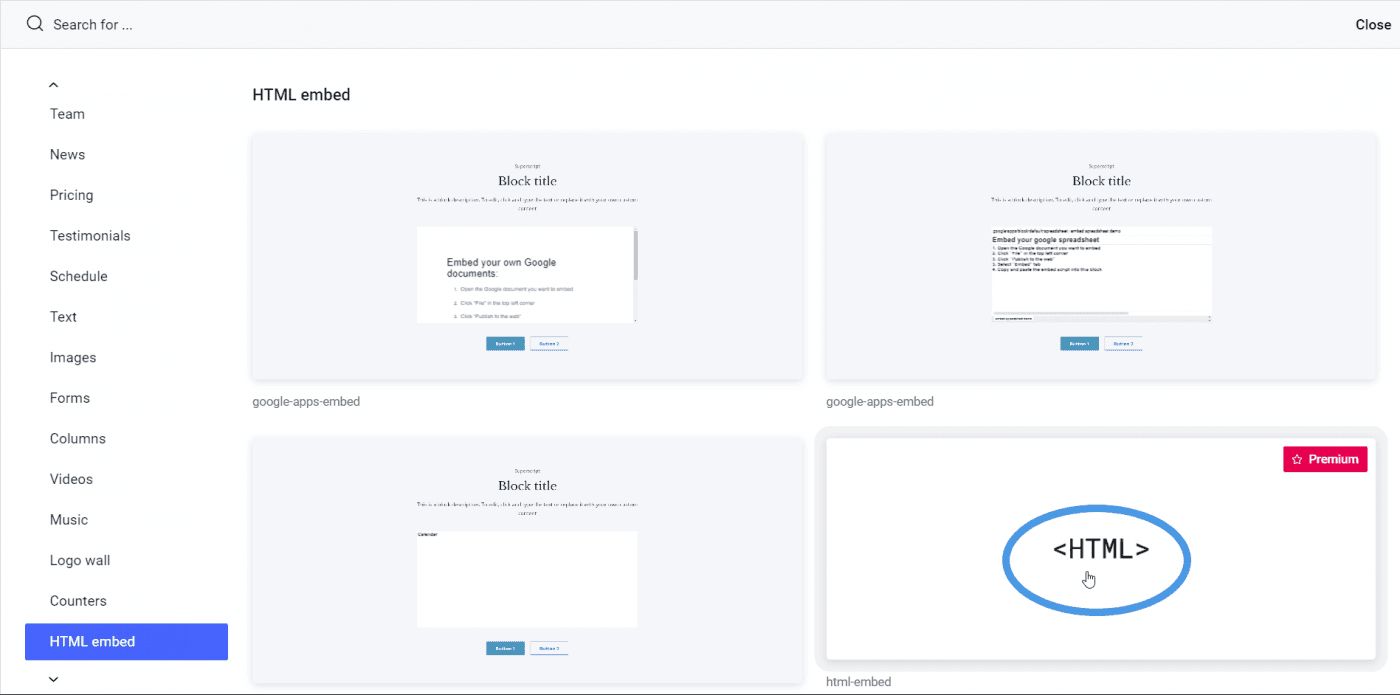
This is what we’ve got so far:
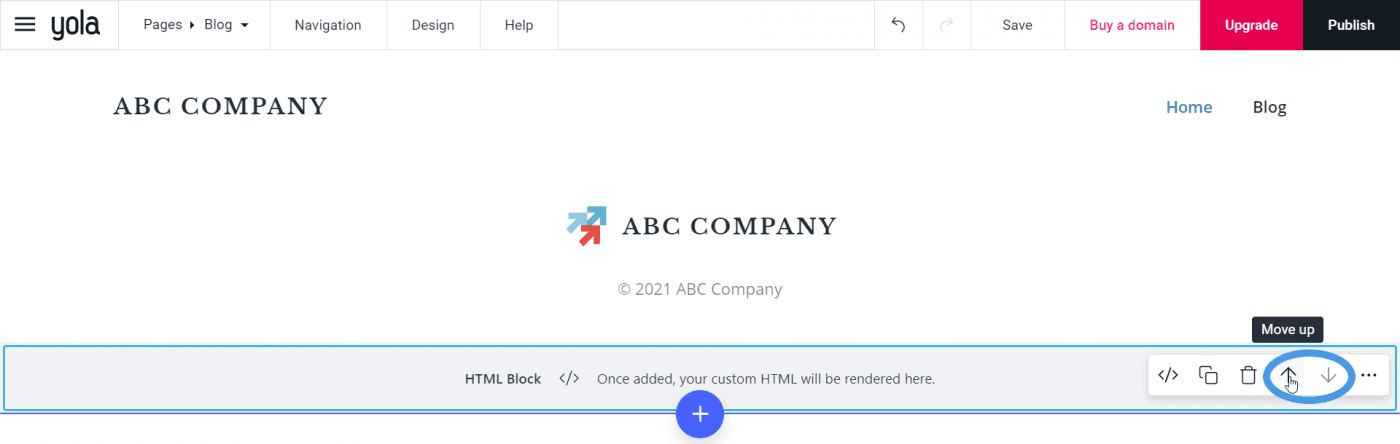
Keep in mind that you can relocate a block up or down the page by clicking on the arrows as shown in the image above.
Step 3: Add the Embed Code
We’re off to a good start, and we’re ready to move forward with the next step: adding the embed code.
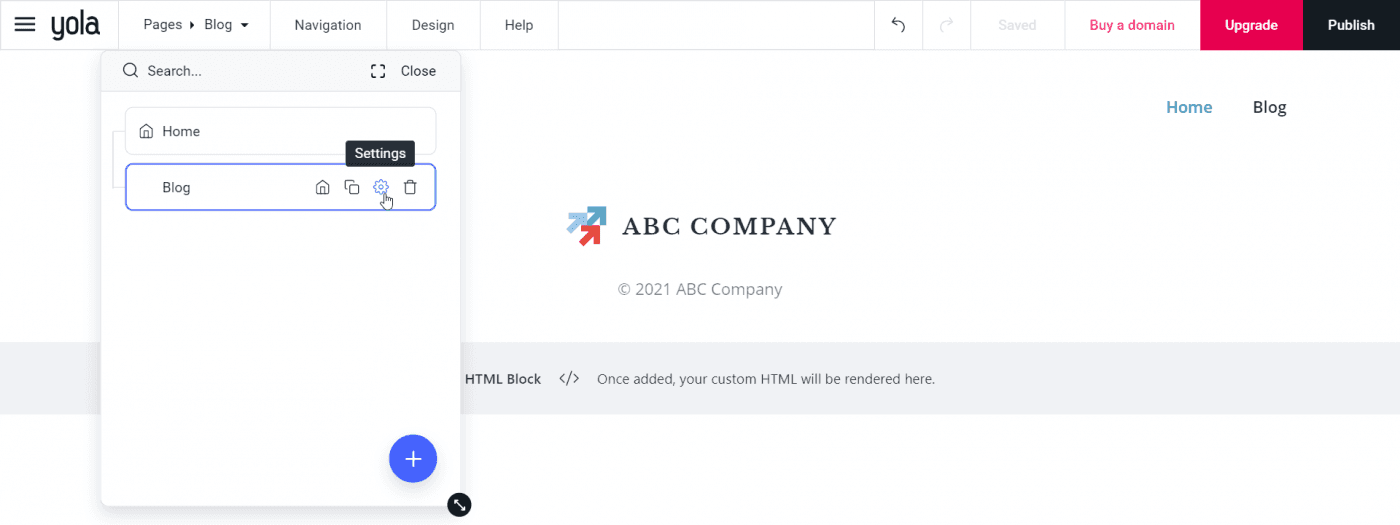
Once you’ve added the block, click Pages and then your blog page’s Settings:
Scroll down until you see the “Before </body> tag” section. This is where you’ll add the first snippet of HTML code from DropInBlog.
In your browser, open a new tab, log in to your DropInBlog account, and click Code & Layout. Copy the code from Step 1 and paste it into the closing body tag section, as shown in the picture below.
The Step 1 code looks like this:
<script src="https://io.dropinblog.com/embedjs/XXXXXXXXXXXXXXXXX.js"></script>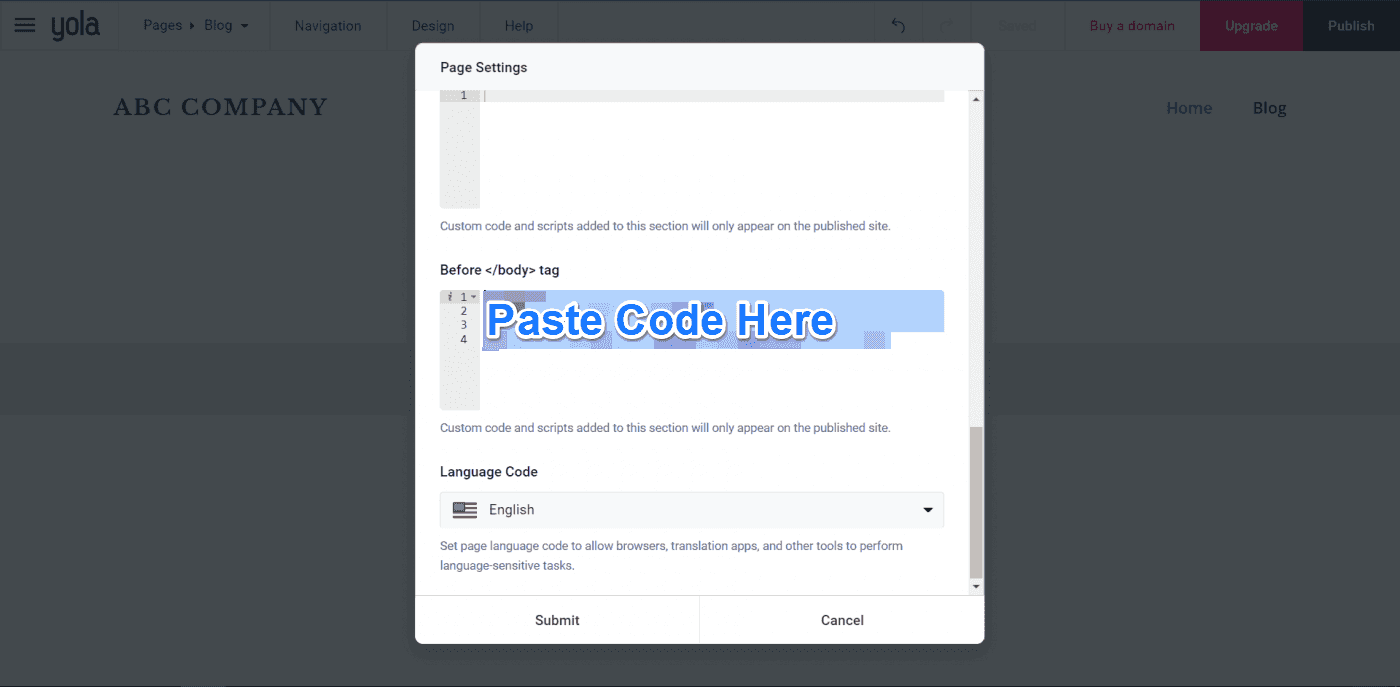
Save your changes by clicking Submit.
One thing to note before we go any further. Your DropinBlog ID will be unique to your account and will contain a combination of numerals and uppercase letters. In this image the XXXs are there just for illustrative purposes.
Step 4: Display the Blog Posts on Your Page
Now, return to your blog page and select Custom HTML.
Head back to the Code & Layout page on DropInBlog, copy the code from Step 2, paste it into your Yola blog page, and click Submit.
This is what the Step 2 code looks like:
<div id="dib-posts"></div>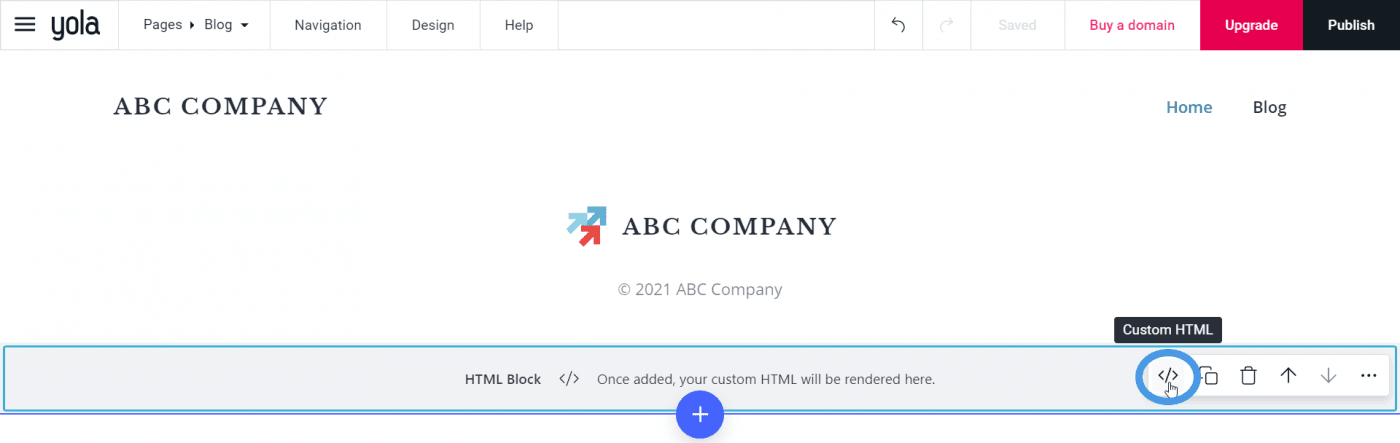
In order to finalize the process, you need to publish your site. Click the Publish button in the upper right corner, and you’ll see this message from Yola:
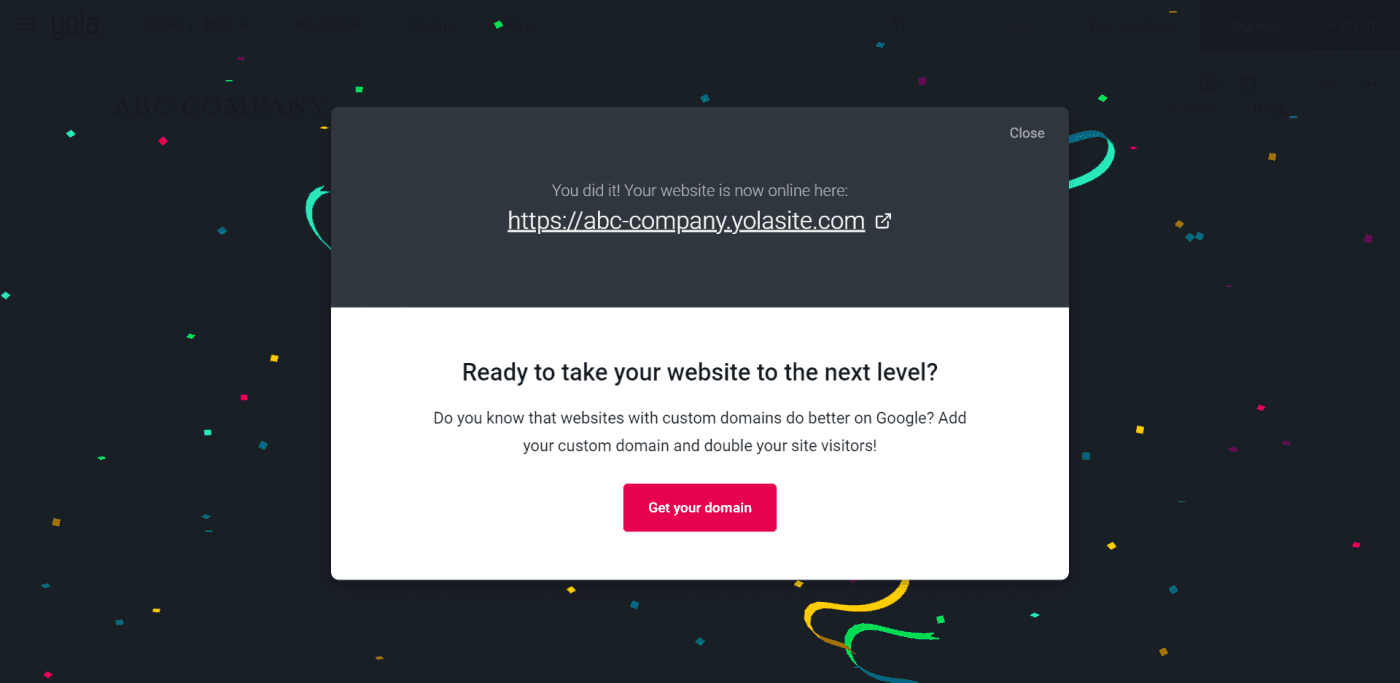
Based on our research, Google will index your Yola site even with a yolasite.com domain. However, we always recommend a custom domain, particularly for businesses.
After you’ve published your site, you can either click on the link that pops up or check how your live website looks from the dashboard. The link you receive, obviously, won’t be exactly the same as the one shown in the image above.
Step 5: Copy Your Blog URL to Your DropInBlog Account
There’s one last thing to do. Copy your blog URL:
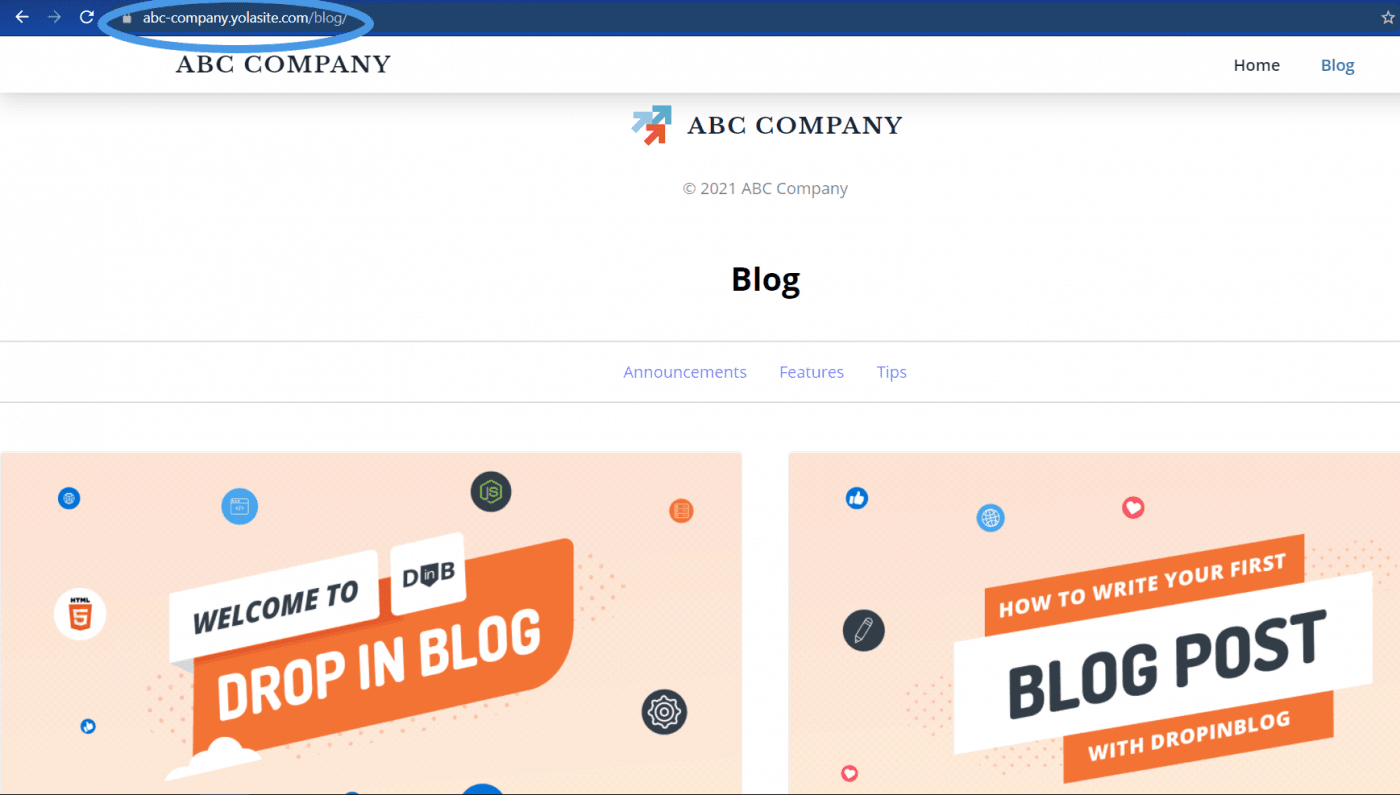
After you’ve copied it, head back to your DropInBlog account once again, click Settings in the navigation menu, and paste the URL as shown in the image below:
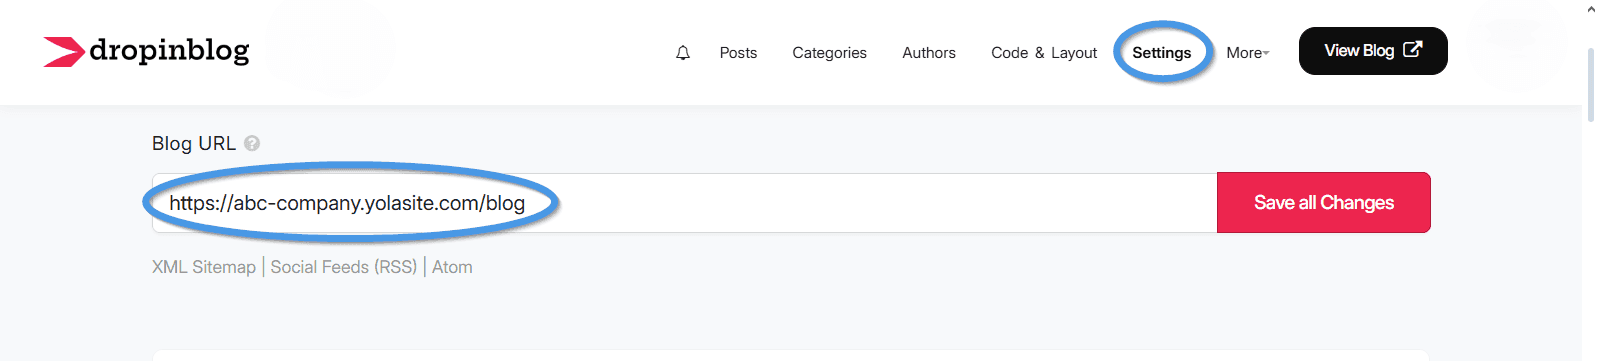
Scroll down to the Save All Changes button, click on it, and that’s it. You’re done! See, we told you that it’s an easy and quick process, didn’t we? :)
Now, your DropInBlog account is fully connected to your Yola account. As you add new posts on DropInBlog, you’ll see them published on Yola. You have a cool website and an amazing blog – you’re well on your way to greatness.
Design Tips for Using DropInBlog With Yola
Yola offers a ton of well-designed templates. No matter which template you choose, DropInBlog will automatically match the layout of your Yola page. Apart from the SEO Analyzer, which is a stand-out feature, the ability to inherit the styles of your template is one of the most valuable assets of DropInBlog.
If you want more control over the look and feel of your blog, you can always add your own custom styling. The process to do this is exactly the same as how we integrated DropinBlog. You just need to add a new HTML embed block to your blog page and write some CSS, but this time, you’ll need to put your CSS code within <style></style> tags.
For instance, if you want to change the background color, you could add something like this: <style>body {background-color:#999;}</style>. Custom CSS can make your blog look exactly the way you want.
Also, DropInBlog lets you add custom CSS directly into your DropInBlog account. To do that, you just need to go to the Code & Layout page. Under Advanced, you’ll find the Custom CSS section where you can add your custom styles.
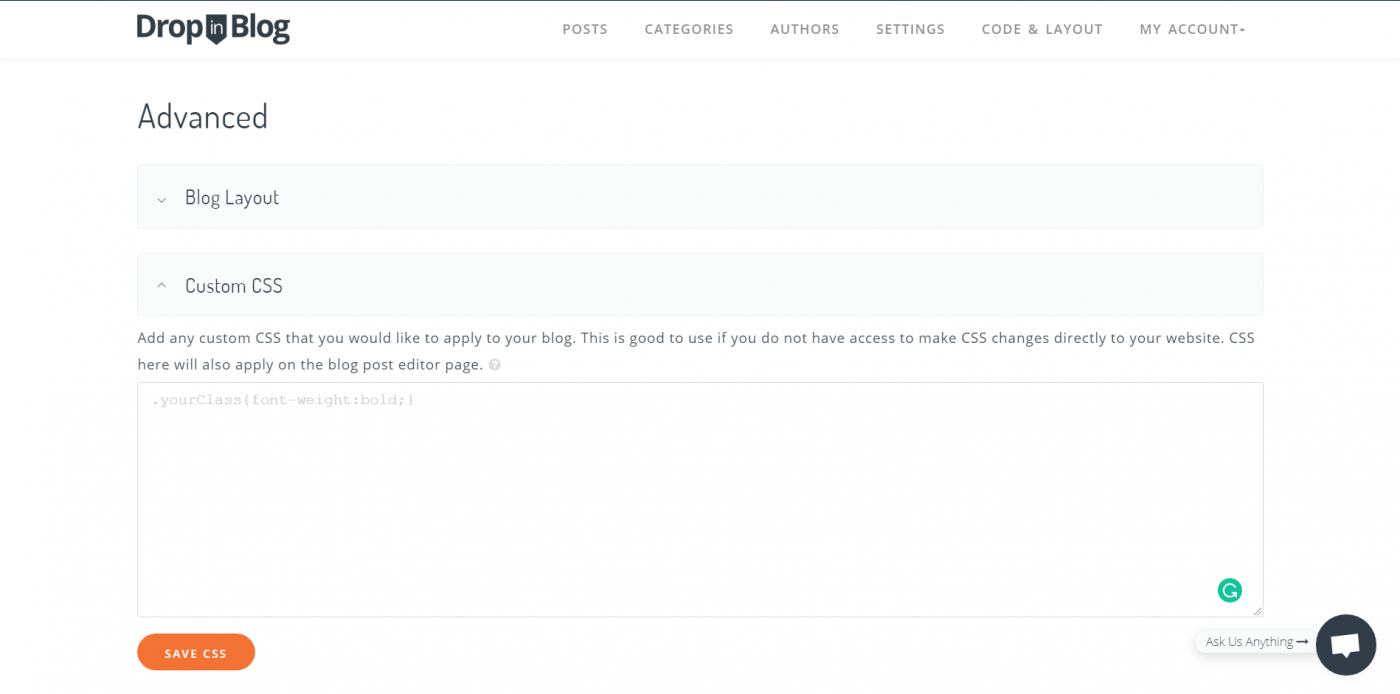
Let’s say you want to add some margin to your page; you can do that by adding the following CSS rule to the Custom CSS section: .dib-post-wrap {margin: 0 3em;}
Although these are only two examples of what you can do, the styling possibilities with custom CSS code are indeed endless.
FAQs
Can I start an SEO-friendly blog on Yola?
Because there is no professional blogging option with Yola at present, you will have to use an alternative. DropinBlog makes it easy to publish SEO-friendly blogs on Yola.
Once you integrate DropinBlog with your Yola website, your blog posts will be visible on your Yola page as soon as you publish them. It’s super simple, and DropinBlog’s SEO Analyzer will help you optimize your content effortlessly.
Does Yola have a built-in blog?
No. Yola discontinued its native blog feature on August 15, 2012. Users who created blog pages before that date can still access them, but no new native blogs can be created. Everyone building on Yola today needs to use a third-party tool like DropInBlog.
Can I add a blog to Yola for free?
Not through the DropInBlog embed method, as you need a paid plan to add custom code.
How much does Yola cost?
Yola's current plans are Free, Personal, Business (Most Popular), and Business Elite. Actual monthly prices vary based on billing cycle and any active promotions, so check Yola's pricing page for current numbers.
In Summary
Yola is a “been there, done that” website builder, but unfortunately, it lacks blogging capability. That’s where DropinBlog comes to the rescue. DropinBlog integrates easily with Yola and allows you to publish SEO-friendly content to your Yola site. Integration is possible by pasting a couple of lines of code – that’s it.
Get started today, and if you need help with anything, please contact us. We’ll be delighted to help.