
Key Takeaways
- The best way to add a blog to your Kajabi site is with DropInBlog!
- The free trial and quick setup lets you to test it in a few minutes.
- DropInBlog has different pricing plans for individuals and teams.
In this brief tutorial, we’ll walk you through the steps of integrating DropInBlog with Kajabi. Adding DropInBlog to Kajabi is a quick, fun, educational, and rewarding experience.
As a fully-featured blogging platform with a built-in SEO Analyzer, DropInBlog can help you achieve multiple objectives, including:
- Implementing your content marketing strategy more efficiently
- Promoting your business
- Attracting new audiences
- Driving more traffic to your Kajabi site
- Translating this traffic into conversions
So, let’s see how to add this blogging tool to your Kajabi toolbox and get the most out of it.
Table of Contents
What Is Kajabi?
Kajabi is an all-in-one web platform that allows you to create websites, landing pages, membership sites, courses, podcasts, or sales pipelines, and more. Needless to say, as an all-in-one platform suitable for building a strong online presence, it includes analytics, automation, marketing, and payment processing tools.
Can You Blog on Kajabi?
Yes, Kajabi comes with a native blogging solution. You’ll find it on your admin dashboard under the Website option placed on the left sidebar. It’s a decent blogging tool with the usual blogging features that allow you to:
- Set a publishing date.
- Attach a video or audio to your posts.
- Add a tag, page description, page title, and an image alt attribute.
- Choose a social image.
However, since Kajabi is far from a full-fledged blogging platform, its native blogging solution has limited capabilities and falls short in certain areas. For example, the Kajabi blogging tool is not ideal for entrepreneurs and marketers who place a high priority on content marketing.
In contrast, this is where DropInBlog shines. DropInBlog gives you significantly more control by:
- Making it easier for you to add categories.
- Allowing you to optimize SEO for each post.
- Allowing you to add multiple contributors that collaborate on your blog without giving them access to your entire website.
- Enabling you to optimize your content in line with the best current SEO practices through the previously mentioned SEO Analyzer.
DropInBlog offers so much more to entrepreneurs and marketers who prioritize content marketing than the built-in Kajabi blogging app. The best way to see this is through hands-on experience with this blogging platform.
Prerequisites
Speaking of hands-on experience, DropInBlog allows you to kick the tires of the platform for free. Setting up an account and starting a free trial is all you need in order to add DropInBlog to Kajabi.
As far as Kajabi is concerned, you can integrate this platform with DropInBlog regardless of which plan you subscribe to – Basic ($149/month), Growth ($199/month), or Pro ($399/month).
Two Ways to Use DropInBlog with Kajabi
There are two ways to use DropInBlog with Kajabi:
- Completely replace Kajabi’s built-in blog with DropInBlog.
- Add DropInBlog to Kajabi as a secondary blog, alongside its built-in blog.
One of the main advantages of replacing the Kajabi blog with DropInBlog is that this allows you to have your blog located at the /blog URL.
In this tutorial, the main focus is on explaining how to add DropInBlog to Kajabi. However, we won’t leave out the process for adding DropInBlog as a secondary blog to Kajabi.
How to Replace the Kajabi Blog with DropInBlog
Hide the Elements of the Built-in Blog
Since we’re replacing the Kajabi blog, the first thing we need to do is hide the elements of the built-in blog. To do that, log in to your Kajabi account, click Website, then Pages. Find your Kajabi blog page and click Customize, just like in the picture below:

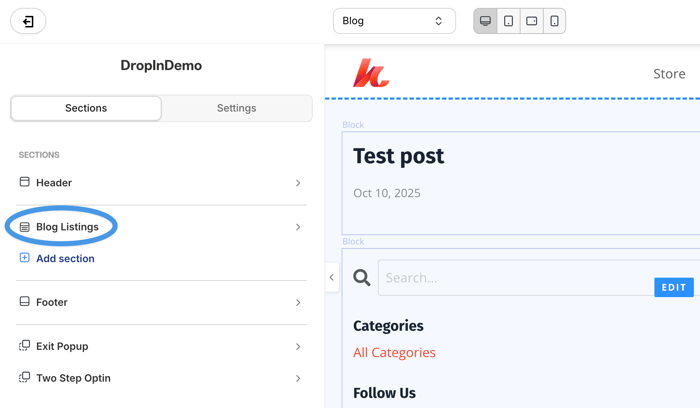
Next, click the Blog Listings option located on the left sidebar:
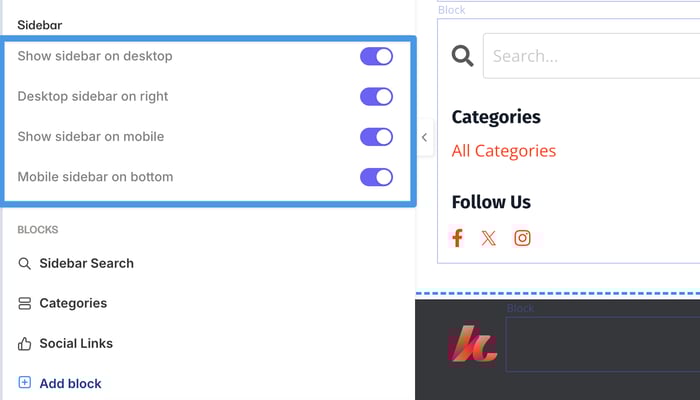
Scroll down until you see Sidebar. Uncheck all four of the items under the Sidebar and click Save. The purpose of this step is to hide the sidebar of the built-in blog because you won’t need it.
Remove the Posts Shown on the Built-in Blog
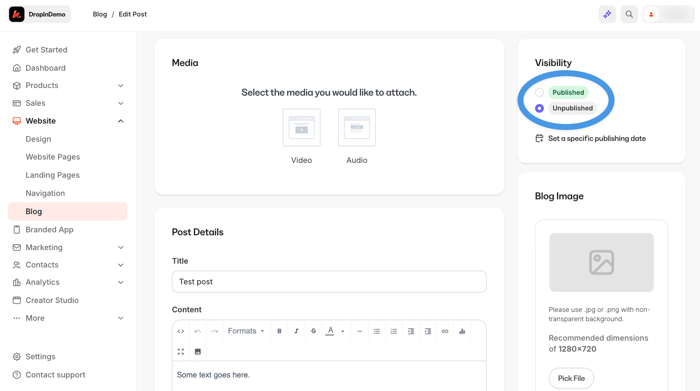
To completely remove any trace of the built-in blog, you need to either unpublish or delete the existing built-in blog posts, if there are any. This requires you to go back to Website and click on Blog. Here you’ll see a table of all the existing blog posts.
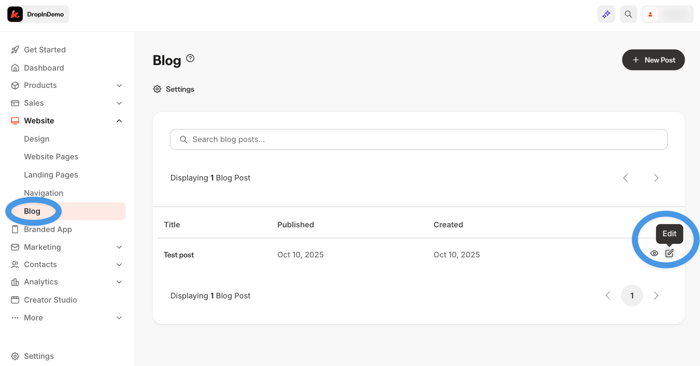
Clicking the Edit icon will show you the Visibility panel, under which you’ll see two options: Published and Unpublished. Select the latter and click Save if you want to get rid of the posts without deleting them.
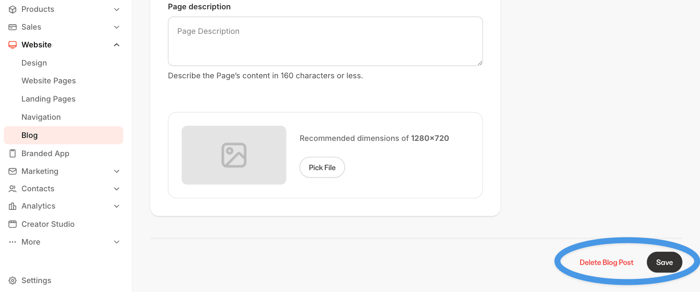
If the opposite is true and you prefer not just to hide, but to completely remove the built-in blog posts, scroll all the way down to the bottom of the page until you see Delete Blog Post. Click this option and confirm your choice.
Unfortunately, you can’t delete blog posts in bulk, so you’ll have to repeat the same process for each of the remaining posts.
Copy the Custom Code from DropInBlog
We’ve cleared the way for DropInBlog, and now it’s time to go over the few steps that will allow us to integrate it with Kajabi.
Just like in previous steps, head back to Website and click Pages. Find the Blog page and click the Customize icon (the palette icon).
Your blog page should now be blank, aside from your website header and footer. If there's anything additional on the page you'd like to remove, just go ahead and delete the sections. We're now ready to integrate DropInBlog!
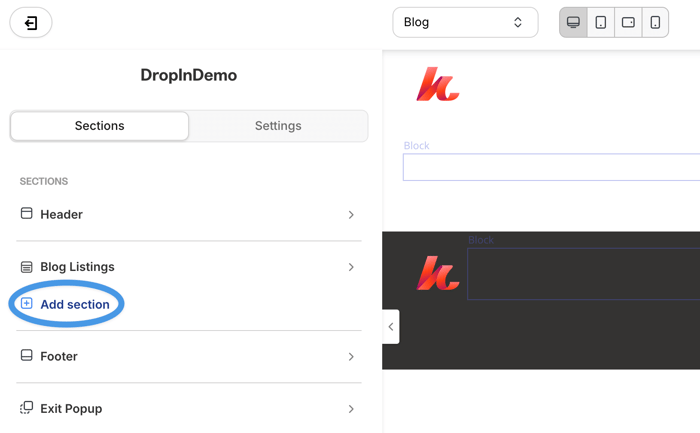
Click Add Section, scroll to the bottom, select Custom Code, and click Add.

You’ll notice a new content block appears on the page with a blue Edit button in the middle. Click the Edit button. When you do that, you’ll see a Code section in the left sidebar.
This is where you need to execute the most important step. Leave Kajabi open, open a new tab in your browser, and head over to DropInBlog. Log in to your DropInBlog account, then click Code & Layout in the navigation bar. You'll be taken to the following page:
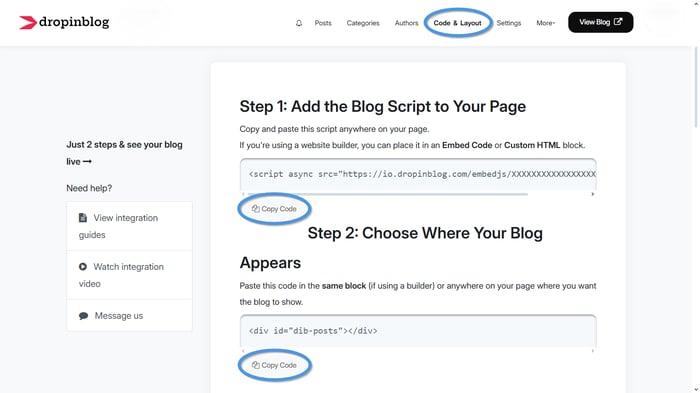
Copy the code from Step 1 and Step 2, and paste it into the Code section in Kajabi. One caveat: in your Step 1 code, you’ll see a combination of letters and numbers – this is your unique DropInBlog ID (we replaced ours here with Xs just for demonstration purposes).
Just in case, here is the code again:
Step 1:
<script src="https://io.dropinblog.com/embedjs/XXXXXXXXXXXXXXXXX.js"></script>Step 2:
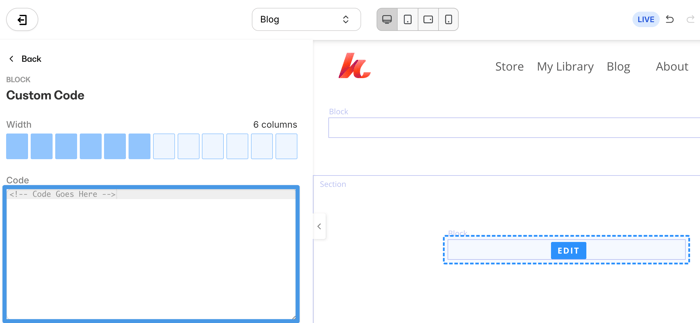
<div id="dib-posts"></div>And this is what it looks like when you paste it into Kajabi:
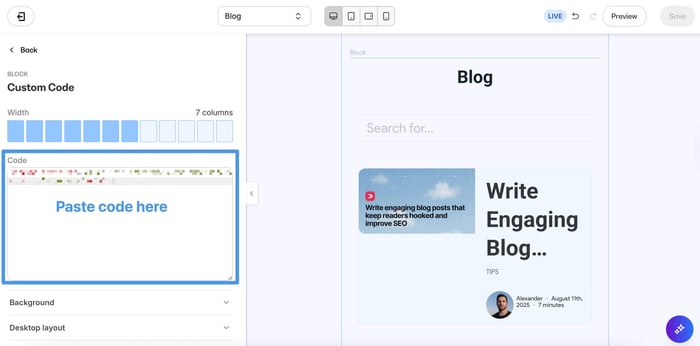
You’ll notice at the top of the sidebar in the image above that, by default, the width of the block is set to six columns. You can adjust this in line with your taste and preference by adding or removing the gray squares. For instance, if you want your new block content to take all the available space (12 columns) – just click the last gray square as in the following picture:
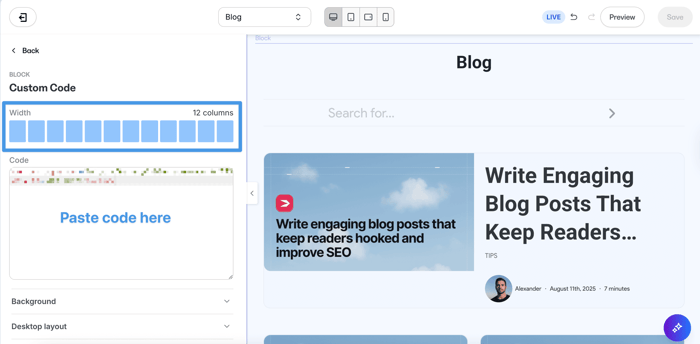
You can make other changes as well, such as modifying the background, experimenting with the layout, or playing around with animations. When you’re happy with the adjustments, click the Save button at the bottom of the sidebar, and head back to Pages.
Add Your Blog URL to DropInBlog
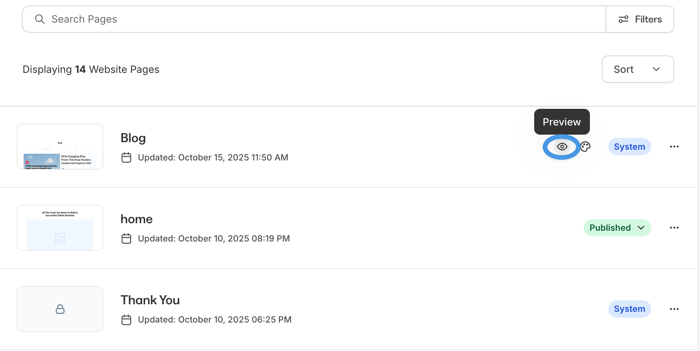
You’re one step away from finalizing the integration of DropInBlog with Kajabi. The last thing you need to do is copy your blog URL and paste it into DropInBlog. Click the three dots right next to System, then select Copy URL from the dropdown menu.
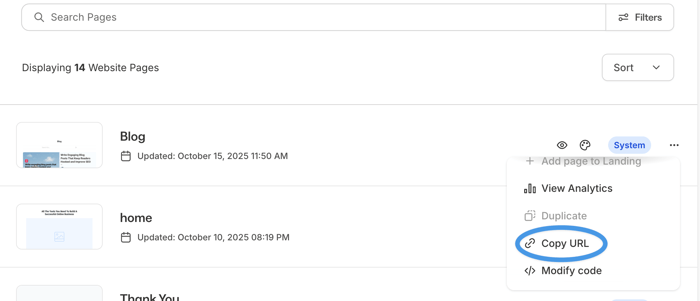
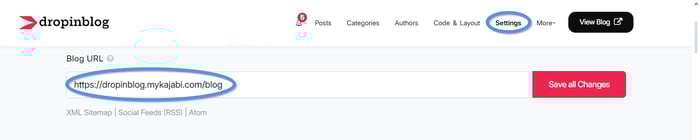
When you do that, you’ll see a short message in the bottom right corner saying, “Text has been copied to your clipboard.” Now go to DropInBlog again, click Settings in the navigation bar, and paste your blog URL in the indicated field on the Settings page.
For these changes to take effect, click Save All Changes on the right side of the screen.
And just like that, you have successfully integrated DropInBlog with Kajabi, replacing the built-in blog with a modern, elegant, and powerful blogging app. Congratulations! 🥳
To see your blog in its full splendor, head back to Kajabi, click Pages, and preview your blog home page.
Finally, this is your blog home page:
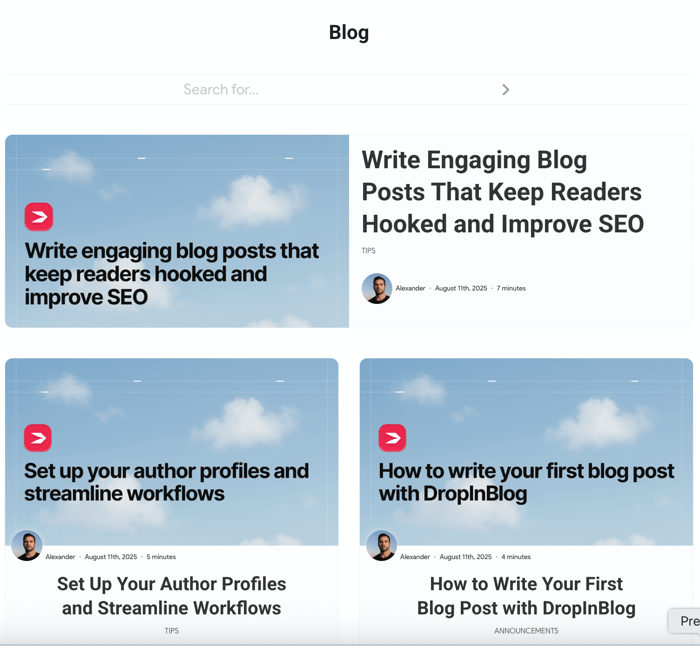
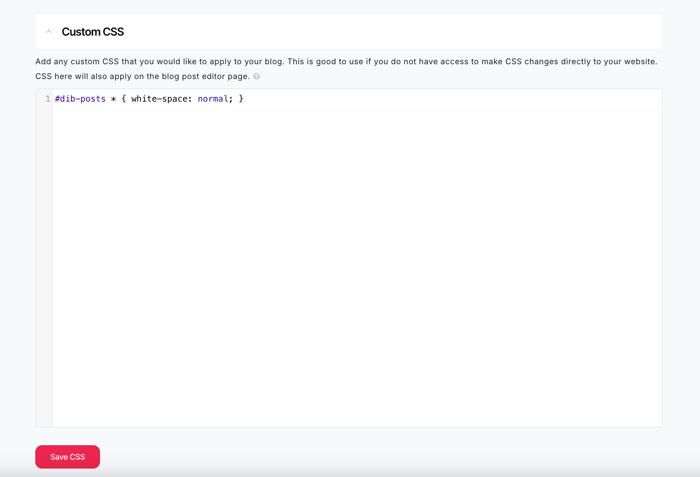
If you notice that there’s some extra white space at the top of the page, like in the image above, you can easily change this by adding custom CSS in DropInBlog. Just head over to your DropInBlog account and click Code & Layout in the navigation bar. Scroll down until you see the Custom CSS section. This is where you can add your own styles to customize the look of your blog.
How to Add DropInBlog and Keep the Kajabi Built-in Blog
To add DropInBlog as a second blog and keep the Kajabi built-in blog, you need to create a new page in Kajabi where you can insert the code from DropInBlog.
As we mentioned before, one of the main downsides to this method is that you won’t be able to use the page slug (URL) /blog because it’s already used by the built-in blog. However, this doesn’t mean that you can’t use the name “Blog” for your new page in the menu bar or can’t have the page title be “Blog.” You’re free to use whichever name you want; it’s just the page URL that can’t contain “blog” in its name.
The process of adding DropInBlog as a secondary blog is almost the same as when you’re replacing the built-in blog. For this reason, we’ll single out only the major differences and outline the integration steps.
Create a New Website Page
The first step is to create a new page. From your Kajabi admin, click Website and then click Pages. Click the blue New Website Page button in the upper right corner, and give your new page a name; we’ll call it “Articles.” After you enter the name, click Customize Page.

Make Room for DropInBlog
This will lead you to a familiar place: the Kajabi editor. Similar to when replacing the built-in blog, what you’ll want to do here is get rid of the unnecessary content blocks and clear the path for DropInBlog. This is what we see currently:
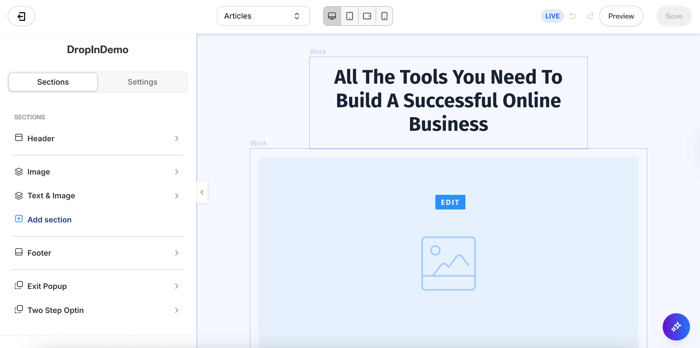
To remove a block, just click the Edit button (it usually appears in the middle of the block), then scroll down to the bottom until you see Delete This Block. Click this button, and you’ll have the block removed.
A somewhat faster alternative is to simply delete the whole section. Click somewhere inside the section you want to remove, scroll down to the bottom of the sidebar on the left, and click Delete This Section – just like you see in the following image:

Whatever you decide to do, just don’t forget to click Save whenever you delete a part of the page. Otherwise, you’ll have to repeat the same process over again.
Further Steps
Once you’ve prepared the new page on your Kajabi site, then you simply follow the same steps we outlined earlier to connect DropInBlog. As a quick reminder, the process looks like this:
- Add a new section.
- Add a Custom Block.
- Edit the block that appears.
- Copy the Step 1 and Step 2 code from DropInBlog.
- Paste the code into the code field.
- Save the changes.
- Adjust the page width as you like by increasing the number of columns (optional).
- Copy your newly-created page URL.
- Paste the URL into DropInBlog Settings.
- Save the changes (in DropInBlog).
One final thing: In case you want to update your home page heading, you can do that on the DropInBlog Settings page and then click Save All Changes. This is optional, so it’s entirely up to you whether you update the page heading or not – it won’t affect the integration process as a whole.
FAQs
What’s the easiest way to start a blog on Kajabi?
You could use Kajabi’s native blogging tool, but you might find it not as effective or efficient to use. Luckily, Kajabi allows you to integrate third-party apps to extend its functionality, so you’re free to integrate a more professional blogging platform like DropInBlog.
Can I set up DropInBlog on Kajabi?
Yes, you can, and it’s very easy to do. You can either integrate DropInBlog and leave Kajabi’s native blogging feature alongside or remove it entirely and just use DropInBlog. The process is very simple and requires a quick copy and paste of the provided code. In just a few short steps, your fully functional blog will be up and running.
Happy Blogging!
Now you know how to integrate DropInBlog with Kajabi and use it either as an exclusive blogging solution or as a secondary blog. If you have any questions, please do not hesitate to reach out to us – we’ll be more than happy to help. Until next time, happy blogging!


