
Adding sharing buttons on Shopify blogs can dramatically increase your visibility and generate quality traffic to your store.
Social media dominates the day-to-day lives of so many people it’s no surprise that social media drives up to 12% of a website’s traffic. By adding social sharing buttons to your store, you make it far easier to get noticed, leading to a potential increase in sales.
Social sharing buttons are a quick and easy way for your site visitors to share links to your products with friends and family on platforms like Facebook, Instagram, Twitter, and Pinterest. Think of it as free marketing.
To summarize, the overall benefits of customizable sharing buttons are:
- Increased visibility at no extra cost to you.
- Improved search engine ranking as a result of being viewed as active on social media.
- A boost to your business credibility with customers.
- A choice of where to place the buttons for maximum conversions.
- The ability to design the buttons to fit your brand and page theme.
Table of Contents
How to Add Sharing Buttons to Shopify
There are essentially three different options to add social sharing buttons to your Shopify store and blog. You can do so quite easily from within your Shopify theme, by using a plugin, or – the most difficult option – by adding Liquid code.
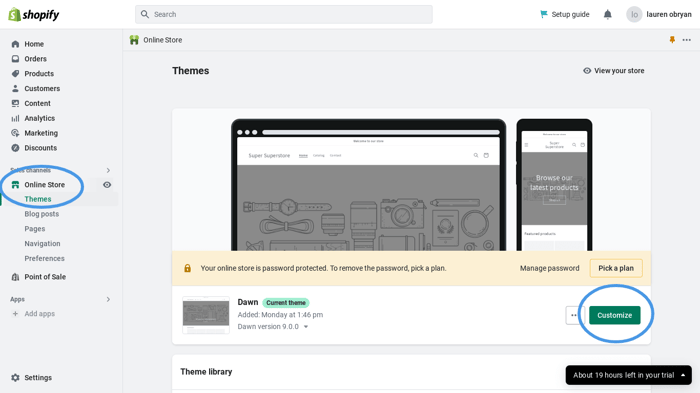
Option 1: Add Sharing Buttons from Within Your Shopify Theme
When you log into your Shopify Store editor, click on Online Store in the sidebar and go down to Themes. On the right-hand side, hit the green Customize button.
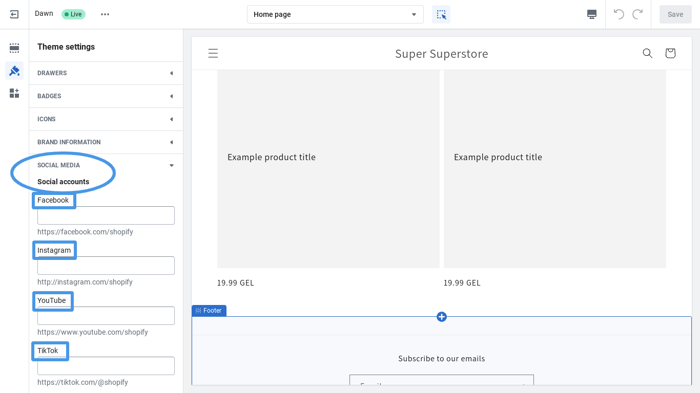
From here, you need to select Theme Settings in the sidebar. The icon looks a little like a paintbrush.
Scroll down to Social Media and add the social media account links that you want to display on the page.
Option 2: Use a Plugin
There are various plugins or extensions you can connect that will enable you to add sharing buttons. If you go to the Shopify App Store and search for “sharing buttons” or something similar, you’ll get a range of options.
Many of these plugins are available free of charge, while others allow a free trial period and then require payment. While a plugin may seem like an easy option, an excessive amount of plugins can weigh down your site and lead to slow loading times. Let’s face it – if you can add the sharing buttons from within the Shopify theme, then a plugin isn’t necessary, even if it’s free.
Option 3: Manually Add the Code
The most complicated and probably least popular option is manually adding the code for social sharing buttons. Firstly, in your Shopify dashboard, you’ll need to go to Online Store and then Themes, just like we did with the first option.
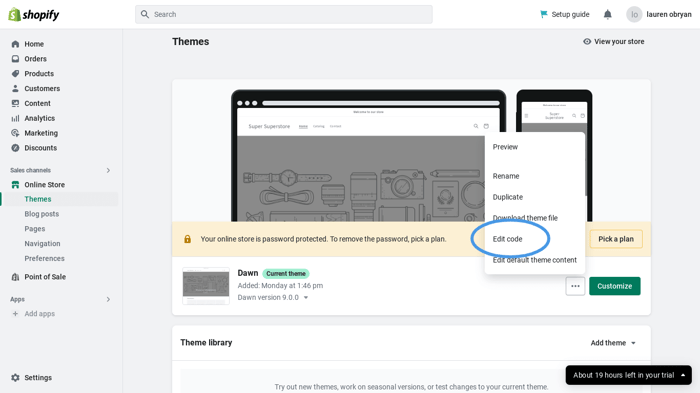
Find the three little dots on the right-hand side of your theme and scroll down to Edit Code. It’s not just as simple as adding the code, however – you first need to upload the icon imagery. So, find the Assets folder and click Add a New Asset. Now you can add the social media icons file from your computer.
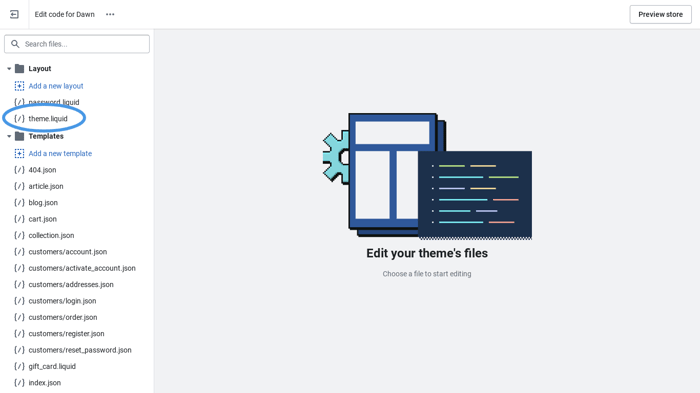
Back in the code editor section, you’ll see a file called theme.liquid. Open this and select the correct location within the page code to place your button. Then insert your code, which – for Twitter – will look a little like this:
{{ 'my-twitter-button.png' | asset_url | img_tag | link_to: 'https://twitter.com/youraccount', 'follow me on twitter' }}As you can see, this method of adding social sharing buttons is more time-consuming and prone to errors unless you have a background in web development.
Using DropInBlog to Add Sharing Buttons to Shopify Blogs
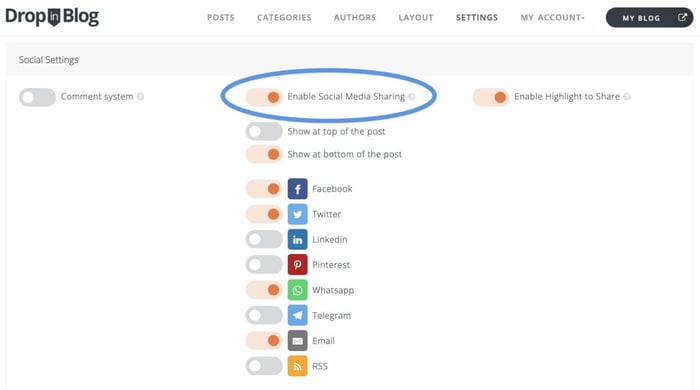
If you’ve chosen to manage your Shopify store blog with DropInBlog – and you should! – then you can easily enable social media sharing. It’s as simple as heading to the Settings page on your DropInBlog dashboard and scrolling down to Social Settings.
At this point, you can toggle on whichever social sharing buttons you choose, as well as choose where on the page you wish them to appear.
As you can see, it’s much more seamless and much easier than any of the other methods.
FAQs
Can I change the appearance of the sharing buttons on my Shopify blog?
You can only change the appearance of the social sharing buttons by editing the CSS code in your theme. Alternatively, if you have chosen to manually add the sharing buttons via the Liquid code editor, you can upload your desired social media icon.
Can I choose which social media platforms to include in the sharing buttons?
You can choose which social media sharing buttons to display. It can be anything from Facebook, Instagram, and Twitter to TikTok or Pinterest. However, depending on how you’ve built your Shopify blog, this can either be straightforward or challenging.
Is there any way to add email or SMS sharing?
It is possible to add a button for sharing by email and SMS sharing with apps like WhatsApp or Telegram.
In Summary
Naturally, you’ll want to find the quickest, easiest solution to add social sharing buttons to the blog on your Shopify store. In this article, we’ve outlined the step-by-step process for three different ways to add customizable sharing buttons. Hopefully, one of these works for you.
If you want to give DropInBlog a try for yourself, you can make use of the free trial and test out all the features available to help your blog draw a crowd.


