

If you're trying to add a blog to your GoDaddy website, you have three options: GoDaddy's built-in blog (part of Websites + Marketing), a WordPress install on GoDaddy hosting, or an embedded blogging app like DropInBlog. Each one has its strengths, and picking wrong usually means either a blog that can't rank or a second job maintaining plugins.
In this guide, we'll compare all three GoDaddy blog hosting options, then walk through the fastest one, step by step: embedding DropInBlog, which takes about three minutes and automatically inherits your site's design.
TL;DR: How to Create a Blog on GoDaddy
- GoDaddy gives you three blogging options: the built-in Websites + Marketing blog, WordPress on GoDaddy hosting, or embedding DropInBlog.
- The native blog is fine for occasional updates; WordPress is powerful but high-maintenance; DropInBlog gives you the SEO features without the upkeep.
- Setup takes about three minutes on any Websites + Marketing Basic plan or higher: start with the free trial.
Table of Contents
GoDaddy Blog Hosting Options: 3 Ways Compared
- GoDaddy's native blog (Websites + Marketing): Included with your plan. You add a Blog section in the website editor, and GoDaddy's AI tools can help draft and schedule posts. It's genuinely quick, but the SEO toolkit is thin, with basic settings, limited structured data, and no feedback on whether your content can actually compete in search.
- WordPress on GoDaddy hosting: Maximum control and every plugin imaginable, and GoDaddy even runs its own company blog on WordPress. The cost is your time: theme setup, plugin updates, security patches, backups, and a blog that lives visually apart from your site. If you left WordPress once, this is the road back.
- DropInBlog: embedded in your GoDaddy site. Two lines of code in an HTML section. Your blog inherits your site's fonts and styling, and you get the full SEO stack, with content scoring, automatic BlogPosting/FAQ/video schema, and AI search optimization, with zero maintenance. Works on Websites + Marketing Basic and higher.
GoDaddy native blog (Websites + Marketing) | WordPress on GoDaddy hosting | DropInBlog (embedded) | |
Setup time | Minutes | Hours (install, theme, plugins) | About 3 minutes |
Cost | Included with your Websites + Marketing plan | Hosting plan + plugin costs | $39/month |
Ongoing maintenance | None | Plugin updates, security, backups | None |
SEO tools | Basic settings + AI writing assist | Depends on plugins (Yoast, etc.) | Built-in SEO Analyzer with content scoring |
Schema markup (BlogPosting, FAQ, video) | Limited | Via plugins | Automatic |
AI search optimization | No | Via plugins | Mention Boost™ built in |
Matches your site's design | Yes (native) | No, separate theme | Yes, inherits your site's styling |
Reusable blocks & one-click CTAs | No | Via plugins | Smart Snippets™ built in |
Text-to-speech | No | Via plugins | Blog Voice AI™ built in |
Best for | Occasional updates | Full control if you don't mind the maintenance | SEO-focused blogging without the upkeep |
How to Add a Blog to GoDaddy Using DropInBlog
For the integration to work, you have to create a website on GoDaddy and subscribe to their Websites + Marketing Basic plan or higher. This will allow you to add HTML to a webpage.
When it comes to DropInBlog, you don’t need to select a pricing plan. Instead, just activate the free trial to add a blog to your site. Once the trial is over, you can decide if DropInBlog is the right solution for you.
Let’s start the integration!
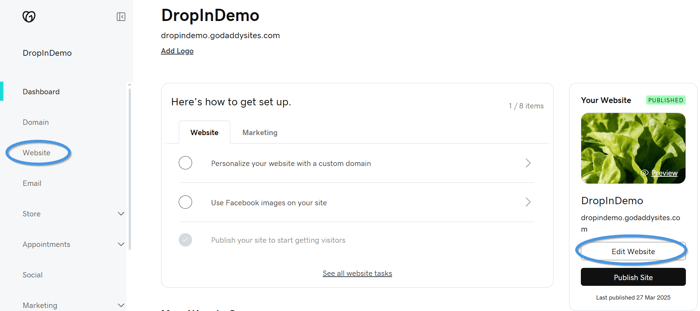
Step 1: Launch the GoDaddy Site Editor
Log in to your GoDaddy account and click on the Website tab to find your existing website. Then, select Edit Website on the right to launch the editor.
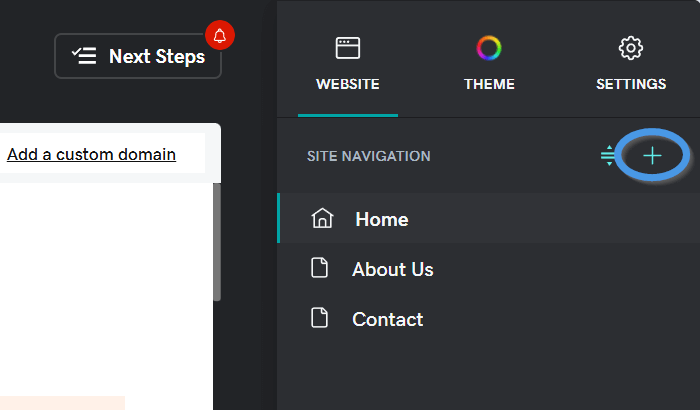
Step 2: Add a New Page
Clicking on the Edit Website button will take you to the GoDaddy editor, from where you can add a new page by clicking on the plus sign icon on the right.
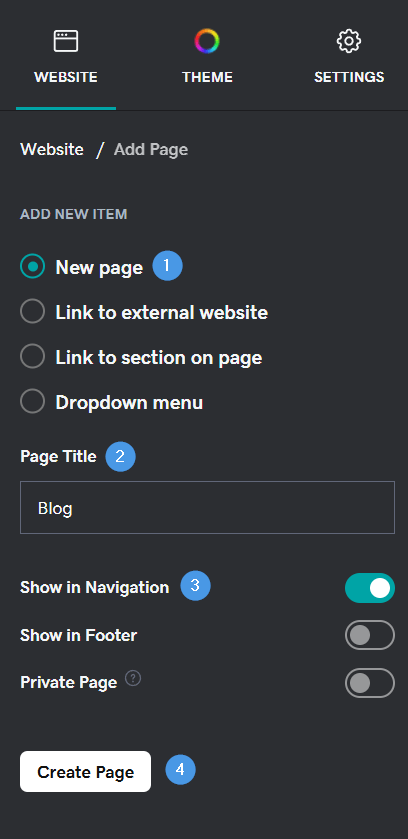
In the menu on the right, under Add New Item, make sure New Page is selected. Then, under Page Title, type in “Blog,” turn the toggle next to Show in Navigation on, and click on the Create Page button.
Step 3: Add the HTML Element to Your New Page
To add DropInBlog to your new blog page, click on the Add Section button first.
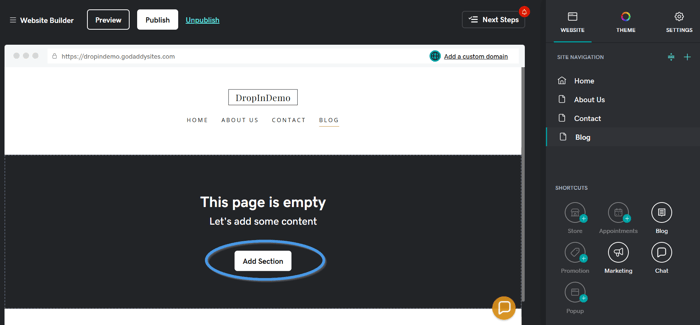
Selecting this option will open a slideout menu with all the sections you can add to your page.
Click on the Files & Web tab, select HTML from the list, and click on the Add button on the right to add this section to your page.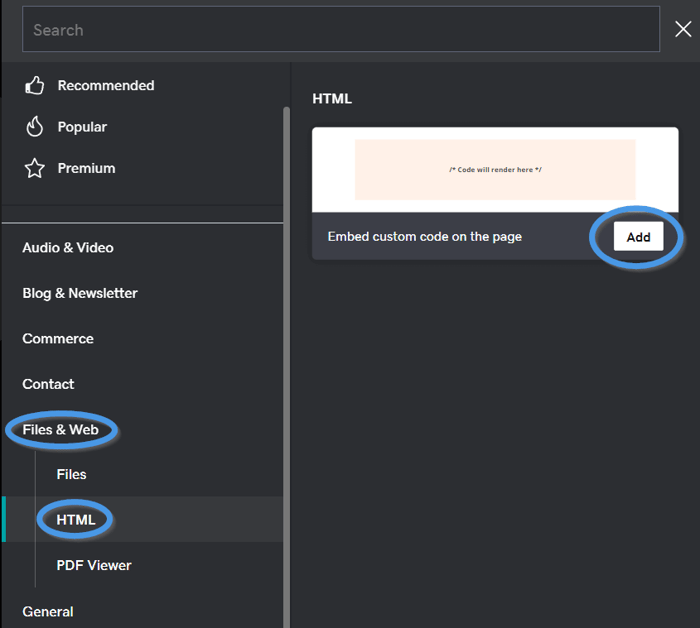
Your next step is to add your DropInBlog code.
Step 4: Add Two Lines of Code From Your DropInBlog Account
After you sign up for a free trial and create a DropInBlog account, log in to your admin dashboard.
Click on the Code & Layout page in the top navigation menu to access the code that’s unique to your account.
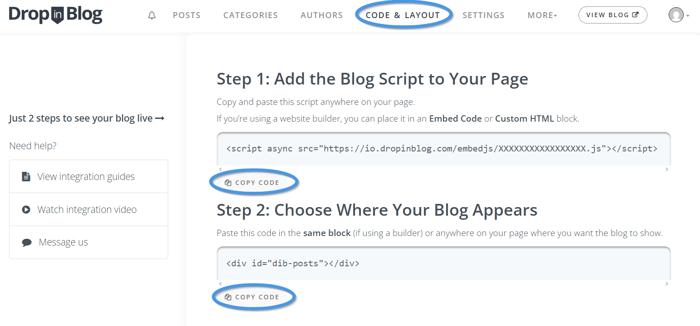
Copy the code under Step 1, then return to the GoDaddy editor and paste the code in the Custom Code section.
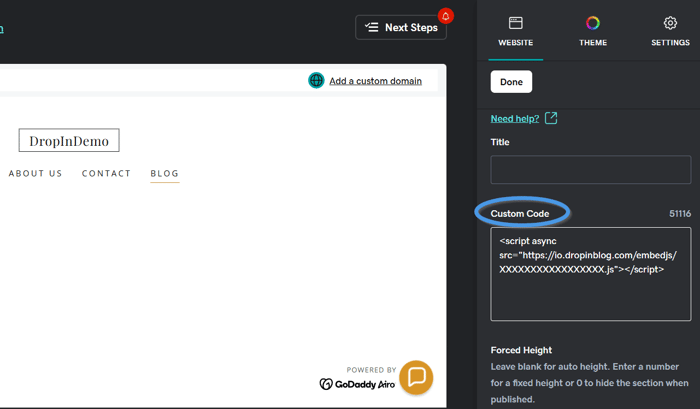
Go back to the Code & Layout page in your DropInBlog account, and copy the code under Step 2, then paste that code into the text box under the Custom Code section.
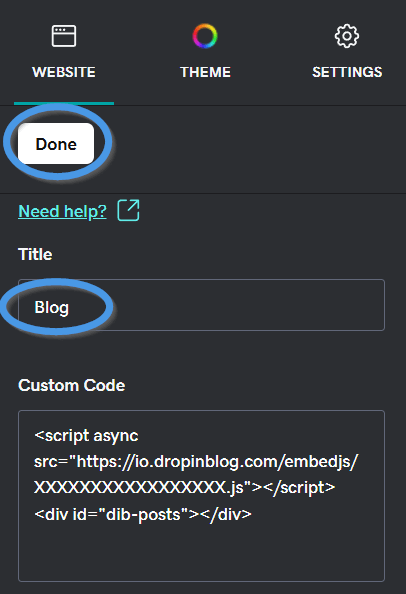
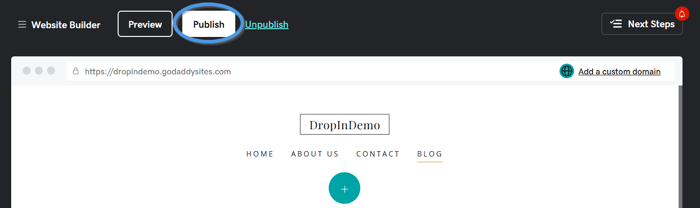
Name your page by typing “Blog” under Title, then click on the Done button at the top to save your changes.
Next, select Publish at the top of the page editor and, in the popup window, click on View Site to open it in a new window.
Step 5: Add Your Blog Link to Your DropInBlog Account
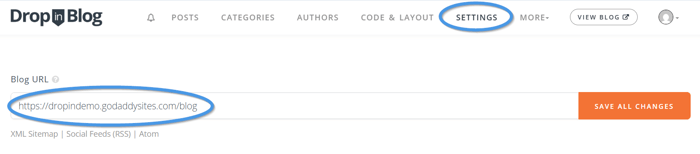
After you publish the site, select Blog from the navigation menu and copy the link of your new blog page.

Head back to your DropInBlog account, open the Settings page, paste the blog link in the text field under Blog URL, and save your changes.
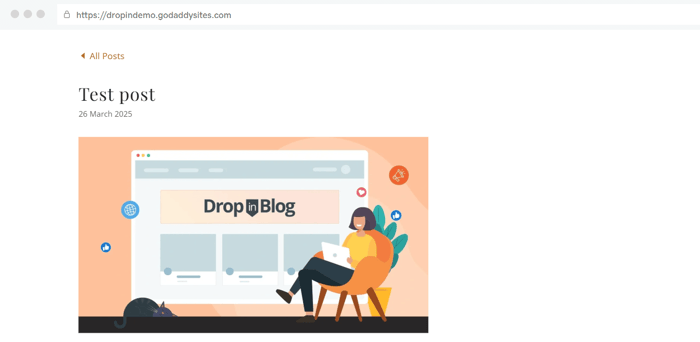
That’s it! You’ve successfully added a blog to your GoDaddy website. 🎉
Add Your First Blog Post
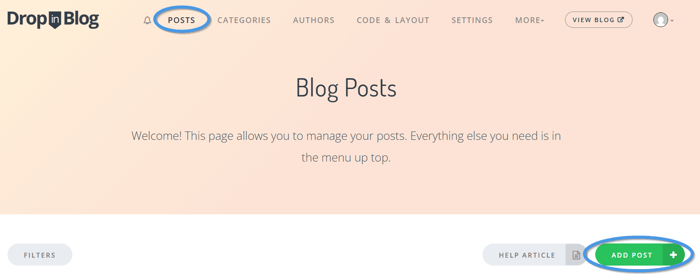
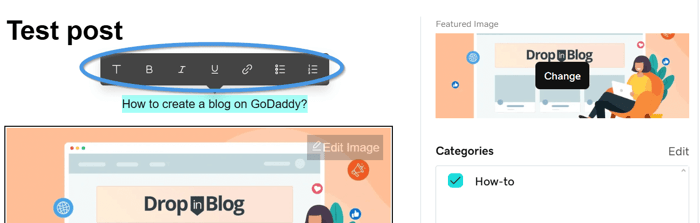
Once you’ve completed the integration, you can start adding content to your blog. Just open the Posts page in DropInBlog and click on the Add Post button to open the DropInBlog editor and start adding your blog content.
Don’t worry, you won’t have to do everything twice. Once you add a post from your DropInBlog account, it will automatically sync with your GoDaddy blog page.
The Limitations of GoDaddy’s Native Blog Feature
While GoDaddy has a native blog, it’s lacking in several areas and might not be adequate for your blogging needs. It allows you to use some basic formatting options and add images and videos. That’s it.
When adding a link to a blog post created in GoDaddy, you can only add the link destination and set it to open in a new tab. Advanced blogging tools, on the other hand, let you add relationship attributes to your links, helping search engines learn about the relationship between your site and the ones you link to.
GoDaddy even lacks some basic editing options, such as adding embedded code to your posts and customizing their URLs.
Next, if you want to add headings to your posts, you’ll have to use a word processor to create them and then paste them into GoDaddy’s editor. Otherwise, you can only choose between small and large text.
Another area of concern is that you can’t preview your posts from your GoDaddy dashboard, and if you want your blog posts to align with the rest of your page, you’ll have to play around with code. Otherwise, you might have more white space on your posts than you wanted.
When it comes to some more advanced blogging features, such as the option to create and manage reusable content, add CTAs with a single click, and turn your written content into audio, you won’t get these with GoDaddy’s native blog feature. To access these features, you’ll have to use a third-party blogging app like DropInBlog.
FAQs
Is the GoDaddy blog free?
No, GoDaddy doesn’t have a free plan, meaning you can’t create a blog for free. Instead, you have to purchase a plan to have your website (and your blog) online.
Is GoDaddy good for blogging?
GoDaddy is a good choice for blogging if simplicity is important to you. However, if you need an advanced blogging tool that will help you easily create your content and optimize it for search engines, you’ll be better off with another solution. Even GoDaddy uses WordPress for their company blog.
Can you have multiple blogs on GoDaddy?
No, GoDaddy doesn’t support multiple blogs. You can create the impression of having multiple blogs by showing different blog categories across your site. Or you can use a third-party app like DropInBlog that offers the option of having multiple blogs.
How can I integrate DropInBlog with the GoDaddy website builder?
Integrating DropInBlog with GoDaddy is super easy. You just need to copy and paste a couple of lines of code and you’re done. It’s a great way to get the added benefits of a professional blogging platform with your GoDaddy site.
Create a Blog on GoDaddy with DropInBlog Today
Whichever route you take, the worst option is a blog that no one reads. If you want yours to rank in Google and AI search without adopting WordPress maintenance as a hobby, DropInBlog is free to try, and setup is genuinely two minutes long.
Once you’ve signed up, just copy your DropInBlog code and paste it into the HTML section of your GoDaddy website. That’s it – no unnecessary steps, difficult coding, or long wait times.
And as always, if you have any questions, feel free to reach out to the DropInBlog team.
Happy blogging!


